This article was co-authored by Matt Ham and by wikiHow staff writer, Christopher M. Osborne, PhD. Matt Ham is a Computer Repair Specialist and the CEO and President of Computer Repair Doctor. With over a decade of experience, Matt specializes in Mac, PC, iPhone, iPad, and Smartphone repairs and upgrades. Matt holds a BS in Mechanical Engineering from North Carolina State University and an MS in Mechanical Engineering from Columbia University. Matt has expanded Computer Repair Doctor to seven different locations. He is also a Co-Owner of Repair Life, a full-scale marketing agency specializing in driving both online and offline leads to cell phone and computer repair shops and device retailers.
There are 16 references cited in this article, which can be found at the bottom of the page.
This article has been viewed 11,126 times.
Honestly, is there anything more frustrating than having your computer restart randomly and repeatedly? You want to know why it’s happening, but more importantly what you can do to stop it! Before calling in a repair person (or chucking your computer out of the window), check out the following list of helpful DIY suggestions for handling a Windows PC with a restart problem.
Steps
Power Supply Problems
-
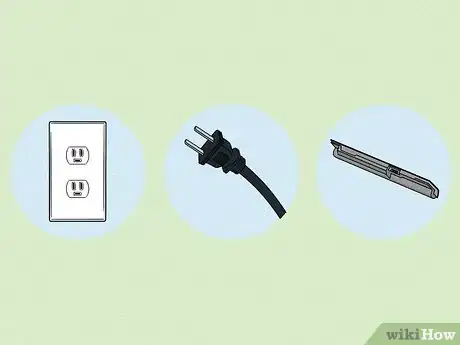
Test your electrical outlet, power cord, and laptop battery. If you have a laptop, remove the battery, plug in the power cord, and test your computer out. If the restart problem is solved, it’s most likely time to buy a new battery.[1] X Research source For a desktop computer, give the following a try:
- Plug the PC into a different power outlet in another part of your home. If the computer works without restarting, have a licensed electrician inspect the other outlet and your home wiring in general.
- Disconnect the power cord and replace it with a new one that meets the same specifications.
Overheating
-
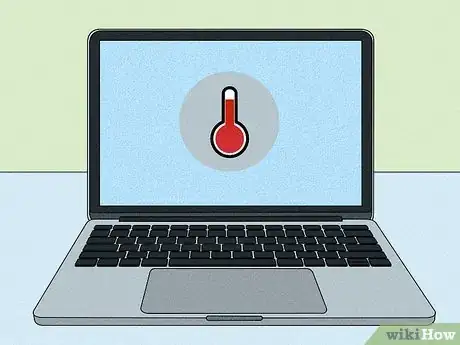
Monitor your computer’s temperature and try several fast fixes. Your PC may respond to overheating by shutting down to protect sensitive components. To diagnose overheating, download temperature-monitoring software—well-regarded options include HWMonitor, Core Temp, and NZXT's CAM.[2] X Research source If the software reports overheating, try the following:
- Increase the open space around a desktop tower.
- Use a cooling pad under a laptop.
- Knock loose any dust buildup in the vent fans by spraying them with compressed air. Spray the compressed air at an angle to knock the dust loose without blowing it straight into the computer.[3] X Research source
- If these measures don’t work, it may be necessary to clean the inside of the computer. This isn’t a DIY job unless you really know what you’re doing and don’t mind voiding the product warranty, so contact a computer repair person instead.
Faulty External Devices
-
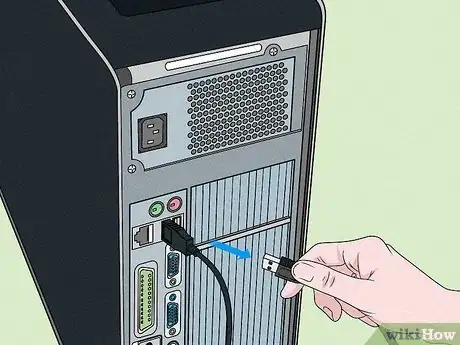
Remove USB-connected externals (like a mouse) one at a time. Even something as simple as a faulty mouse, keyboard, camera, or game controller can sometimes cause random restarts. If you have multiple USB-connected devices, disconnect one and see if the problem resolves itself. If it does, replace the device with a new one. If it doesn’t, run the same test with another connected device until you pinpoint the culprit.[4] X Research source
- Don’t just pull out the cord to remove a USB-connected device. Instead, right-click on the icon along the bottom right of your screen, choose the item you want to safely eject, and wait for the prompt that it can be safely removed.
Fast Startup Mode Trouble
-
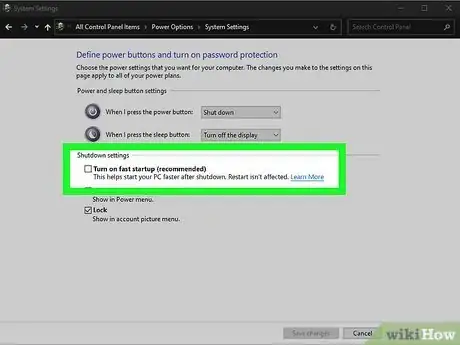
Disable fast startup mode to confirm it or rule it out as the culprit. Fast startup mode, which is automatically enabled on Windows 10, typically does exactly what the name indicates—it makes your computer start up faster! In some cases, however, it may cause your computer to keep restarting. Fortunately, you can quickly disable this mode, restart your computer, and see if your problem is solved.[5] X Research source
- To disable fast startup mode, search for “control panel” in the taskbar and choose it from the list of results. Select Power Options, Choose what the power buttons do, and then Change settings that are currently unavailable. Uncheck Turn on fast setup (recommended) and then click Save Changes. Restore that checkmark if and when you want to turn fast setup back on.
Startup Errors (without Fast Startup)
-
Run Startup Repair to hopefully fix this problem without much fuss. This may seem a little strange, but you have to restart your computer several times in order to run Startup Repair! Here’s the 2-part process:[6] X Trustworthy Source Microsoft Support Technical support and product information from Microsoft. Go to source
- Enter the Windows Recovery Environment (winRE): Turn on your device, then turn it off by holding down the power button for 10 seconds at the first sign (such as the Windows logo or PC’s brand logo) that Windows is starting up. Repeat this process a second time, then start your computer up a third time but allow it to load. The Automatic Repair screen will appear.
- Run an Automatic Repair: Select Advanced Options on the Automatic Repair screen, then select Troubleshoot, Advanced Options, Startup Repair, and finally Restart. Startup Repair will run and restart your PC, then—fingers crossed—your problem will be solved.
Faulty Windows Update
-
Uninstall the update, run a test, and reinstall it for another try. Minor errors in an update may cause restart troubles, so get rid of the last update and see if things go back to normal. If this doesn’t help, reinstall the update and try other troubleshooting options. If it does help, reinstall the update to see if a fresh install fixes the problem. If the problem returns, remove the update again and wait for the next one![7] X Trustworthy Source Microsoft Support Technical support and product information from Microsoft. Go to source
- To uninstall an update, click the following tabs in order: Start >> Settings >> Update & Security >> Windows Update >> View your update history >> Uninstall Updates. Right-click the most recent update from the list and select Uninstall.
Problematic Files, Apps, or Drivers
-
Computer problems that involve applications acting strangely oftentimes leave you wondering what has happened. Your application has been working just fine, but now, seemingly without reason, it is doing something strange. For instance, your Word document will no longer show the top margin of your document. It still says it's there, and when you print it, there's not a problem. You just can't see it on your monitor. If this is happening, you may want to restart your computer. Conducting an internet search for the type of problem you're experiencing or consulting your user manual may help you as well.
- If you have computer problems, chances are, system repair software can help you fix it. Most of these applications can repair operating system problems that lead to the Blue Screen of Death. They can also replace missing or damaged DLL files. System repair software can also free up space you need for another application, and it can optimize your computer so it runs faster. It may even identify problems you're having with applications, but it depends on the software you use and the application that's having problems.
- Do a System Restore to go “back in time” before your restart troubles. Your PC automatically creates restore points when you install a new app or driver, which means you can easily revert back to that point in time. If, after the system restore, your restart problem vanishes, you know you’ve identified the troublemaker. From there, you can choose whether to reinstall the offending items or move on without them.[8] X Trustworthy Source Microsoft Support Technical support and product information from Microsoft. Go to source
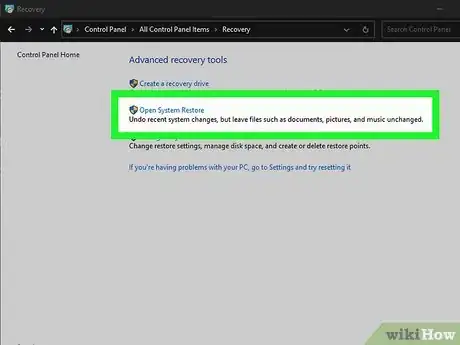
- To do a system restore, search for “control panel” in the taskbar and choose it from the list of results. In the Control Panel search box, type “recovery,” then select Recovery and Open System Restore. Select Next in the Open system files and setting box. Select the restore point you want to use from the list of options, click on Scan for affected programs to see what will be deleted, then select Close, Next, and Finish.
Frequent Automatic Restarts
-
Disable auto restart as a temporary solution. When Windows encounters a system error that affects a critical process, its default response is to restart. While this is a good thing overall, it can be really annoying if it keeps happening while you’re in the middle of doing something. While it’s important to dig deeper to identify the system error—such as by using other techniques listed in this article—you can temporarily disable the automatic restart feature by doing the following:[9] X Research source
- Create a System Restore point (as described elsewhere in this article).
- Press the WIN and R keys to open the Run utility.
- Type 'sysdm.cpl' and hit Enter to open System Properties.
- Click on the Advanced tab and then the Settings tab.
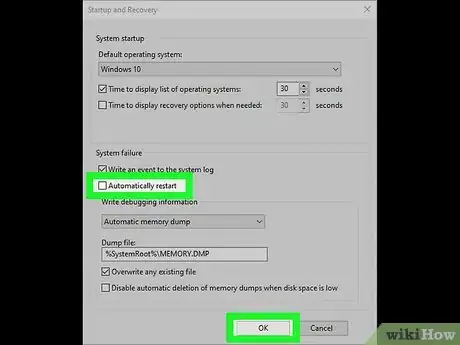
- In the System Failure section, uncheck Automatically Restart, then click OK >> Apply >> OK.
- Reboot your computer to apply the changes.
- Follow the same process to restore automatic restarts. Don’t permanently leave your PC in this setting and ignore the underlying issue causing the restarts.
- You can find 3 alternate ways to disable automatic restarts at https://www.thewindowsclub.com/disable-automatic-restart-system-failure-windows.
Malware
-
Run a virus scan in Safe Mode to identify and remove malware. Operating in Safe Mode may prevent the malware from affecting your PC while you find and destroy it. Here’s the process:[10] X Trustworthy Source Microsoft Support Technical support and product information from Microsoft. Go to source
- Click the Start button, then select Settings. Select Update and Security, Recovery, and Open Recovery Settings. Under Advanced Setup, select Restart Now.
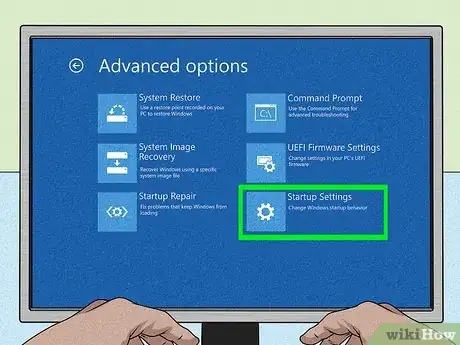
- After the computer restarts, select Troubleshoot, Advanced Options, Startup Settings, and then Restart.
- Once your computer restarts again, select 4 from the list of options for standard Safe Mode, or select 5 for Safe Mode with Networking (so you can access the internet and other devices on your network).
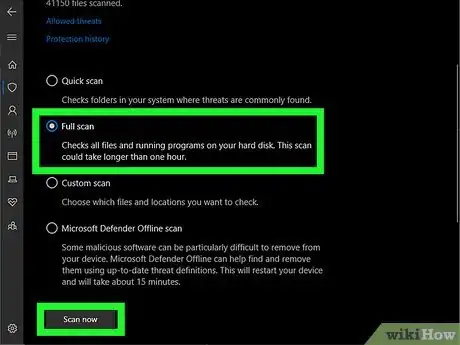
- After starting up your computer in Safe Mode, run a full scan with your anti-virus software.
- If and when any malware is found and eliminated, reboot your computer again to take it out of Safe Mode and test whether or not your problem is solved.[11] X Research source
Hard Disk Troubles
-
Run Check Disk (chkdsk) to identify and address hard disk errors. First, just in case problems arise, create a new system restore point by searching for “create a system restore” in the taskbar search box and clicking on the System Restore result. Click the System Protection tab and then Create.[12] X Trustworthy Source Microsoft Support Technical support and product information from Microsoft. Go to source After that, do the following:[13] X Research source
- Open the File Explorer, select This PC, then right-click on the icon for your hard disk drive.
- Select Properties on the pop-up menu, then Tools.
- Click the Check button under the Error Checking header.
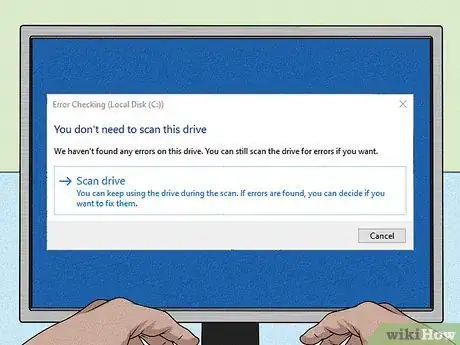
- After a quick scan, a pop-up may come up to tell you no errors have been found. Click the Scan Drive button to start a longer scan that may take a few hours to complete.
- After the longer scan, follow the prompts to repair any problems that were found.
Corrupted Windows Install
-
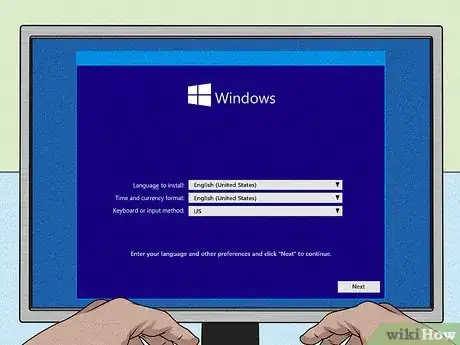
Reinstall Windows while saving your personal files. To give this strategy a go, start by inserting or connecting the Windows installation media—such as a disc or portable hard drive—to your computer. Open File Explorer and choose the drive with the installation media. Go to the root directory of the drive, double-click on setup.exe, and choose Yes when prompted about allowing changes to be made to your device. Select Change what to keep and choose one of the 3 options: Keep personal files and apps, Keep personal files, or Keep nothing. Click Install to begin the installation process.[14] X Trustworthy Source Microsoft Support Technical support and product information from Microsoft. Go to source
- Choosing Keep nothing is the best way to get a “clean” version of Windows, but it also means you’ll lose all your personal data, settings, and apps. So make backups beforehand if you want to go this route!
RAM Issues
-
Run a RAM test to check for errors and replace the RAM if needed. RAM errors can cause a host of troubles, including repeated restarts. Try the following to handle this problem:
- Enter “create a system restore” in the taskbar’s search box and choose System Restore from the results. Click the System Protection tab and then Create. Type a brief description for this restore point so you can easily identify it.[15] X Trustworthy Source Microsoft Support Technical support and product information from Microsoft. Go to source
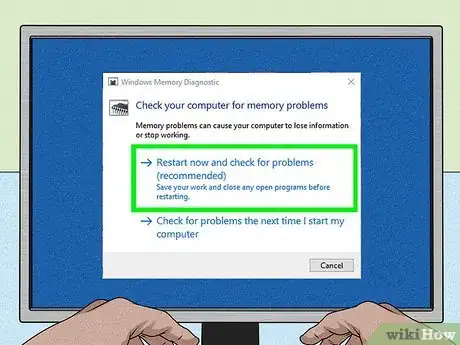
- Type “windows memory diagnostic” in the search bar and click on the result with the same name. Follow the prompt to restart your computer, then allow the diagnostic to run after the restart. Check the message report for notification of any RAM anomalies.
- Alternatively, use a third-party RAM diagnostic tool such as MemTest86, which may provide more detailed results.[16] X Research source
- Unless you have the skills and knowledge to do the job yourself, hire a computer repair pro to replace your RAM if errors have been found.
Blue Screen of Death (BSoD)
-
The blue screen of death (BSoD or STOP Error) may appear to be one of the scariest computer problems you'll come across. However, all your computer may need is for you to reboot it. This STOP error appears on your screen for a variety of reasons: failing hardware, damaged software, corrupt DLL files, problems with drivers and more. The remedy for a blue screen of death depends on the original problem. The screen provides you with codes that can help you identify and fix your computer problems.
- Open the Device Verifier Manager. Click the Windows Search icon and type verifier in the search box. Click on the search result and select Yes to open it.
- Select a task. Select Create Standard settings in the window then click Next.
- Select what drive to verify. Check on Automatically select unsigned drivers then click Next.
- Search for unsigned drivers. Device Verifier Manager will automatically start searching for unsigned drives to see if they are causing the problem. If the search result is no problem, then a popup will appear telling you No unsigned drivers have been found.
You Might Also Like

 How to See All Open Apps and Windows (for Windows 10, 11, and Mac)
 Easy Guide to Updating the BIOS on a Computer (Windows)
 How to Have Computer Fun: Content, Games, Writing, & More
 How to Print Screen on an HP Laptop, Desktop, or Tablet
 How to View System Information on Windows & Mac in Seconds


 How to Install a BIOS Update from a USB

References
- ↑ https://answers.microsoft.com/en-us/windows/forum/all/my-computer-keeps-restarting-for-absolutely-no/a62bdc57-7bfa-4ab9-8609-6354ed17398f
- ↑ https://www.tomshardware.com/how-to/how-to-monitor-cpu-temp-temperature
- ↑ https://www.sony.com/electronics/support/articles/00009965
- ↑ https://www.thewindowsclub.com/how-to-fix-random-computer-freezes-and-reboots-caused-due-to-hardware-problems
- ↑ https://www.windowscentral.com/how-disable-windows-10-fast-startup
- ↑ https://support.microsoft.com/en-us/windows/recovery-options-in-windows-31ce2444-7de3-818c-d626-e3b5a3024da5#bkmk_startup_repair
- ↑ https://support.microsoft.com/en-us/windows/recovery-options-in-windows-31ce2444-7de3-818c-d626-e3b5a3024da5#bkmk_remove_installed_windows_update
- ↑ https://support.microsoft.com/en-us/windows/recovery-options-in-windows-31ce2444-7de3-818c-d626-e3b5a3024da5#bkmk_restore_from_system_restore_point
- ↑ https://www.thewindowsclub.com/disable-automatic-restart-system-failure-windows
- ↑ https://support.microsoft.com/en-us/windows/start-your-pc-in-safe-mode-in-windows-10-92c27cff-db89-8644-1ce4-b3e5e56fe234
- ↑ https://www.pcworld.com/article/478239/how-to-remove-malware-from-your-windows-pc.html
- ↑ https://support.microsoft.com/en-us/windows/create-a-system-restore-point-77e02e2a-3298-c869-9974-ef5658ea3be9
- ↑ https://techcult.com/check-disk-for-errors-using-chkdsk/
- ↑ https://support.microsoft.com/en-us/windows/recovery-options-in-windows-31ce2444-7de3-818c-d626-e3b5a3024da5#bkmk_use_recovery_drive
- ↑ https://support.microsoft.com/en-us/windows/create-a-system-restore-point-77e02e2a-3298-c869-9974-ef5658ea3be9
- ↑ https://techcult.com/test-your-computers-ram-for-bad-memory/
- ↑ https://edu.gcfglobal.org/en/basic-computer-skills/starting-a-computer-in-safe-mode/1/
About This Article

