This article was co-authored by wikiHow Staff. Our trained team of editors and researchers validate articles for accuracy and comprehensiveness. wikiHow's Content Management Team carefully monitors the work from our editorial staff to ensure that each article is backed by trusted research and meets our high quality standards.
There are 10 references cited in this article, which can be found at the bottom of the page.
This article has been viewed 26,568 times.
Learn more...
If you have a brand new wax warmer that you don't know how to use, never fear. Using wax melts is pretty easy, and soon, you'll have your house filled up with a scent you love! The purpose of a wax melt is to add scent to your home, much like a candle, and the benefit of an electric warmer is it is somewhat safer than having an open candle around. Mostly, you just stick a wax melt in the warmer and turn it on. You may have a bit more trouble getting the wax out once you're done, but with a few tips and tricks, you'll be changing out your waxes with ease.
Steps
Melting the Wax
-
1Set up your wax warmer first. These come in different varieties, but you should set up your warmer where you want it to sit before trying to warm the wax. Typically, they either plug directly into the wall or they have a cord that goes into the wall. Only plug it in if you're ready to warm your wax.[1]
- Some have bowls that sit on top of a candle warmer, which is essentially a hot plate, while others just use a small, hot light bulb to warm up the wax.
- Others may heat the wax with a small tealight in the bottom, so you won't need to plug it in.
-
2Put the wax in the top of your wax warmer. Usually, there's a small bowl in the top of the warmer for the wax. Just use one piece of wax, as you don't want to overflow the bowl when it melts.[2]
- Wax melts usually come in pre-portioned sizes.
- Different wax warmers will hold different amounts. For instance, a tart wax warmer is meant to hold a much larger piece of wax.
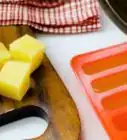
- If you want, you can set a silicone baking cup in the warmer first. That way, you can just pop the wax out of the baking cup when it solidifies. This also allows you to switch between scents easily.[3]
Advertisement -
3Turn the wax melter on. Some come on when you plug them in the wall. Others will have a small on/off switch. Switch the melter on so that it will start heating up your wax. After you turn it on, you may need to set the bowl that holds the wax back on top, depending on the style.
- You may even run into more unusual styles, such as a touch lamp. Touch the base of the lamp to turn it on, and the light bulb will heat up the wax.[4]
- If yours has a tealight, place it in the holder and light it before setting the warming bowl on top.
-
4Change the wax out after it stops smelling. After a time, the wax won't put off any scent any more. When that happens, it's time to pour it out and put in a new piece of wax.[5]
- Typically, that takes about a week, but it depends on the brand and scent you're using and how long you leave the warmer on.


Removing Wax from the Warmer
-
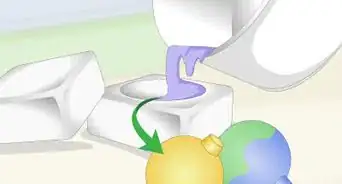
1Pour the hot wax back into the container for a quick fix. When pouring wax, it should be heated enough to be liquid, but let it cool a little first. Tip the wax into the container, and throw it out that way.[6]
- Don't pour it directly into your trash, as it can melt a hole in your garbage bag.
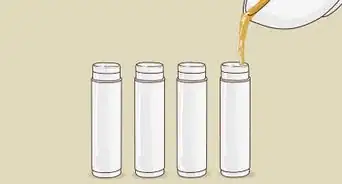
- You can also pour it into a disposable plastic cup, which is typically sturdy enough to handle the heat.[7]
- Be careful handling the bowl or warmer. It could be very hot, and the wax definitely will be hot. Don't spill it on yourself.
- Run a paper towel around the inside of the dish to clean the rest of the wax out.[8]
-
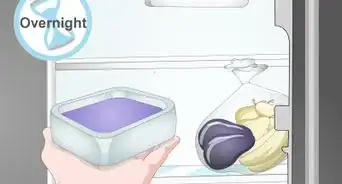
2Pop cooled wax into the freezer for 5-10 minutes. Let the wax cool completely on the warmer so it solidifies. Place the bowl of the warmer into the freezer. After 5-10 minutes, take it out, and the wax should come right out of the bowl with a gentle push.[9]
- If your warmer doesn't have a separate bowl, you can place the whole thing in the freezer, particularly with tea light versions.
- If the wax still has scent, you can save it for later. Otherwise, toss it in the trash or save it for crafting projects.
-
3Place ice on top of the wax for a few minutes to pop it out quickly. Wait until the wax is cooled on the warmer and it's solid. Place several ice cubes on top of the wax, enough to cover it completely. Wait for a few minutes, then pop out the wax with your finger.[10]
- This method works for any type of warmer.
-
4Pierce the wax with a wooden skewer if you're having trouble. If you can't get solidified wax out very easily, don't despair. Simply poke a wooden skewer between the edge of the wax and the warmer. The wax should pop out easily, especially if you've employed one of the other methods first.[11]


Warnings
- Always be careful around hot wax. You can burn yourself!⧼thumbs_response⧽
References
- ↑ https://www.youtube.com/watch?v=0R4Qetdie-g&feature=youtu.be&t=113
- ↑ https://www.youtube.com/watch?v=0R4Qetdie-g&feature=youtu.be&t=187
- ↑ https://www.youtube.com/watch?v=PIeJdS62oTo&feature=youtu.be&t=47
- ↑ https://www.youtube.com/watch?v=0R4Qetdie-g&feature=youtu.be&t=270
- ↑ https://jillcataldo.com/wax_melt_firestarters/
- ↑ https://jillcataldo.com/wax_melt_firestarters/
- ↑ https://www.youtube.com/watch?v=sBpxe5LyM8Y&feature=youtu.be&t=163
- ↑ https://www.youtube.com/watch?v=sBpxe5LyM8Y&feature=youtu.be&t=257
- ↑ https://www.youtube.com/watch?v=sBpxe5LyM8Y&feature=youtu.be&t=341
About This Article