wikiHow is a “wiki,” similar to Wikipedia, which means that many of our articles are co-written by multiple authors. To create this article, 9 people, some anonymous, worked to edit and improve it over time.
This article has been viewed 36,934 times.
Learn more...
A scanning electron microscope (SEM) is a very high resolution microscope that allows one to see small things in very great detail. This is a quick overview on how to take pictures of a sample using one. Keep in mind that an SEM is a very delicate piece of equipment and should be used with great care. However, following these steps closely will almost guarantee that you will not damage your microscope. There are also many more features that aren't discussed in this article, but this procedure describes how to get a basic picture.
This article provides specific instructions for a JEOL JSM-6010LA microscope. Any JEOL microscope will have extremely similar controls to the microscope described in these instructions. Hitachi microscopes will also be very similar, but other brands such as Zeiss might have control knobs in different places.
Steps
-
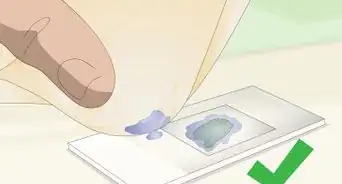
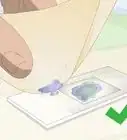
1Obtain a prepared sample. Preparing a sample for electron microscopy is a very in-depth procedure on its own, so for this procedure, use a sample that has been prepared for you. If a sample is prepared for SEM, it will need to be an appropriate size and will also need to have a conductive surface. Since the sample was prepared already, this article will assume it meets these qualifications.
-
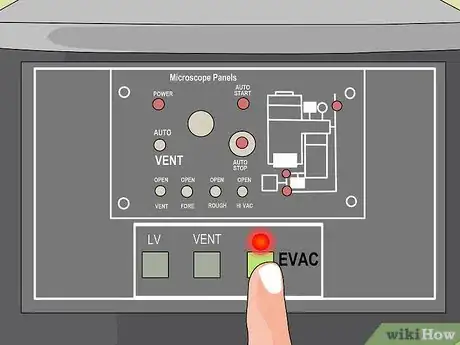
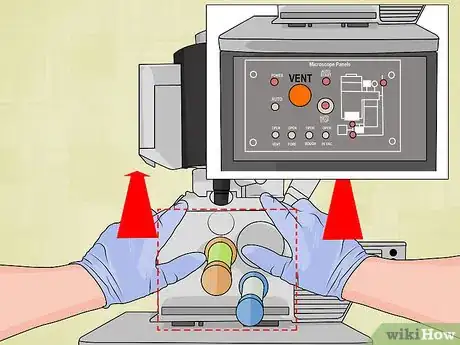
2Bring the SEM to atmospheric pressure in order to open the sample door. Understand that the SEM will always be powered on, and the sample chamber will always be under vacuum. This means that the chamber will be completely empty of any gas molecules so electrons will have a clear path towards the sample. Press and hold the VENT button until it flashes and you will hear a click. The VENT button will continue to flash until the environment in the chamber is raised to atmospheric pressure. Once the VENT button is solid orange, this means the chamber is at atmospheric pressure and you can open the door.Advertisement
-
3Put on gloves. This is extremely important because the chamber of the SEM needs to stay very clean!
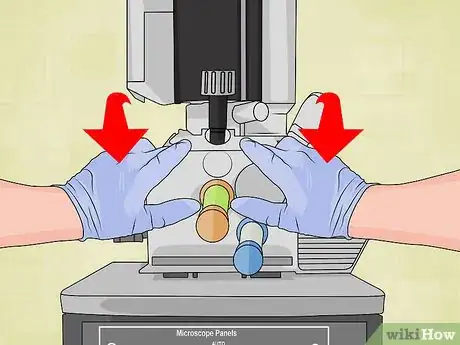
- Using the handles on either side of the door, slide out the door slowly.
- Once the door is open, carefully grab the sample holder and slide it to the right. It will come loose from its grooves and now you can load your sample.
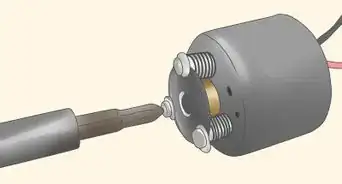
- On each of the four corners of the sample holder, there are two set screws holding the sample in place. Loosen these screws slightly (half a turn of the screwdriver should be enough) and then remove the blank sample from the holder.
- You can put the blank sample aside for now, but be sure to place it on a Kimwipe and not directly on a desk or table. Place your sample into the holder, then tighten the screws.
- When your sample is in place, go ahead and slide the sample holder back into its grooves on the sample stage.
- Now you can close the door by pushing the door back into the chamber.
-
4While holding the door shut, press and hold the EVAC button until it begins to blink to put the chamber back under vacuum. You will hear clicks, then after a minute or so you will hear the pump turbines spinning up. These pumps will remove all gas particles from the chamber and bring the internal pressure to about 10^-6 torr. When the EVAC button glows solid green, this means the chamber is at vacuum. Now wait an additional 5 minutes before continuing to the next step.
-
5After the 5 minutes is up, you are ready to turn on the electron beam and start taking pictures!
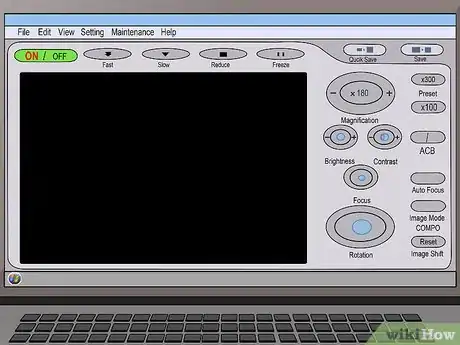
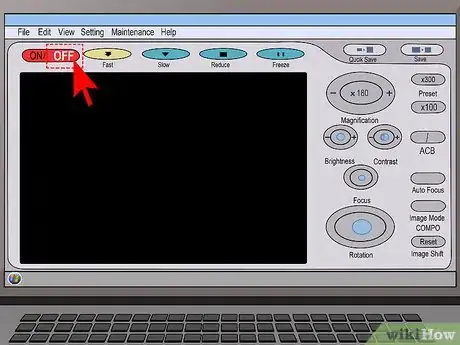
- Go to the SEM's computer and the microscope software should be turned on. The green button in the top right corner of the screen will say OFF, indicating that the electron beam is off. Click it to turn the beam on, and then it will say ON.
- Next, click the ACB (automatic contrast and brightness) button and your sample should come into view.
- Using the magnification knob on the control panel, zoom in to your desired magnification. It is a good idea to do your focusing at a higher magnification than you want for your image, therefore your image will look better when you zoom out. For example, if you want an image at 2,500x, you might want to focus at about 4,000x.
- Once you are zoomed in, use the focus knob to bring your image into focus.
-
6Adjust the sample height. Now your sample is in focus, but you might notice it doesn't look as good as you would expect.
- Underneath the picture of your sample in the computer screen, you will see the working distance specified as "WD x mm" where x is a number usually around 10-20. Take note of this number.
- For good images, you might want to use a working distance of 10mm. This means that the beam is focused 10mm away from the lens. To set your working distance, click on "WD x mm" and a slider will appear, allowing you to change whatever number x is to 10. Go ahead and click 10.
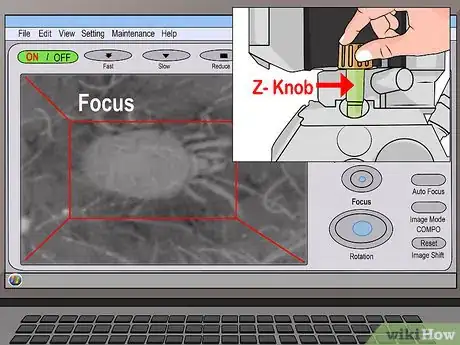
- Currently, the sample height is Z=25mm. To change the sample height, you will use the Z-knob. This part can be tricky. Whatever the original working distance was, subtract 10 from is and this is how much you will need to move your Z-knob. For example, if your WD was 16 mm and you changed it to 10mm, you will need to move your Z-knob down approximately 6 mm. So you will turn it to about 19mm.
- While you turn the Z-knob, watch the screen because it will begin to come into focus. Once it is in focus, your picture is ready!
-
7Zoom back out to your desired magnification and if you want to move to another area of your sample, you can use the X and Y knobs. You can also adjust contrast and brightness to your liking. When you find an area you like, take a picture by clicking the camera icon that says "STORE." This will open a dialog box allowing you to save your image file. You can name the file as you choose and store it in any folder on the computer or on a flash drive.
-
8Turn off the electron beam by clicking the green button that says "ON" on the top right corner. Make sure it says "OFF" before you continue. Turn the X, Y, and Z knobs so that each value is 25mm. Now press and hold the VENT button until it blinks to return the sample chamber to atmospheric pressure.
-
9Open the sample chamber once the VENT button is solid orange. Once you remove your sample from the holder, place the blank sample back in the holder and slide it back into the sample stage. Slide the door back to the closed position. Finally, press and hold the EVAC button until it blinks. NEVER leave the SEM chamber vented, this can cause damage to the parts inside. Once the EVAC button glows solid green, it is save to leave the SEM.
Warnings
- It is very important to wear gloves when touching anything that will go into the sample chamber!⧼thumbs_response⧽
- Never leave the SEM chamber vented. If you leave the SEM, make sure the EVAC button is glowing solid green.⧼thumbs_response⧽
- If your sample hasn't been prepared especially for an SEM, do not put it in the microscope! Some samples simply won't show up well, but others can actually cause damage to the internal parts.⧼thumbs_response⧽


