This article was co-authored by Laura Smith. Laura Smith is a House Cleaning Specialist and the Owner of All Star Cleaning Services. With over 16 years of experience, her team specializes in providing natural and eco-friendly house cleaning services. All Star Cleaning Services has earned the Association of Residential Cleaning Services International’s (ARCSI) Seal of Approval and maintained an A+ rating with the Better Business Bureau.
There are 10 references cited in this article, which can be found at the bottom of the page.
wikiHow marks an article as reader-approved once it receives enough positive feedback. In this case, 100% of readers who voted found the article helpful, earning it our reader-approved status.
This article has been viewed 552,260 times.
Grill pans provide a great way to mimic the experience of outdoor grilling. They’re especially useful for people who live in apartments. However, using a grill pan is different than cooking with regular stovetop pans. There are several things you need to do so your food cooks properly and has char marks and a grilled taste. Ultimately, by preparing your pan and food, taking steps to properly gill your food, and seasoning and storing your pan, you’ll be able to use your grill pan to its full potential.
Steps
Choosing a Grill Pan
-
1Pick a pan with raised ridges. Generally, grill pans with dramatically raised ridges are better than those with gentle or shallow ridges. Ultimately, the deeper the ridges, the more dramatic your sear mark. In addition, the larger the ridges, the more grill-like your final product will appear. Look for a grill pan with ridges that are taller than 1⁄2 centimetre (0.20 in).[1]
-
2Choose a cast iron pan. Cast iron pans tend to retain more heat than pans with a nonstick surface. In addition, cast iron pans tend to mimic the grill better than nonstick surfaces. Finally, cast iron pans will sear your food better than nonstick pans.
- While nonstick pans are easier to clean, they won’t cook your food the same way.[2]
- Avoid using a cast iron grill pan if you have a ceramic stovetop.
Advertisement -
3Go with a square-shaped grill pan. Round grill pans work fine, but they offer less surface area than square grill pans. With a square grill pan, you'll have more room to cook your favorite meats and vegetables.[3]
-
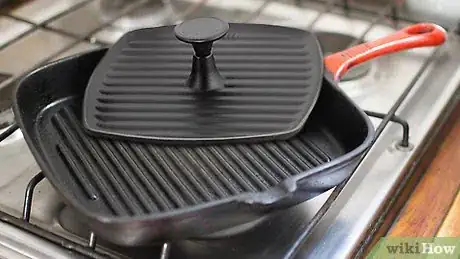
4Look for a grill pan with a matching press if you want defined grill marks. Some grill pans come with matching presses you can use to press the down the food as it cooks to enhance the grill marks. You can still get grill marks without a press, but they may not be as defined or even.
-
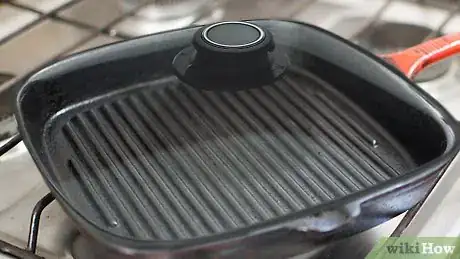
5Get a pan with a lid if you want your food to taste like it was made on a grill. When you cook on an actual grill, you usually close the grill lid to trap in heat, smoke, and flavor as the food cooks. Covering your grill pan with a lid while you're cooking food on it can help create the same effect.
Preparing Your Pan and Food
-
1Rinse and dry the pan. Before you use the pan to cook on, quickly rinse it with warm water. This will make sure any dust that accumulated on the pan while it was being stored is washed away. After rinsing, dry the pan with a clean cloth.[4]
-
2Cut your food into relatively thin slices. Because you’re trying to simulate the grilling experience without burning your food, you’ll need to slice your food relatively thin. This way, your food will get char marks and a smoky taste but won’t burn while you’re trying to cook the inside. Some foods you can prepare using a grill pan include:[5]
- Thin hamburgers, slices of chicken, or steak.
- Bacon and eggs.
- Vegetable slices like zucchini, potatoes, carrots, peppers, or onions.
-
3Brush oil on the food. Before placing your food on the pan, carefully brush oil on your food. By brushing oil onto the food instead of the pan, you’ll make sure the food doesn’t stick and the oil doesn't burn on the pan.[6]
- Use an oil with a high smoking point, like peanut oil, canola oil, avocado oil, or soybean oil. Avoid using olive oil, which has a low smoking point.
- Avoid brushing oil on the entire pan, as it may burn.
Grilling Your Food
-
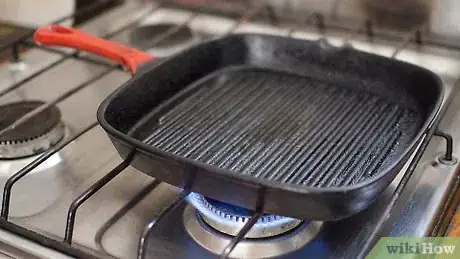
1Preheat the pan on medium high. Allow the pan to heat for at least five minutes. By doing this, you’ll make sure the entire surface of the pan is equally hot. This will ensure your food cooks evenly. In addition, it’ll help you get good char/grill marks.[7]
-
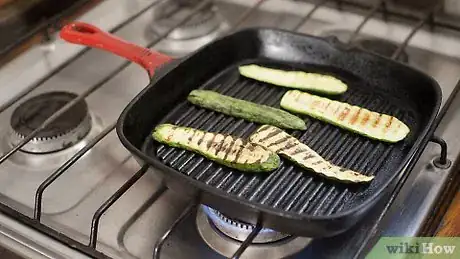
2Place your food on the pan. When the pan has had sufficient time to heat up, you’ll need to gently place your food in it. Do so with tongs or other grill equipment. Allow half an inch (1.25 cm) between large items (like pieces of chicken or steak). Lay the food perpendicular to the grill ridges so you get grill marks.[8]
-
3Cover the pan. While grill pans seldom come with covers, covering the pan may increase the speed with which your food cooks. In addition, it may enhance the smoky/charred flavor. To cover your pan, carefully place a lid or upside-down metal bowl over the food on the grill pan.[9]
-
4Avoid moving food for about one minute. Once you place the food onto your grill pan, you shouldn’t flip it or move it for about a minute. By leaving it in place, you’ll help create those sear/grill marks that add so much character to your food.[10]
-
5Rotate or move your food after a minute or two if needed. If you think your food is burning or cooking unevenly, use tongs to rotate the food slightly. Depending on the food, your pan, and your stove, you may need to experiment to determine how often you need to rotate your food.
- Keep in mind that rotating the food will cause the grill marks to be diamond-shaped instead of straight lines.
-
6Flip your food. Once you’ve rotated your food and allowed it to sit for several minutes, you’ll need to flip it. Flipping it is important so that you cook the food evenly. In addition, flipping your food will help prevent burning.
- If you’re cooking steak that is about 1 inch (2.5 cm) thick, allow it to sit for 3-5 minutes on one side before moving or flipping it.
- If you’re cooking chicken that is about 1 inch (2.5 cm) thick, allow it to cook for 5-10 minutes on each side.
- Let pork cook for 6-7 minutes on one side before flipping it.
- Flip burgers after 3 minutes.
- Cook bratwurst for 5 minutes before flipping.
- Allow shrimp to cook for 2-3 minutes before flipping.
- Let vegetables cook for 3-4 minutes on one side before flipping them over.
- If you notice your food charring or burning too much, flip it more. If it continues to burn, turn your heat down.[11]
-
7Take the temperature of your food. If you’re cooking meat, you should take its temperature before you remove it from the pan. This way, you’ll make sure the inside of the meat has risen to minimum temperatures that will guarantee it is safe to eat. Without taking the temperature, you’ll simply be guessing about whether the food is done and safe.
- Shellfish should be cooked to 145 degrees Fahrenheit (63 degrees Celsius).
- Poultry should be cooked to 165 degrees Fahrenheit (74 degrees Celsius).
- Beef, pork, veal, and lamb should be cooked to 145 degrees Fahrenheit (63 degrees Celsius).
- Ground meat should be cooked to 160 degrees Fahrenheit (71 degrees Celsius).[12]
Cleaning and Storing Your Pan
-
1Clean the pan with hot water. After you’ve allowed the pan to cool, rinse it thoroughly with hot water. Then, take a clean cloth, soak it in hot water, and carefully wipe the pan down. Focus on the grooves in between the ridges. To clean them good, take your finger, cover it with the cloth and wipe along the groove. Rinse the cloth from time-to-time.
- After cleaning the grill pan, dry it thoroughly with a towel. Allowing it to air dry will invite rust.[13]
-
2Season the pan if it's cast iron. Before storing a cast iron grill pan, you want to rub a light coat of vegetable oil onto the pan with a paper towel. Then, place the pan on the middle rack of your oven and set your oven to 375 degrees Fahrenheit (190 degrees Celsius). Let the pan bake for 1 hour, turn the oven off, and allow the pan to cool.
- Seasoning your pan after each use may increase the effectiveness of your cooking and prolong the life of your pan.[14]
-
3Store the pan in a dry location. When storing your cast iron grill pan, you’ll want to make sure to put it in an area that is dry. If you put it in a humid location – like in an outside storage area – it could wind up rusting. As a result, try to store it in a pantry or another location that is cool and dry.
Community Q&A
-
QuestionCan I use a grill pan on an electric stove?
 Community AnswerYes.
 -
QuestionHow do I grill fish on a grill pan?
 Community AnswerFish will always stick at first; however, given time, the proteins in contact with the surface denature and it releases. Once you put the fish in the pan, DON'T move it around -- wait until it's time to flip and be gentle.
 -
QuestionCan a cast iron pan be used on a glass top stove?
 Community AnswerWith a few exceptions, you can use most of today's cookware on a glass-top stove. The general rules are that your cookware should be heavy, have a flat, even bottom with no ridges; and be able to withstand the heat produced by the recessed coils. A cast iron pan should be fine.
Things You'll Need
- Grill pan
- Water
- Scouring pad
- Vegetable oil
- Paper towel
- Towel
- Food
References
- ↑ https://foodandnutrition.org/may-june-2017/tips-tricks-choosing-using-indoor-grill-pan/
- ↑ http://www.finecooking.com/article/grill-pans
- ↑ https://www.tastingtable.com/cook/national/what-is-a-grill-pan-best-grill-pans
- ↑ http://www.epicurious.com/expert-advice/how-to-use-maintain-cast-iron-grill-pan-article
- ↑ http://www.meatscience.org/TheMeatWeEat/topics/meat-safety/meat-cookery
- ↑ http://www.finecooking.com/article/grill-pans
- ↑ http://www.epicurious.com/expert-advice/how-to-use-maintain-cast-iron-grill-pan-article
- ↑ http://www.seriouseats.com/2013/06/ask-the-food-lab-do-grill-pans-actually-mimic-grilling.html
- ↑ http://www.epicurious.com/expert-advice/how-to-use-maintain-cast-iron-grill-pan-article
- ↑ http://www.epicurious.com/expert-advice/how-to-use-maintain-cast-iron-grill-pan-article
- ↑ http://amazingribs.com/tips_and_technique/mythbusting_grill_marks_and_flipping_meat.html
- ↑ https://www.fsis.usda.gov/wps/portal/fsis/topics/food-safety-education/get-answers/food-safety-fact-sheets/safe-food-handling/safe-minimum-internal-temperature-chart/ct_index
- ↑ https://www.thekitchn.com/how-to-clean-a-cast-iron-skillet-cleaning-lessons-from-the-kitchn-107747
- ↑ http://www.southernliving.com/food/how-to/how-t0-season-a-cast-iron-skillet
About This Article
To use a grill pan, preheat it over medium-high heat for 5 minutes before cooking on it, which will allow the entire surface of the pan to get hot. While the pan is heating up, brush oil onto the food you'll be cooking. Avoid putting oil directly in the grill pan since it could burn and ruin the flavor of your food. Once the grill pan is preheated, put the food in the pan and cover it with aluminum foil so it cooks faster. Let the food cook in the pan and use tongs to flip it once halfway through the cooking time. If you want to learn how to clean and store your pan after you cook with it, keep reading the article!


