This article was co-authored by Rebecca Schweiger. Rebecca Schweiger is a Professional Artist, Published Author, and the Founder of The Art Studio NY, New York City's #1-rated art school and global online art studio. Celebrated by TV networks, press, and celebrities including NBC, ABC, E!, Time Out New York, The Kardashians, and Big Bang Theory's Jim Parsons, Rebecca specializes in creating abstract artwork and teaching studio art classes. Her art studios provide 100+ weekly, beginner-friendly drawing and painting art classes to people around the globe. With more than 22 years of art experience, she is the author of Release Your Creativity: Discover Your Inner Artist with 15 Simple Painting Projects, and her artwork has been exhibited in more than 50 museums and galleries around the world. Rebecca holds a BFA in Painting from Boston University's School for the Arts and has participated in acclaimed artist residencies worldwide.
This article has been viewed 15,846 times.
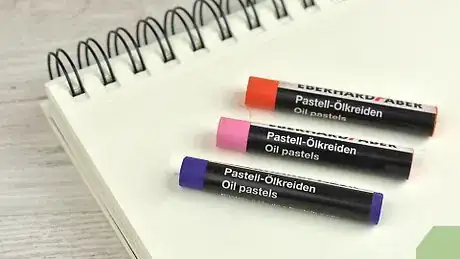
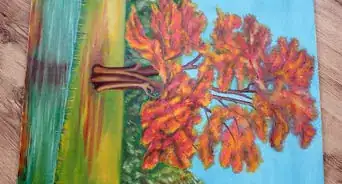
Oil sticks, also known as oil bars or pigment sticks, are basically condensed oil paints that you can comfortably hold in your hand.[1] If you enjoy working with mediums like pastels or charcoal, give oil sticks a try! You can paint with oil sticks on any surface that you could use regular oil paints on. Learn some basic techniques to start applying pigment to your chosen surface using an oil stick. After you get a feel for how oil sticks work, try using different tools and techniques to create unique effects, such as thick texturing or diluted colors.
Steps
Using Basic Techniques
-
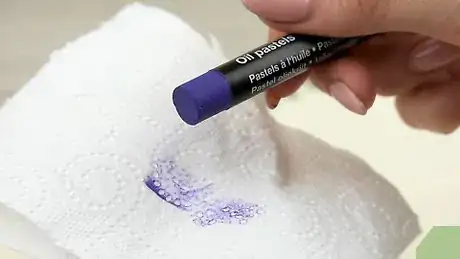
1Wipe the tip of an oil stick with a paper towel or rag to expose the paint. Place the end of the oil stick inside a paper towel or clean rag. Hold the paper towel or rag tightly over the tip and twist the stick around inside to remove the film that forms around the paint.[2]
- This film will form around the exposed paint overnight after each use, so remember to wipe it off any time you want to use an oil stick.
- The skin that forms around the paint keeps it fresh and creamy inside, so you don’t have to worry about oil sticks drying out. There is no special way to store oil sticks.
-
2Use oil sticks on canvas, paper, wood, or metal.[3] Choose canvas or high quality drawing paper for a classic painting backdrop. Paint on wooden or metal panels for a more unique option.[4]
- Oil sticks are composed of a pure pigment and a drying oil, which means you can apply them to any surface you can use oil paints on. There is also a small amount of wax in the sticks which gives them their form, but this doesn’t affect how the paint goes onto a surface or dries.
Advertisement -
3Start by drawing in main shapes using a light touch. Hold the oil stick between your thumb and index finger and rest it on your middle finger, just like a pen or pencil.[5] Lightly press the tip of the oil stick against the surface and move it to draw thin, crayon-like lines.[6]
- This works well to sketch out the initial composition of an artwork. For example, if you want to draw a bouquet of flowers, you can use this technique to outline the heads of the flowers, their stems, and foliage.
Tip: You can also use this technique to add fine accent lines and highlights later on in your painting.
-
4Fill in areas of thick color and tone using a hard touch. Continue holding the oil stick between your thumb and index fingers like a pen or pencil. Press it hard against the surface and move it firmly back and forth to create thick, paint-like strokes.[7]
- This technique works well to fill in blocks of color after you’ve sketched out the initial composition of your painting. For example, if you’re painting a bouquet of flowers, you can use these bold strokes to color in the petals and the foliage.
-
5Overlap different oil paint colors to create layers of color to work with. Draw over areas of color you already laid down so different colors overlap. Press the oil stick hard against the surface to transfer more color.[8]
- This will build up layers of color that you can manipulate to create different effects.
- Think about colors that can be mixed together when you do this as well. For instance, if you use red, yellow, and blue to fill in the background of your painting, you can overlap them so you can blend them together later and create many different shades of colors.
Creating Different Effects
-
1Draw on top of oil stick paint with a pencil to create fine details. Press the tip of a sharp pencil into areas of color that you’ve already added with an oil stick. Move the pencil around in the pigment to draw fine lines that stand out from the rest of the painting.[9]
- For example, you could use a pencil to outline the petals of a flower to make them stand out and appear more intricate.
-
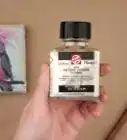
2Use a paint brush and mineral spirits to dilute the oil paint.[10] Dip a paint brush in mineral spirits. Use the damp brush to paint over oil paint that you’ve already added to the surface to thin it out and spread it around, creating watercolor-like effects.[11]
- This is a good way to create several different shades from 1 color. For instance, if you are making a painting with a blue sky, you can lay down 1 shade of blue pigment using an oil stick, then use a brush and mineral spirits to spread it around and make different shades of blue in the sky.
-
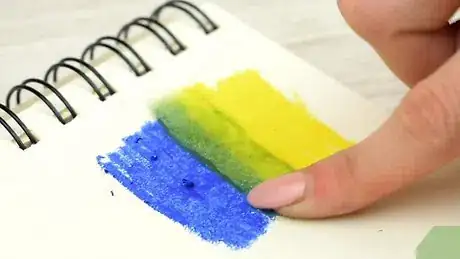
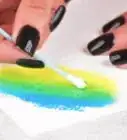
3Blend colors together by rubbing them with your fingers or a blending stick. Smudge different shades of the same color together by moving your fingertips or a blending stick back and forth over the sections of paint to get different gradients of the color. Rub 2 different colors together to make new colors.[12]
- A blending stick, also known as a blending stump, is a rolled cylinder of paper with a conical tip. They are often used to blend pencil or charcoal, but can also be used to blend oil stick paint.
- For example, you could blend yellow and red together to simulate the different colors of a sunset or a fire.
Tip: You can also purchase colorless oil sticks that you can use for blending.
-
4Scrape away paint with your fingernails to expose hidden layers of colors. Scratch lightly at areas where you overlapped colors to expose small lines of the color underneath and create a textured look. Press harder and scrape using the back of your fingernail to reveal whole sections of the color underneath the top layer and create contrasts.[13]
- For example, if you painted over a section of blue background with a green oil stick, you could lightly scratch it with the very tip of a fingernail to add texture and create the appearance of long blades of grass against a blue sky.
-
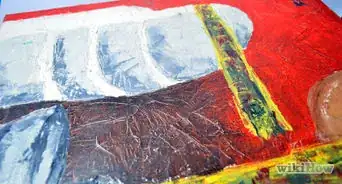
5Apply oil paint sticks with a putty knife or your fingers to make chunky textures. Mash an oil stick between your fingers or on a mixing tray using a putty knife until it becomes smooth and buttery. Use your fingertips or the edge of a putty knife to smear the paste onto your artwork’s surface and create dark spots of color that stand out and stick up from the surface.[14]
- This technique works well if you want to make an abstract painting with a lot of different colors and textures.
Expert Q&A
-
QuestionHow do you use oil paint sticks?
 Rebecca SchweigerRebecca Schweiger is a Professional Artist, Published Author, and the Founder of The Art Studio NY, New York City's #1-rated art school and global online art studio. Celebrated by TV networks, press, and celebrities including NBC, ABC, E!, Time Out New York, The Kardashians, and Big Bang Theory's Jim Parsons, Rebecca specializes in creating abstract artwork and teaching studio art classes. Her art studios provide 100+ weekly, beginner-friendly drawing and painting art classes to people around the globe. With more than 22 years of art experience, she is the author of Release Your Creativity: Discover Your Inner Artist with 15 Simple Painting Projects, and her artwork has been exhibited in more than 50 museums and galleries around the world. Rebecca holds a BFA in Painting from Boston University's School for the Arts and has participated in acclaimed artist residencies worldwide.
Professional Artist & Art School Founder If you don't want to use the sticks directly, you could take pieces of the sticks and put them in a palette, mixing them with some medium to apply the colors to a canvas.
Things You’ll Need
Using Basic Techniques
- Oil sticks
- Canvas, drawing paper, or wooden or metal panel
- Paper towel or rag
Creating Different Effects
- Mineral spirits
- Paint brush
- Pencil
- Blending stick
- Putty knife
- Plate
References
- ↑ Rebecca Schweiger. Professional Artist & Art School Founder. Expert Interview. 19 November 2021.
- ↑ https://www.artistsandillustrators.co.uk/how-to/oil-painting/1441/how-to-paint-with-oil-bars
- ↑ Rebecca Schweiger. Professional Artist & Art School Founder. Expert Interview. 19 November 2021.
- ↑ https://www.artistsandillustrators.co.uk/how-to/oil-painting/1441/how-to-paint-with-oil-bars
- ↑ Rebecca Schweiger. Professional Artist & Art School Founder. Expert Interview. 19 November 2021.
- ↑ https://www.artistsandillustrators.co.uk/how-to/oil-painting/1441/how-to-paint-with-oil-bars
- ↑ https://www.jacksonsart.com/blog/2019/05/16/oil-stick-vs-oil-pastel/
- ↑ https://www.artistsandillustrators.co.uk/how-to/oil-painting/1441/how-to-paint-with-oil-bars
- ↑ https://www.artistsandillustrators.co.uk/how-to/oil-painting/1441/how-to-paint-with-oil-bars
- ↑ Rebecca Schweiger. Professional Artist & Art School Founder. Expert Interview. 19 November 2021.
- ↑ https://www.jacksonsart.com/blog/2019/05/16/oil-stick-vs-oil-pastel/
- ↑ https://www.artistsandillustrators.co.uk/how-to/oil-painting/1441/how-to-paint-with-oil-bars
- ↑ https://www.artistsandillustrators.co.uk/how-to/oil-painting/1441/how-to-paint-with-oil-bars
- ↑ https://www.youtube.com/watch?v=I7iCvqc8SCU&feature=youtu.be&t=28

