X
wikiHow is a “wiki,” similar to Wikipedia, which means that many of our articles are co-written by multiple authors. To create this article, volunteer authors worked to edit and improve it over time.
This article has been viewed 59,748 times.
Learn more...
When you became an Instacart Shopper, Instacart sent you their Shopper app so you could work. But if you don't know your way around Instacart's Shopper app, this article is here to help.
Steps
Part 1
Part 1 of 5:
Setting Up
-
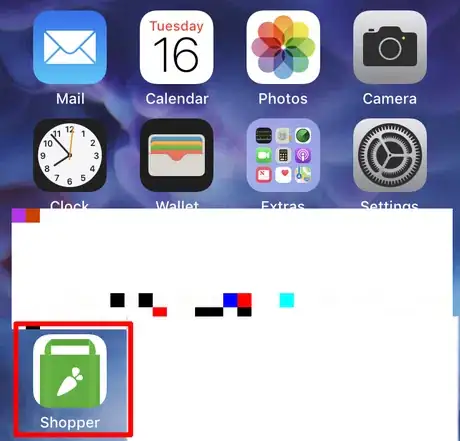
1Open up your Instacart's Shopper app on your phone. Instacart's Shopper app looks like a green Instacart bag on a white background.
- The icon that looks like a carrot on a white background isn't the one that is used to purchase items - not to perform your Instacart Shopper job.
-
2Log into the app. You'll be asked to provide your Shopper email address, and Instacart will provide you a temporary (one-time use) password they'll use to log you into the app over text messages.
Advertisement
Part 2
Part 2 of 5:
Getting to Know the App
-
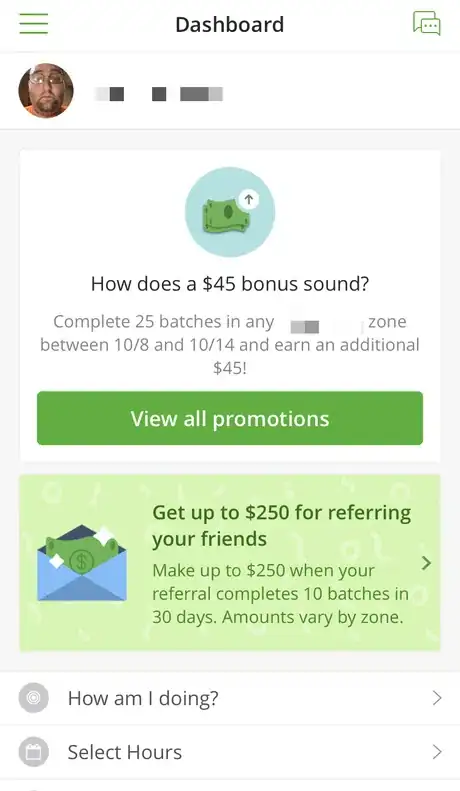
1Look at the Instacart Dashboard. The Dashboard is your friend as an Instacart Shopper and provides a quick skimmable place for most of what you do when you first enter into the app. You'll see your current schedule as well as a place to add hours to your Instacart Schedule, and a link to your current stats. If any of your region or zones have a promotion pay event going on, the Dashboard also provides that information. You can invite your friends to become other Instacart Shoppers or you can check out the Shopper Help Center - the in-depth place of Instacart Shopping 101 as well as a place to see if any bugs are currently found. If there's an app update, you'll see a box telling you so.
- Look out for app updates on the Dashboard. From time to time, you'll see a message come up on the Dashboard alerting you that there's an in-app update available; you'll need to tap it to update the app. Because Instacart's Shopper app isn't in the app store, when app updates are available, updates are shown here instead. Updates aren't too frequent, but do come up every so often and it is wisely suggested to take advantage of every update as it comes out.
-
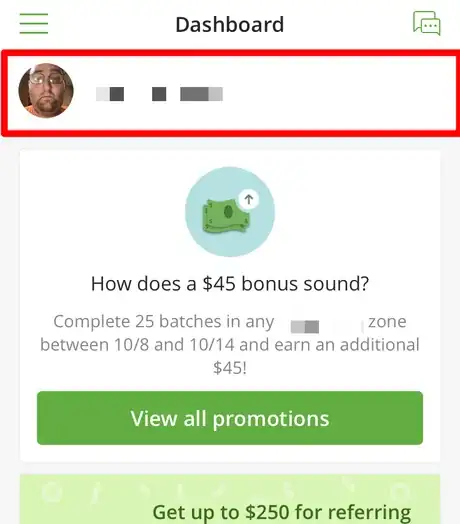
2Explore your profile. Tapping on your profile picture on the static line of your Instacart Dashboard will display a link to your profile page which can allow you to change your email, phone number, address and profile picture. Your first, last name and middle initials as well as birthday are disabled from editing and to edit it, you must contact Instacart who can make these changes for you.
-
3Wait for an On Demand order, if possible. Routinely, Instacart Shopper will look for orders that haven't been taken by Shoppers and will put these into their own queue for any Shopper watching Instacart for the taking. You will notice a box that initially will say "No batches available" but will change with every order that gets placed into that queue show up.
-
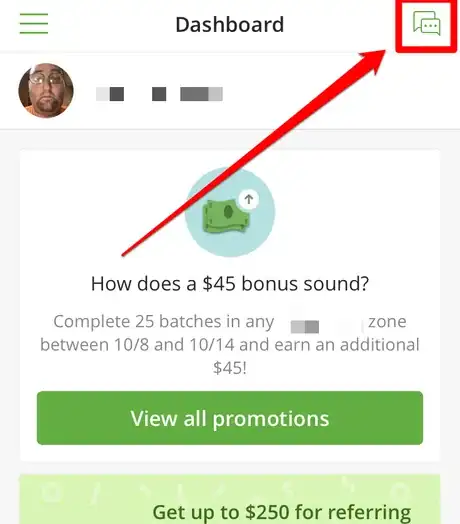
4Look out for Instacart chat messages on Instacart's Shopper screen. Up in the right corner of your Dashboard, you'll see a messaging icon that (rarely) alerts the Shopper about things you'll need to know or about updates to policy.
-
5Explore the menu bar. When you open the menu on the top left corner of the screen, there are several options:
- Dashboard tends to be a great link back to your Dashboard if you aren't already on it. It's also the place to tap if the app didn't bring you into the map when your shift started. It's also the place to tap if your shift ended but the app didn't close out of the map view nor have given your feedback page about the day inside your app. You'll see your order requests pop up in this screen. This is a go-to place.
- Current Orders is a go-to place if you are Shopping and all-of-a-sudden your app loses your connection or causes Instacart to close. You will be able to return to your batches (each order request is called a batch for Instacart) that you'll need to Shop for using this tab-button.
- Demo Orders: Not commonly used in all areas, but available in Canada. Some places give you sample orders, while others just come up blank with no orders available. Don't worry if you've previously Shopped for orders and see this. Orders are rather self-explanatory on the page as you Shop (in the mere case you need help).
- Messages: This links to your messages, much like the messages button in the top right corner of your Dashboard, or the occasional link to new messages into the Inbox from the button that displays right on the Dashboard.
- Help is another link to the Help Center you learned about from your Dashboard. This sends you to the Shopper Help Center - (Instacart 101 at your service!)
- How Am I Doing?: This provides another link to your stats you learned about from your Dashboard. These stats include your total speed in the last 30 batches Shopped, as well as a graphic designating your speed compared to average of the zone. You can find tips to speed up your shopping and make life easier in Speed Tip (but that changes at every tab opening). Customer feedback presents the percentage of perfect orders you've delivered, including a graph charting your feedback progress of perfect orders. Tip for Reducing Missing Items always is shown, but keep these tips in mind. Reliability Incidents always is something to keep in mind, if you consistently unreliable or cancel hours within the time frame that you're not supposed to cancel hours in. Watch your Batch Acceptance Rate; if you miss a batch or try and decline it (without a button), it'll appear that this percentage will go down.
- Referrals is another link back to the Driver invite page you learned about from your Dashboard. You can view your current details for inviting as well as a place to copy the code to your mobile clipboard as well as to send it to additional device-specific sharing locations. If you'd like to see who you've invited, you can see this list after tapping "View referral history".
- Hours provides a quick link to scheduling hours, finding out what hours you've assigned yourself to, which hours you've worked that (Sunday to following Saturday) week as well as as well as ways to Schedule yourself additional hours in zones. was shown as "Select Hours" on your Dashboard.
- Earnings is a multi-view set of information. It can provide information to view your history of earnings by day, by week or somehow else, it can provide information for your promotions in zones, it can be used to set up or manage your direct deposit bank account or it can be used to file and view status of reimbursement requests when you forget your card and have to use your own credit (or debit) card to pay for the order (as long as you have a copy of the receipt in hand to send them.
- Profile provides access to managing your current Instacart payment card (in My Payment Card), as a place to request a new card. "Edit Profile" will give you a link to your personal Shopper profile with your first and last name, middle initial, birthdate and complete address, along with Shopper picture. Update zones will show you information about all nearby zones you've been given access to shop in and will allow you to remove or add back zones in your nearby regions. "Edit Account Status" gives you button links to "Set Vacation" (time when you are "away" and not able to shop for an extended time period) along with a way to completely remove yourself from the Instacart platform (in Deactivate Account).
- Settings gives you a place to set and manage your default navigation app to use for navigation along with a way to Wipe Batch State (if Instacart Shopper Happiness tells you to do so), or to check the status of the app (another link to the Reported Issues and Bugs from your Dashboard.
- Logout button provides the way to temporarily leave and come-back later.
Advertisement
Part 3
Part 3 of 5:
Starting out Shopping
-
1Review your next work hours. If you've scheduled your hours, you'll see your next scheduled work time on the Dashboard.
- If Instacart knows of additional work times that might suit you, or if there's a slow time when they'd be okay with you logging off without a Reliability Incident, you'll also get messages about that on your Dashboard.
-
2Take an order when the time comes. Keep in mind that the app will have different screens once you are inside of an order. This process is described in How to Complete an Instacart Delivery instead.
Advertisement
Part 4
Part 4 of 5:
Understanding the Map
-
1Find you region boundaries. Instacart's Shopper app marks these with a light grey. You'll see other map colors, too (like a pinkish-red for medical areas, green for parks, and a darker grey for educational centers), but these aren't relevant to your Shopper duties.
-
2Watch out for Instacart Shopper hot spots. Instacart designates areas of high shopper demand with red rectangular areas. There's also pink for areas of moderate demand, while greyish-white indicates normal (or weak) demand.
- Hot spots may either signify that there are orders at particular stores while in other Instacart regions hot spots signify much higher demand at one store than others.
- If the schedule is filled with two Shoppers, the first Shopper to have signed up for these hours will receive the first request. If more orders become available, you will receive the orders. In some Instacart regions, you may - or may not - receive a second order, and as soon as the request is received, your hotspot will go off as you refresh your screen (go up to the menu bar and re-select Dashboard).
- Tapping a hotspot on the map will give you a Navigate button that will allow this location to be sent to your navigation app of choice which can get you to this location before the order request is received.
-
3Look at the top area above the map for your current activity. This area displays your current schedule, your current Instacart zone, and your type of shopping.
-
4Be aware of your current location. The blue dot is the current location of the phone (and you) on the map.
-
5Use the re-center button when necessary. It's over on the righthand side, just above the slide-out bar near the bottom. There should be two buttons; you'll want to press the bottom-most button to re-center yourself on the map.
-
6Find the helpful links on the map slide-out when you scroll up. You'll find a link to your current schedule (and an Edit button to adjust them), a link back to the Shopper Help Center, and the Reported Issues and Bugs page. If you're scheduled for three or more hours, after an hour, you'll also see a "Schedule a break" button (for one unpaid 20 minute break).
- Sometimes, demand is slow. If you receive a box with a turtle icon as well as the saying "Want to leave early? We're not as busy as expected and have more shoppers working than we need." be sure to choose either "Keep working" or "Leave early."
Advertisement
Part 5
Part 5 of 5:
During a Shop
-
1Get to know the process. This was explained in How to Complete an Instacart Delivery.
-
2Recognize what's behind the mysterious "i" button. The i button holds special information which may differ from one point to another.
- Before accepting an order and after completing checkout and proceeding into the delivery, you'll have access to the customer's name and complete address with their delivery notes (with a button to map the address in your third-party navigation app of choice), and button to review the items in the order.
- After accepting the order but before sliding the bar to begin shopping, you'll have access to the name of the store along with the name of the customer and how many orders they've had, as well as their Customer Notes and a button to call Shopper Happiness.
- During shopping, you'll still have access to the name of the store and customer (with how many orders) and customer notes, but instead of Calling Shopper happiness, you'll get rundown of how many items the customer has and a button to go see a preview of the items in the order (which defeats the purpose of the scrollable list during Shopping).
Advertisement
About This Article
Advertisement
