wikiHow is a “wiki,” similar to Wikipedia, which means that many of our articles are co-written by multiple authors. To create this article, volunteer authors worked to edit and improve it over time.
The wikiHow Tech Team also followed the article's instructions and verified that they work.
This article has been viewed 38,897 times.
Learn more...
Why should you uninstall older Java versions for your Windows, Mac? Up earlier this year, online malware developers have been using the consecutive security holes such as the "zero-day" vulnerability to remotely take control of your device. In response to these flaws in Java, we strongly recommend that you apply the latest version of Java for your operating system, you manually set the Java's Security Level to "High"; and you always run some well-known antivirus software (suite) or firewall program configured for daily updates and active monitoring. Overall, for common users, you should consider using Java only when other installed apps, websites need it to allow them to work properly. Now follow this wikiHow tutorial to uninstall Java (a.k.a, JRE) on your Windows system.
Steps
-
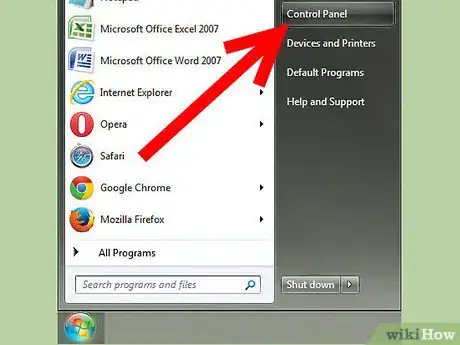
1After logging on to your device as the administrator user, you click on Windows' start (Orb) button and go to Control Panel.
-
2Select "Uninstall a program" (click the Add/Remove Programs if you're a Windows XP owner).Advertisement
-
3Find the old Java item like the following "Java 7 Update 25 (64-bit)", launch (click) Uninstall option (button)to execute the standard uninstall procedure.
-
4Choose Yes from Programs and Features (Add or Remove Programs) to proceed with the uninstallation process.
-
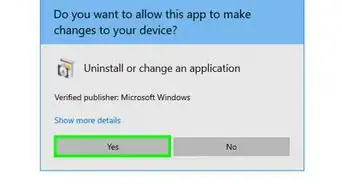
5You then need to wait for seconds while Windows Installer initializes the Oracle's built-in uninstaller file and then, you answer Yes to the below UAC to continue with the removal of the Java application.
-
6Afterwards, your system should help you uninstall the Java silently. Close Control Panel and then, restart your machine.
-Step-2.webp)
-Step-3.webp)
-Step-4.webp)
-Step-5.webp)
-Step-6.webp)
