This article was co-authored by Ndeye Anta Niang. Ndeye Anta Niang is a Hair Stylist, Master Braider, and Founder of AntaBraids, a traveling braiding service based in New York City. Ndeye has over 20 years of experience in African hair including braiding box braids, Senegalese twists, crochet braids, faux dread locs, goddess locs, kinky twists, and lakhass braids. Ndeye was the first female of her tribe in Africa to move to America and is now sharing her knowledge of African braids passed on from generation to generation.
This article has been viewed 29,579 times.
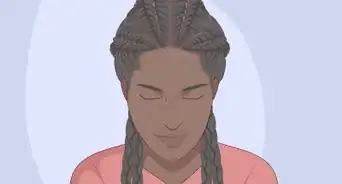
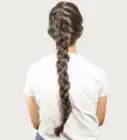
Under braiding can refer to a number of hairstyles, from the underhand French braid to the upside down French braid. The underhand French braid is a protective hairstyle for natural hair that uses a twisting technique. The upside down French braid is a great way to get long hair, regardless of texture, up and out of the way. If you are having trouble French braiding upside down, then there's a cheater version as well!
Things You Should Know
- Under braiding techniques will generally result in tighter braids that sit flush against your head, while over braiding will lead to looser, flimsier braids.
- There is no single way to under braid; if you’re braiding your hair by grabbing it from the inside and pulling it out to make your braids, you’re under braiding.
- The underhand French braid is probably the most popular style that utilizes this technique; it involves creating three strands of hair, pulling them out individually, and wrapping the strands underneath one another to create a tight French braid.
- Under braiding is a popular technique for folks with natural hair who want a protective style that will prevent damage.
Steps
Creating an Underhand Braid
-
1Comb your hair until it is free of knots and tangles. Comb your hair gently with a wide-toothed comb, and use cream or detangler as needed.[1] The underhand French braid is a protective hairstyle for natural, ethnic, or textured hair, but people with other hair types can wear them, too.
- This style works great with kanekalon extensions. If you wish to add extensions for length and volume, be sure to separate them out ahead of time.[2]
-
2Use the handle of a rat-tail comb to section off your hair. The rows need to run from your front hair line down to the nape of your neck. Secure each section off with a hair clip.
- How many rows you do is up to you.
Advertisement -
3Apply oil, cream, and edge control to your part and hairline. If desired, you can apply a moisturizing oil to your hair and let it soak in. However, some people skip the oil because it can make your hair slippery and difficult to work with. Next, apply a rich, moisturizing cream to your part and hair line, then comb it down into your hair. Finally, apply a small amount of edge control to your hairline.[3]
-
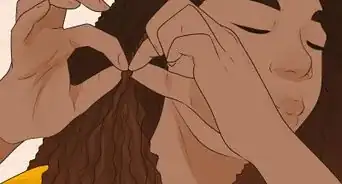
4Choose a row to start with, then section it further. Pick the bottom-most row (section) on either the left or right side of your head. Use the handle of a rat-tail comb to separate a thin section of hair from the front of the row at your hair line. Next, split the row down the middle, all the way down to your nape.[4]
- The row will have a top half and a bottom half. This will make it easier to grab sections when you are doing the actual braid.
-
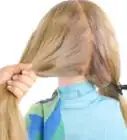
5Braid the front section for two cross-overs. Take the thin section from your hairline and split it into three strands. Cross the bottom strand over the middle one, then the top strand over the middle one.[5]
-
6Add hair to the bottom strand. Take a thin section of hair from the bottom half of the row. Add it to the bottom strand.[6]
-
7Rotate the bottom strand with the middle strand. Hold both the bottom strand and the middle strand in one hand. Twist your hand so that the bottom strand end up in the middle, and the middle strand is no on the outside.[7]
-
8Add hair to the top strand, then rotate it with the middle strand. Gather a thin strand of hair from the top half of the row, and add it to the top strand. Hold both the top strand and the middle strand in your hand. Twist your hand so that the two trade places.[8]
-
9Continue braiding down the length of the row. This method is very similar to French braiding because you are adding hair to the outer strands and crossing them over the middle one. The main difference is the twisting motion with your hand, which will help to keep the braids tight.[9]
-
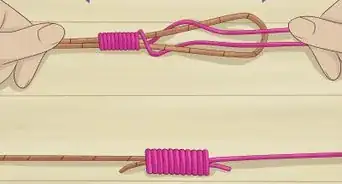
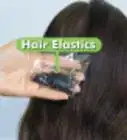
10Finish the braid off. Once you reach the nape of your neck, finish off with a regular braid. Wrap a black or clear hair elastic around it a few times if you are worried about the braid unraveling. However, this may not be necessary for textured hair. Tuck the tail end of your braid under the elastic, then wrap it a few more time to secure it.
- If you used extensions, you can seal them with boiling water instead. Dip the end of each braid in boiling water and then dry it off with a towel.
-
11Repeat the process on the other rows. Remember to split each row down the middle. Always start braiding with the bottom strand, regardless of which side of your head you are working on. If you have a braid going down the top-center of your head, you will have a left and right strand instead. In this case, you can pick a strand to start with.
-
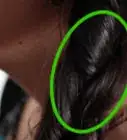
12Touch up your braids. Use the handle of a rat-tail comb to tuck in any stray hairs. Apply more edge control to the hairline, and smooth the hairs down with cream. If you want a little more shine, mist the hair with some shine spray.[10]
Doing an Upside Down French Braid
-
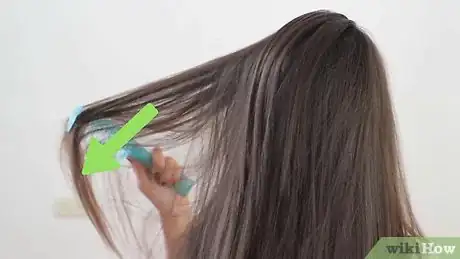
1Lean forward and allow your hair to drape across your face. This style will look like a French braid running up the back of your head and disappearing into a ponytail or bun. It will work best if your hair is long and comes past your shoulders.
- Take a moment to brush out your hair. It's best to do this after you lean forward, just in case any new tangles form.
- You should be able to easily do this braid yourself since you will be braiding up your head instead of down.
-
2Gather a thin section of hair from the nape of your neck. The section needs to span from one side of your nap to the other, and be about ½ inch (1.27 centimeters) thick.[11]
-
3Do a regular braid for two cross-overs. Split the section into three smaller sections. Cross the left strand over the middle one, then cross the right strand over the middle one.[12]
- If you wish to create a Dutch braid, cross the left and right strands under the middle one.
-
4Add some hair to the left strand before crossing it over. Gather a thin section of hair, about ½ inch (1.27 centimeters) wide from your hairline. Add it to the left strand, then cross it over the middle one.[13]
- If you are doing a Dutch braid, cross the left strand under the middle one.
-
5Repeat the process for the right strand. Gather another ½-inch (1.27-centimeter) wide section of hair from the hairline, and add it to the right strand before crossing the right strand over the middle one.[14]
- Again, cross the right strand under the middle one for a Dutch braid.
-
6Continue French braiding until you reach the back of your crown. Secure the braid with a small hair tie or a clear elastic. The rest of your hair should still be hanging loose.[15]
- Keep your stitches small, tight, and neat.
-
7Gather all of your hair into a high ponytail. The ponytail need to be at the same level where you tied off the French (or Dutch) braid. Secure the ponytail with a hair tie. If there is any braided hair sticking out of the top of the ponytail, unravel it now.[16]
-
8Finish off with a bun, if desired. Twist the ponytail into a rope, then coil the rope into a bun. Secure the bun with another hair tie, then pin down the sides with bobby pins.
- You can also create your bun using a sock or a foam bun maker.[17]
Making a Faux Upside Down Braid
-
1Lean forward and let your hair fall over your face. This style is a simpler take on the upside down braid. It works best on long hair that falls past your shoulders.[18]
- You can also create two faux upside down braids. First, part your hair down the center on the back of your head.
- Brush your hair out after you lean forward. Even if you brushed it earlier, new tangles may have developed.
-
2Gather a section of hair from your nape and begin to braid it. The section needs to be about 1 inch (2.54 centimeters) thick and span the width of your nape.[19]
- If you parted your hair down the middle, then braid the hair on the left and right sides of the part.
-
3Secure the braid with an elastic when it reaches the back of your crown. You will be gathering your hair into a high ponytail or bun. The braid will look like it is disappearing into the ponytail or bun.[20]
- To reduce bulk, use a small hair tie or a clear elastic.
- If you parted your hair down the middle and made two braids, then you'll need to secure both braids.
-
4Gather all of your hair into a ponytail, then straighten up. Use your hands to smooth your hair into the ponytail. Make sure that the braid is on the underside, going into the ponytail. Once you are happy with the height, secure the ponytail with a hair tie.[21]
- If you braided too far, carefully unravel whatever braid is sticking out of the ponytail.
-
5Twist the ponytail into a bun, if desired. Twist the ponytail into a rope first, then coil it into a bun. Secure it with another hair tie.[22] For a nicer finish, you can secure the sides of the bun to your head with bobby pins.
- For a fancier bun, try a sock bun or use a foam bun maker.
Things You'll Need
Creating an Underhand Braid
- Wide-toothed comb
- Rat-tail comb
- Hair clips
- Hair oil, cream, and edge control
- Kanekalon extensions (optional)
- Black or clear hair elastics (optional)
Doing an Upside Down French Braid
- Hair tie
- Mini hair tie or clear elastic
- Sock or foam bun maker (optional)
- Bobby pins (optional)
Making a Faux Upside Down Braid
- Hair tie
- Mini hair tie or clear elastic
- Sock or foam bun maker (optional)
- Bobby pins (optional)
References
- ↑ Ndeye Anta Niang. Hair Stylist & Master Braider. Expert Interview. 10 January 2020.
- ↑ https://www.youtube.com/watch?v=1VC6NR8ekB0
- ↑ https://www.youtube.com/watch?v=1VC6NR8ekB0
- ↑ https://www.youtube.com/watch?v=1VC6NR8ekB0
- ↑ https://www.youtube.com/watch?v=1VC6NR8ekB0
- ↑ https://www.youtube.com/watch?v=1VC6NR8ekB0
- ↑ https://www.youtube.com/watch?v=1VC6NR8ekB0
- ↑ https://www.youtube.com/watch?v=1VC6NR8ekB0
- ↑ https://www.youtube.com/watch?v=1VC6NR8ekB0
- ↑ https://www.youtube.com/watch?v=1VC6NR8ekB0
- ↑ https://www.youtube.com/watch?v=9lS5qpgrTmI
- ↑ https://www.youtube.com/watch?v=9lS5qpgrTmI
- ↑ https://www.youtube.com/watch?v=9lS5qpgrTmI
- ↑ https://www.youtube.com/watch?v=9lS5qpgrTmI
- ↑ https://www.youtube.com/watch?v=9lS5qpgrTmI
- ↑ https://www.youtube.com/watch?v=9lS5qpgrTmI
- ↑ https://www.youtube.com/watch?v=9lS5qpgrTmI
- ↑ https://www.glamour.com/story/cute-diy-braided-hairstyles
- ↑ https://www.glamour.com/story/cute-diy-braided-hairstyles
- ↑ https://www.glamour.com/story/cute-diy-braided-hairstyles
- ↑ https://www.glamour.com/story/cute-diy-braided-hairstyles
- ↑ https://www.glamour.com/story/cute-diy-braided-hairstyles
