This article was co-authored by Ndeye Anta Niang. Ndeye Anta Niang is a Hair Stylist, Master Braider, and Founder of AntaBraids, a traveling braiding service based in New York City. Ndeye has over 20 years of experience in African hair including braiding box braids, Senegalese twists, crochet braids, faux dread locs, goddess locs, kinky twists, and lakhass braids. Ndeye was the first female of her tribe in Africa to move to America and is now sharing her knowledge of African braids passed on from generation to generation.
There are 8 references cited in this article, which can be found at the bottom of the page.
This article has been viewed 521,753 times.
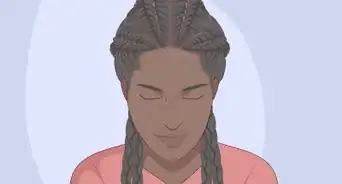
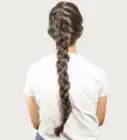
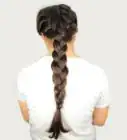
A basic French braid is a simple and elegant hairstyle. When you've mastered the single French braid, you can start using two French braids in your hair for even more style variety. Two French braids can expand your options from a ponytail braid, to pigtails, half ponytails, and even buns.
Steps
French Braid Pigtails
-
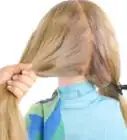
1Part the hair in the middle. Begin by brushing the hair and then parting it in the middle. Make sure the part goes from the hairline all the way to the nape.[1] Pull the two sections of hair over your shoulders, as if you are about to tie your hair into pigtails.
- The part in your hair does not have to be a severe straight line. You can have a messy, uneven part for a chic bohemian style. A zig-zag part can add a bit of funk to your style.
-
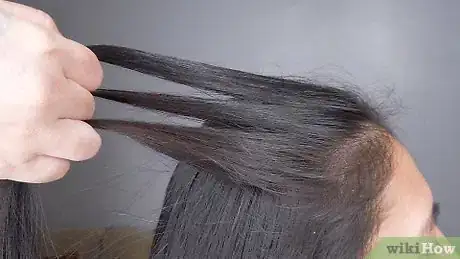
2Make the foundation braid. Choose a side to begin with. Take a small section of about .5 inches (1.3 cm) of hair from your hairline. Separate this section from the rest of the hair with your fingers.[2] Divide this section into three strands. Make the foundation braid by starting a standard braid. Take the right strand and cross over the middle strand. Then cross the left strand over the new middle.
- You may want to secure the other, loose side with a hair band. This will help keep it from accidentally getting combined with the side you are braiding.
- This foundation braid will be on the side of the head. Since you are making French braid pigtails, you should be braiding down each side of your head. The braids will sit just between the ears and the part.
- If you'd like a looser braid, you can start with a larger section.
- If you have very thick hair, you may want to work in larger sections.
Advertisement -
3Begin the French braid. Add a small section of loose hair to the right strand. Cross the right strand over the middle strand while pulling the middle strand to the right. Add a small section of loose hair to the left strand. Cross the left strand over the new middle strand while pulling the middle strand to the left.
- Keep your hands close to the head so the braid will remain tight.[3]
- Make sure to add an even amount of hair each time you add hair to the strands. This will keep the braids neat and uniform, instead of uneven.
-
4Continue braiding. As you move down the side of the head, continue french braiding the hair. You will pull hair from around the hairline in the front, and from along the part in the back. Each time you need a new layer, separate the hair you are adding in a horizontal line.[4]
- When you run out of hair to add to the braid, continue braiding in a traditional 3-strand braid.
- Make sure to keep the braid tight as you braid. This can be achieved by pulling the sections away from each other.
- If you're braiding your own hair, keep both of your arms on one side instead of holding them over your head since it will be easier.[5]
-
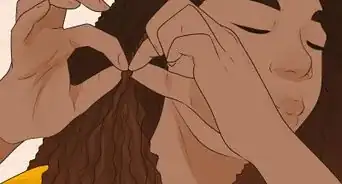
5Secure the hair. When you reach the desired length of your braid, tie it with hair ties. You can add hair clips, ribbon, or other accessories.
-
6Repeat on the other side. On the other side of the head, repeat steps 2-5 on the hair. The braids should look identical.[6] Make sure to stop them at the same place and try to use matching hair ties on each side.
- If you would like an alternate style for French braid pigtails, instead of braiding all the way to the ends of your hair, stop at the nape of your neck. Secure the French braid with a hair tie. The hair hanging over your shoulders will be loose, so you can straighten or curl these strands.[7]
- Another alternate style for two French braid pigtails is a bun. After finishing one of the French braids, pin the tail of the braid into a bun at the back of your head by wrapping the tail around. Secure with bobby pins. Repeat with the other side, pinning the other braid on top of the bun. Use as many bobby pins as necessary to hold the bun in place.[8]
Side French Braids
-
1Part the hair. After brushing the hair, part it in the middle. The part only needs to go from the hairline to the crown of your head.
-
2Start a foundation braid. Choose a side to begin. Take a small section of hair near the face and separate it from the rest of your hair. Divide this into three equal strands. Make the foundation braid with a traditional braid - cross the right strand over the middle, and then cross the left strand over the middle.
- These braids will be small strands that curve around the back of the head to meet in the middle. You are not trying to braid all of your hair into the strands.
- An alternate way to do this same style is to create two larger braids. This will give a slightly different look to the style. Follow the same steps, but add more hair. The larger braids will angle downwards more than the smaller braids, which means they will meet just underneath the crown instead of in the middle of the head.[9]
- When you start the braid, angle the braid away from the face, towards the back of the head. Don't angle it down.
-
3Begin the French braid. Add a small section of hair to the right strand, then cross the now larger strand over the middle. Add a small section of hair to the left strand, then cross the now larger strand over the new middle. Continue this along the curve of the head.
- Stop the braid once you get to the middle of the head. Secure with a clip or a hair tie.
-
4Repeat on the other side. Repeat steps 2 and 3 on the other side of the hair. The two strands should meet in the middle of the back of your head. They should be approximately the same size.
- The braids are forming a braided half-ponytail. Most of your hair will be loose.
-
5Combine the hair. Take the clips or hair ties from the two sides of the half ponytail. Add these two strands together.[10]
-
6Style as desired. With the two French braids along your head, you can now style as you wish. You can secure the half ponytail with a clip or hair tie for a stylish half-up do. You can also pull the hair into a ponytail. If you want to add a bit of sophisticated style, wrap the ponytail into a bun and secure with bobby pins.
- If you style into a ponytail or bun, the two French braids will rest just above the ponytail or bun.
- You can also join the two braids into a single, 3 strand braid that goes down your back. To do this, combine the left and middle sections of your left braid into 1 left strand, combine the right section of your left braid and the left section of your right braid into 1 middle strand, and combine your middle and right sections of your right braid into 1 right section. Then, continue braiding in a traditional 3-strand braid.
French Braid Crown
-
1Part the hair. Brush the hair, and then part the hair down the middle. The part should run from the hairline to the base of the nape.
- Secure one side of the hair with a hair tie. This will keep it out of the way until you are ready to use it.
- An alternate style, you can part your hair to 1 side to create two different sized braids, or you can create a soft, messy part.
-
2Start a foundation braid. Gather the hair at the base of the neck. Divide the hair into three sections. Cross the right strand under the middle, then cross the left strand under the middle. This makes the anchor braid.
- As an alternative, you can create a braided crown by simply French braiding your hair in pigtails, then wrapping each braid up and around your head. Tuck the ends under and pin the braid to your scalp.
-
3Begin a Dutch braid. Add a section of hair to the right strand, then cross under the middle strand. Add a section of hair to the left strand, then cross under the middle strand. You should be braiding upwards along your head.
- A Dutch braid is also called an inverted French braid or a reverse French braid. The hair is braided under instead of over like in a standard French braid.
- This braid will be done from the bottom of the head up instead of from the top of the head down.
- You may want to comb the hair in an upward direction before you begin so the hair is already in the right direction.
-
4Continue braiding around the head. Since this is a crown braid, the braid should follow along the curve of the head. Continue Dutch braiding by adding hair to the outer strands and crossing under.
- Make sure that the amount of hair added to the strands is equal each time. This keeps the braid uniform instead of uneven.
-
5Switch to a plait braid once your reach your center part at your hairline. The center part at the front of your hair will be where you stop adding hair to that side. At this point, stop dutch braiding your hair and switch to plaiting. This is a simple 3 strand braid to complete that side.
- If your hair ends at the part, simply tie it off. Since this style works best on long hair, the braid probably will end somewhere around the forehead.
-
6Secure braid. When the braid is finished, secure with a hair tie. Use a tie that is covered with fabric to minimize the risk of damage to your hair. Choose a hair tie that matches the color of your hair so that it blends in.[11]
-
7Pin your hair down, following the curve of your head. Wrap the tail of your braid around your head as far as it will go. Use bobby pins to pin it down to your head as you wrap the braid. When you reach the end of the braid, tuck the tail into your hair and pin it down.
- Try to hide your tail behind your ear.
- If you have very long hair, you may need to wrap it all the way around your head, ending at the nape of your neck.
-
8Begin braiding the other side. Unlike the first side, you will begin this braid at the top of the head. Starting at the part, repeat steps 2-5 as you Dutch braid down the side of the head. Just like the other side, this braid is curving along the head. Just like the other side, you'll switch to a traditional 3-strand braid when you reach the center part at the back of your hairline. Then, you'll wrap and pin the braid.
-
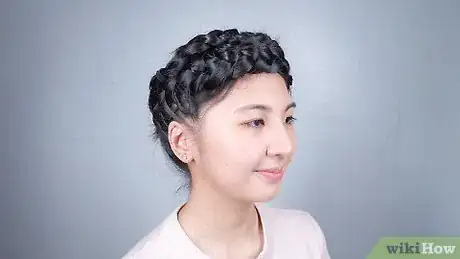
9Wrap around the head. Once you have reverse French braided both sides, wrap the two braids around the head. Secure the braids with bobby pins. Tuck the hair bands and the hair below the hair bands beneath the braids. Secure with bobby pins.
-
10Finished.
Expert Q&A
-
QuestionHow do you braid outside?
 Laura MartinLaura Martin is a Licensed Cosmetologist in Georgia. She has been a hair stylist since 2007 and a cosmetology teacher since 2013.
Licensed Cosmetologist An outside braid, also known as a Dutch braid or boxer braid, is made by inverting the method of the traditional French braid. Start with 3 strands and cross the outsides under the center section, adding hair as you go (rather than crossing them over the center section, like in a French braid).
 -
QuestionHow do you do a French roll?
 Laura MartinLaura Martin is a Licensed Cosmetologist in Georgia. She has been a hair stylist since 2007 and a cosmetology teacher since 2013.
Licensed Cosmetologist To make a French roll, also known as a French twist, gather your hair together slightly to the left of the center of the back of your head. Then, wrap the hair in on itself, making a loop at the ends of the hair and rolling it up toward the center of your head. Spread the loop out to create the roll and secure it with bobby pins.
 -
QuestionHow do you do two French braids on yourself?
 Laura MartinLaura Martin is a Licensed Cosmetologist in Georgia. She has been a hair stylist since 2007 and a cosmetology teacher since 2013.
Licensed Cosmetologist Begin by dividing your hair in the center of the head from forehead to nape. Then clip one side away and braid the other side starting in the front corner of the head, just above the outside of the eyebrow and moving back to the outside corner of the nape. Repeat on the opposite side using a mirror if needed.
References
- ↑ Ndeye Anta Niang. Hair Stylist & Master Braider. Expert Interview. 10 January 2020.
- ↑ http://www.seventeen.com/beauty/hair-ideas/french-braids-0608
- ↑ http://2good2lose.com/braid-french.shtml
- ↑ http://www.seventeen.com/beauty/hair-ideas/french-braids-0608
- ↑ Ndeye Anta Niang. Hair Stylist & Master Braider. Expert Interview. 10 January 2020.
- ↑ Ndeye Anta Niang. Hair Stylist & Master Braider. Expert Interview. 10 January 2020.
- ↑ http://www.latest-hairstyles.com/braids/french-braid-hairstyles.html
- ↑ https://www.youtube.com/watch?v=5AB_kJsbPck
- ↑ http://www.twistmepretty.com/2014/05/learn-your-4-basic-braids.html
- ↑ http://www.thesmallthingsblog.com/2011/10/half-up-braids/
- ↑ http://www.oncewed.com/diy/crown-braid-hairstyles-tutorial/
- ↑ Ndeye Anta Niang. Hair Stylist & Master Braider. Expert Interview. 10 January 2020.
About This Article
To make 2 French braids, start by parting your hair in the middle. Next, begin 1 side of the French braid by taking a small section of hair from around your hairline and dividing it into 3 strands. Take the right strand and cross it over the middle strand, and then cross the left strand over the new middle. Add small sections of loose hair to each strand before you cross it over. When you run out of loose hair to add in, keep braiding in a traditional 3-strand braid until you get to the bottom. Repeat this process for the other side to complete the look! For more tips from our Cosmetologist reviewer, including how to make a 2 French braid crown, keep reading!


