This article was medically reviewed by Erik Kramer, DO, MPH and by wikiHow staff writer, Jessica Gibson. Dr. Erik Kramer is a Board-Certified Primary Care Physician at the University of Colorado. With over 15 years of experience, his clinical interests include obesity and weight management, diabetes care, and preventive care, as well as embracing a holistic approach to primary care. He received his Doctorate in Osteopathic Medicine (D.O.) from the Touro University Nevada College of Osteopathic Medicine and completed his residency at Central Maine Medical Center. Dr. Kramer is a Diplomate of the American Board of Obesity Medicine.
There are 11 references cited in this article, which can be found at the bottom of the page.
This article has been viewed 39,505 times.
Jumper's knee might feel like an inconvenience, but it's important to stay off of the knee and let it heal. Wrap the knee and take ibuprofen to reduce the swelling. If other conservative treatments such as elevating the knee or applying an ice pack don't improve your knee, get a medical diagnosis and treatment plan. Your doctor may suggest physical therapy, injections to manage the pain, or surgery. Once your knee has recovered, you can ease into exercises that will strengthen the supportive muscles.
Steps
Resting and Supporting the Knee
-
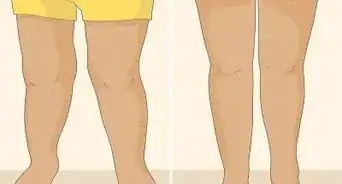
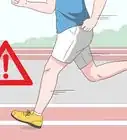
1Rest the knee for at least 24 to 48 hours. Begin to rest the knee as soon as you notice pain or swelling. You'll need to stay off of the knee and let it rest for at least a day or two before you begin to use it again. Avoid playing high-impact sports or training while your knee is inflamed.[1]
- Most cases of jumper's knee will need several weeks or even months of treatment.
-
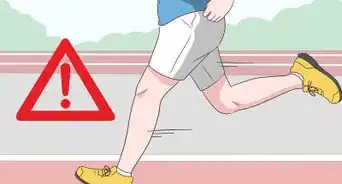
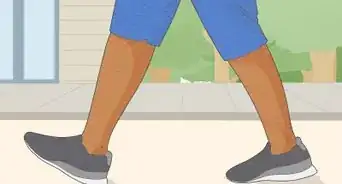
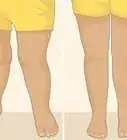
2Modify your activities until your knee recovers. Since jumper's knee is an overuse injury, it's important to change your activity level while your knee heals. Talk to your doctor about which activities are safe to do, what modifications you need to make, and what activities may risk worsening your injury. Take things easy until you recover.[2]
- For instance, you might need to take a break from sports that you play.
- Don't push your body right now. If something hurts, stop doing that activity.
Advertisement -
3Take ibuprofen to reduce pain and inflammation. If your knee has swollen or you feel sharp pain, take ibuprofen for the first 24 to 48 hours. Anti-inflammatory medication can reduce swelling and relieve the initial pain.<refhttps://pubmed.ncbi.nlm.nih.gov/18056743/</ref>
- Talk with your doctor about how long you should take ibuprofen to manage the pain.
-
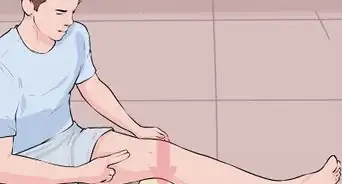
4Apply an ice pack while you rest the knee. Press an ice pack or gel pack to your knee to reduce swelling and relive pain. Hold the ice pack over your knee for up to 10 minutes at a time. Do this once every hour until the swelling goes down.[3]
- If you have chronic jumper's knee, plan on applying an ice pack after exercising.
-
5Elevate the knee. If your knee is painful or you're resting it, raise it up. Try stretching out so you can place pillows or cushions underneath your knee. When you elevate your knee, gravity will help move fluid away from the knee, which can reduce swelling.[4]
-
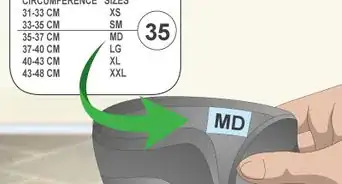
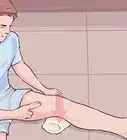
6Wrap the knee with a support or strap. Buy a knee strap and wrap it right under your knee. Wrap it several times so it supports the muscle right beneath your kneecap. The wrap will relieve some of the pressure on your muscle, which can relieve pain and make the muscle heal faster.[5]
- Knee straps are also called infrapatellar straps or Cho-pat straps. You can buy them in most pharmacies or medical supply stores.
-
7Use kinesiology tape to support your knee. Cut 6 strips of tape that are about 15 in (38 cm) long. Apply 2 strips of tape on the side of your knee, crossing them to make an "X." Then, create another "X" on the other side of your knee by crossing 2 more strips of tape. Wrap the 5th piece of tape around the top of your "X" to anchor the tape. Then, wrap the 6th piece of tape around the bottom of the "X" to make another anchor.[6]
- There are multiple ways to apply kinesiology tape. It's best to ask your doctor or physical therapist how to position the tape for your knee.


Getting Medical Treatment
-
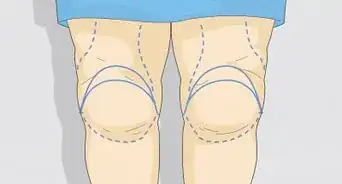
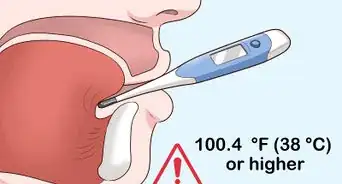
1Diagnose the severity of your jumper's knee. Your doctor will watch you run, jump, kneel, and move your knee to determine the level of your injury. The doctor will grade your jumper's knee from 1 to 5. Grades 1 and 2 are mild injuries, but grade 5 represents severe and constant pain.[7]
- If your doctor suspects you have a bone injury, they might order an X-ray. If they think you have a full tear, your doctor might order an MRI. However, a minor case of jumper's knee may not require any imaging tests.
- The doctor will use the diagnosis to create a treatment plan for your knee. Low level injuries will improve with rest and support, while a more severe diagnosis will need more intensive treatments.
-
2Try massage therapy or electrotherapy for mild jumper's knee. Studies show that professional therapies, such as massage or electrotherapy, help knee tendons heal. Ask your doctor if you'd benefit from massage therapy or electrotherapy along with a rehabilitation program.[8]
-
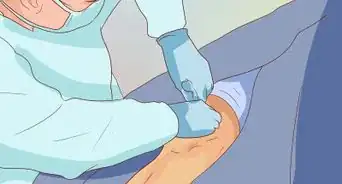
3Get Aprotinin injections. If you have severe jumper's knee that isn't feeling better after you've had mild treatments, you might need injections to relieve pressure and inflammation in the knee. The doctor will inject aprotinin directly into the inflamed tendon, which will desensitize the nerves and relieve pain.[9]
-
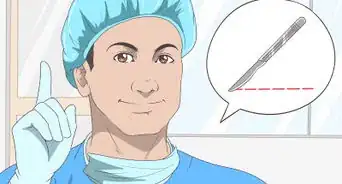
4Consider surgery for severe jumper's knee. If your knee doesn't improve after trying most treatments, the doctor will recommend removing damaged tissue from your knee. The surgeon can repair the tendon and your knee should heal better because blood supply to the knee is improved.[10]
- In most cases, you can return home soon after the surgery is completed.


Exercising to Strengthen the Knee
-
1Stretch your quadriceps muscles. If your doctor recommends that you exercise as part of a rehabilitation program, you'll probably need to stretch the quadriceps muscles in front of your thighs. Try one of these stretches:[11]
- Do the hip flexor stretch by putting one knee on the ground and the other foot in front so the knee is bent. Push your hips forward while you keep your back straight.
- Hold your ankle and pull the leg behind you toward your back. You should feel a gentle stretching in your quadriceps muscles. Hold the stretch for 10 seconds and release it.
-
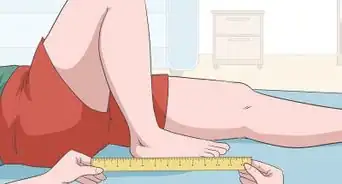
2Begin basic strength training. Once your knee no longer feels painful, start simple exercises to contract and relax your quadriceps. Stand or lay down and pull your knee towards your chest. Hold your knee for 5 seconds before you slowly release it. Do 3 sets of 8 repetitions for each knee.[12]
- You can eventually work up to holding the knee for 10 seconds. Do 4 sets of 12 repetitions for each knee once you feel comfortable.
-
3Use a leg extension machine for more strength training. If you're not comfortable with putting weight on the knee while you exercise, sit down and use the leg extension machine. Extend a single leg with light resistance and try to do 3 sets with 10 repetitions when you start out.[13]
- Work up to 3 sets of 10 to 12 repetitions once your knee feels stronger.
-
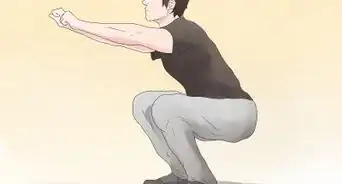
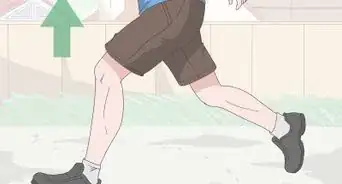
4Do eccentric squats on raised heels. Stand against a slanted foam roller or board so your heels are raised up at the back. Slowly squat down and then stand up a little quicker. Put your weight on the good knee instead of the knee that's healing. Do 3 squats 10 times a day when you start out.[14]
- Work your way up to 3 squats 15 times a day.


References
- ↑ http://www.sportsinjuryclinic.net/sport-injuries/knee-pain/jumpers-knee
- ↑ https://kidshealth.org/en/parents/jumpers-knee.html#
- ↑ https://www.ncbi.nlm.nih.gov/pmc/articles/PMC2971642/
- ↑ https://www.womenssportsfoundation.org/health/injured-the-good-the-bad-and-the-must-do/
- ↑ http://kidshealth.org/en/parents/jumpers-knee.html#
- ↑ https://www.sportsinjuryclinic.net/sport-injuries/knee-pain/mcl-sprain-taping
- ↑ http://kidshealth.org/en/parents/jumpers-knee.html#
- ↑ https://www.ncbi.nlm.nih.gov/pubmed/3071153
- ↑ https://www.ncbi.nlm.nih.gov/pmc/articles/PMC4547110/
- ↑ http://www.houstonmethodist.org/orthopedics/where-does-it-hurt/knee/patellar-tendonitis/
- ↑ https://orthoinfo.aaos.org/en/recovery/knee-conditioning-program/
- ↑ http://www.sportsinjuryclinic.net/sport-injuries/knee-pain/jumpers-knee/strengthening-exercises-jumpers-knee
- ↑ http://www.sportsinjuryclinic.net/sport-injuries/knee-pain/jumpers-knee/strengthening-exercises-jumpers-knee
- ↑ http://www.sportsinjuryclinic.net/sport-injuries/knee-pain/jumpers-knee/strengthening-exercises-jumpers-knee


Medical Disclaimer
The content of this article is not intended to be a substitute for professional medical advice, examination, diagnosis, or treatment. You should always contact your doctor or other qualified healthcare professional before starting, changing, or stopping any kind of health treatment.
Read More...