wikiHow is a “wiki,” similar to Wikipedia, which means that many of our articles are co-written by multiple authors. To create this article, volunteer authors worked to edit and improve it over time.
wikiHow marks an article as reader-approved once it receives enough positive feedback. In this case, several readers have written to tell us that this article was helpful to them, earning it our reader-approved status.
This article has been viewed 51,446 times.
Learn more...
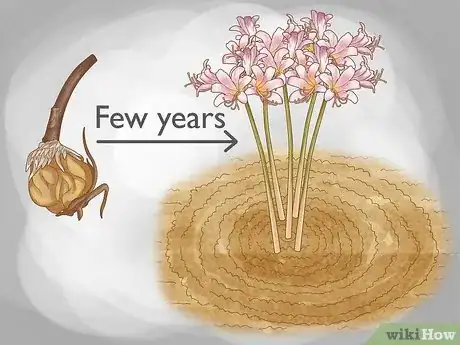
Resurrection Lilies (Lycoris squamigera) are also known as ‘Surprise’ or ‘Magic’ Lilies, and sometimes ‘Naked ladies’! They’ll grow in US zones 5 to 10, which means they can manage temperatures that drop down to -20 degrees Fahrenheit (-26 degrees Celsius). They have lovely pink flowers that generally bloom during the summer months. Resurrection Lilies are slightly unusual in that the flower emerges after the leaves die away, which is the ‘surprising’, ‘magical’, or ‘naked’ effect for which they are nicknamed.[1]
Steps
Planning and Preparation
-
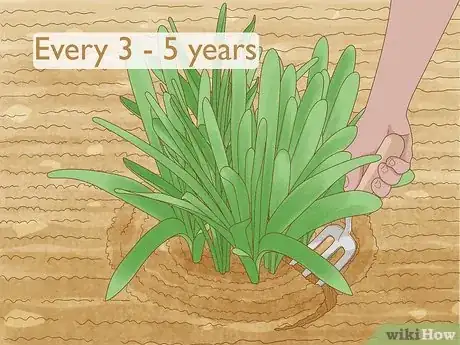
1Divide and transplant your lilies every three to five years. Whether you are moving and want to take your lilies with you, your garden is becoming too crowded, or you have some other reason to transplant your lilies, you should try to divide and transplant every three to five years. Doing this will help to keep the plants from becoming overcrowded and will boost their flower production.[2]
- Lilies will divide themselves in the soil and become crowded. This will cause the patch to produce fewer blooms. Having fewer blooms is a sign that it’s time to divide and transplant the patch.
-
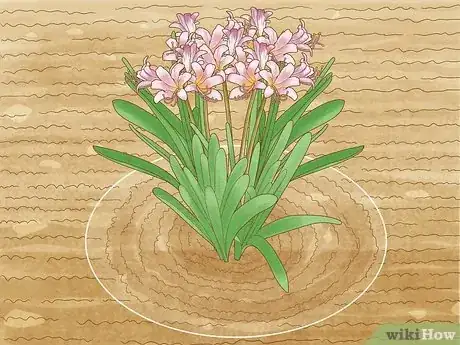
2Mark the location of the lilies before the foliage dies away. Because you need to wait until the lily is dormant before transplanting, it may be hard to find the plant once the foliage has died away. This can make it hard to know where to dig to gain access to the roots of the plant without damaging them.[3]
- One solution is to draw a circle around the plant using spray paint before the flowers fade.
- Alternately, mark the spot with a circle of stones, or insert plant markers into the soil (without damaging the bulb).
Advertisement -
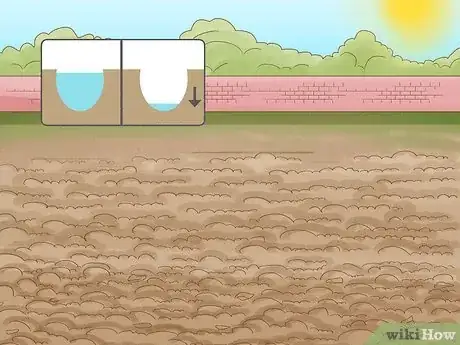
3Prepare the lilies’ new location. At the same time as you mark the plant’s location, it’s a good idea to prepare the new planting area so it has time to settle ahead of planting. Lilies will want a sunny spot with good drainage.[4]
- If you know your soil to be clay-heavy or have poor drainage, or if you observe puddles forming and disappearing rather slowly when it rains, you’ll need to improve drainage by digging in plenty of grit or compost. Alternately, consider raising the beds.
- Weed the soil at the new planting site and incorporate some organic matter into the soil. This organic matter can be compost or manure. Leave the bed to sit for a few weeks or months.
-
4Transplant the lilies a month before the first frost. Resurrection Lilies should only be transplanted when in their dormant stage, which occurs in the late summer and into the fall and winter. Try to transplant your lilies in the fall about a month before you expect the first frosts.
- You should note that, while it’s better to transplant the bulbs when dormant in the fall, it probably won’t harm them to be moved in the late summer or winter. However, this can lead to a delay in flower production during the next season.
-
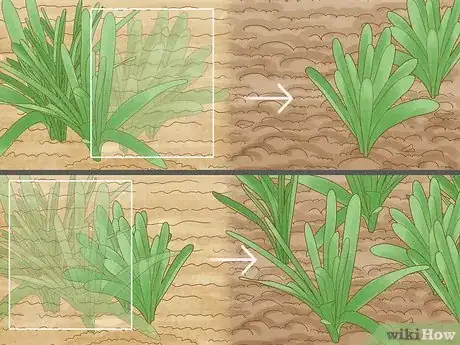
5Consider transplanting resurrection lilies in stages. Be aware that the lilies won’t always flower again the following year after being transplanted. Sometimes they refuse to flower for several years after the shock of the move. You might want to consider transplanting your patch of Resurrection Lilies in stages over a number of years to ensure you get at least some blooms in the year after transplantation.
Digging Up and Dividing the Bulbs
-
1Wait until the foliage has died back on its own. It’s important to allow the foliage to die away naturally, so don’t be tempted to cut it back. The lily will use the foliage to make energy from sunlight to store during the winter. This will help the plant recover from transplantation and bloom again.[5]
- Leave the foliage on the plant until it withers away of its own accord. By mid summer, when the flowers emerge, there won’t be any foliage remaining.
- After the flower withers away the plant will go dormant. By the time the fall comes, none of the plants will be visible above ground and the plant should be dormant.
-
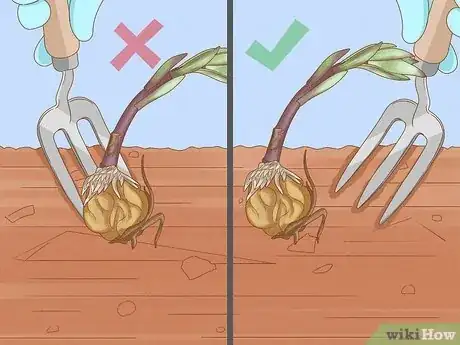
2Carefully dig the lily bulb out of the ground. Carefully dig the onion-shaped bulb out of the ground using a gardening fork, taking care not to damage it. Try to preserve as much of the soil around the root as possible. If the bulb is damaged or shows any signs of rot, discard it. Refrain from composting any diseased bulbs.[6]
-
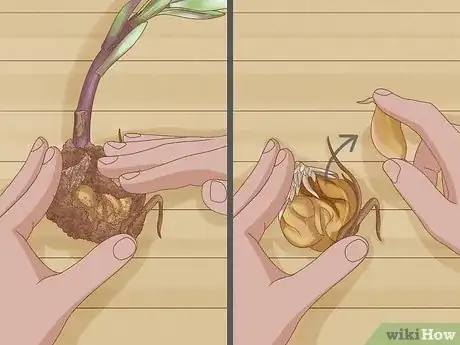
3Clean and divide the lily bulbs. If you think the bulbs need dividing, clean the soil off the roots with the help of a hosepipe. If the bulbs have divided they will have offsets (or baby bulblets) attached. These will look a bit like garlic bulbs with the offsets looking like separate garlic cloves.[7]
- To divide the offsets, gently pry them off with your fingers.
-
4Dispose of any damaged, diseased or stunted bulbs. Keep the largest, healthiest looking ones and dispose of any that are damaged or diseased looking. Bulbs that have rot will seem mushy. This is a good time to give away any healthy offsets that you don’t want to other gardeners.[8]
- You may now have more bulbs than you realized! It may not be worth keeping the smallest ones. However, if you have the patience to wait several years for them to mature, you might consider planting them amongst larger bulbs or at the back of a bed so you won’t notice a bare patch in the garden.
-
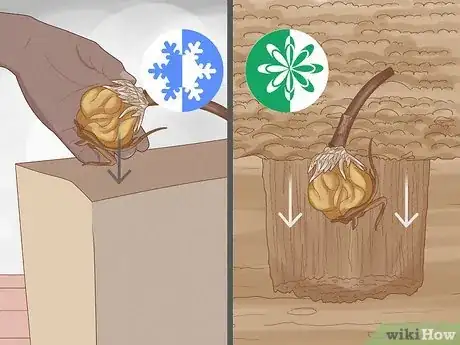
5Store the lily bulbs before replanting them in the spring. If you dig up bulbs in the fall, you can wait and store them over the winter before replanting them in the spring.
- Store them in a cool dry place such as inside a paper bag in a shed or cool cupboard.
Replanting the Lily Bulbs
-
1Replant the lily bulbs 5 inches (12.7 cm) deep and 10 inches (25.4 cm) apart. In the new planting spot, make a hole about 5 inches (12.7 cm) deep. Resurrection lily bulbs will need about 10 inches (25.4 cm) of space between them and other bulbs.
- Place them so that they are sitting on handful of bulb compost and with the pointed end facing upwards.
- Fill in the hole with soil around the bulb and tap it down gently. Avoid pressing the dirt down with your feet. Water the area well.
-
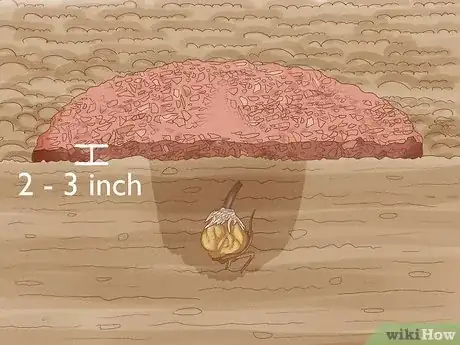
2Place mulch over the lilies in the winter. A two to three-inch layer of mulch, such as hay or leaf mold, will help protect the bulbs over winter but you should remove the mulch in the spring to let the shoots appear.
-
3Understand that the lily bulbs may take a couple of years to bloom again. You should expect that the transplanted lilies might not bloom again the following year, or even the one after. Be patient and don’t give up on them as they will most likely recover from being transplanted eventually.
Community Q&A
-
QuestionCan resurrection lilies be planted in pots?
 Community AnswerYes, as long as the pot is not too small for the plant.
 -
QuestionDo I need to dig up the bulbs every year?
 Community AnswerNo, you don't need to dig up the bulbs every year. You can let them die back and they'll pop up again next season.
 -
QuestionDo they make seeds?
 Community AnswerResurrection lillies do not set seed - flowers are either sterile, or plants will not come true from a seed.
References
- ↑ https://garden.org/plants/view/77659/Surprise-Lily-Lycoris-squamigera/
- ↑ https://www.kentuckyliving.com/home-garden/ask-the-gardener/dig-transplant-magic-lily-bulbs
- ↑ https://www.kentuckyliving.com/home-garden/ask-the-gardener/dig-transplant-magic-lily-bulbs
- ↑ http://www.alenagarden.com/a98618.php
- ↑ https://www.kentuckyliving.com/home-garden/ask-the-gardener/dig-transplant-magic-lily-bulbs
- ↑ https://www.kentuckyliving.com/home-garden/ask-the-gardener/dig-transplant-magic-lily-bulbs
- ↑ https://www.kentuckyliving.com/home-garden/ask-the-gardener/dig-transplant-magic-lily-bulbs
- ↑ https://www.kentuckyliving.com/home-garden/ask-the-gardener/dig-transplant-magic-lily-bulbs
