This article was co-authored by Clark Hill. Clark Hill is a Plant Specialist and the Vice President of Operations at Platt Hill Nursery, a garden center and nursery based in the Chicagoland area of Illinois. Clark and the Platt Hill Nursery plant experts are committed to educating others about plants and providing advice to plant owners. Platt Hill Nursery aims to make gardening an easy and sustainable activity for everybody.
There are 7 references cited in this article, which can be found at the bottom of the page.
wikiHow marks an article as reader-approved once it receives enough positive feedback. In this case, 100% of readers who voted found the article helpful, earning it our reader-approved status.
This article has been viewed 73,896 times.
Transplanting means moving a plant from one location to another. Sometimes this is done merely because the gardener prefers another location for the plant. At other times, there is a need for the plant to be moved. In the case of bulbs, this is frequently because the bulbs have reproduced themselves by growing baby bulbs as ‘offsets’ to the parent plant. When this happens it can be necessary to divide the bulbs in order to maximize their performance by thinning the clumps. To ensure a successful transplant of your bulbs, you must first prepare them and then properly plant them.
Steps
Preparing Bulbs for Transplant
-
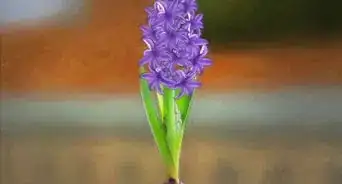
1Transplant bulbs when they are visible to avoid damage. It’s always easiest to move bulbs when you know where they are, so gardeners usually try to transplant bulb plants when some of the plant is still visible above the ground.
- After flowering, the plant will focus on drawing in nourishment to sustain it over the winter.[1]
- For this reason, you must avoid cutting green foliage as this deprives the plant of the ability to nourish itself and store energy from sunlight to see it through the winter.
-
2Transplant bulbs in the fall to achieve the best results. It’s always best to transplant bulbs in the fall after the foliage has withered away and is yellow.
- You can also move bulbs in the springtime but remember never to cut or damage any green shoots.
- If you move them in the spring take especial care not to damage the growing roots at this time.
Advertisement -
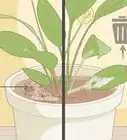
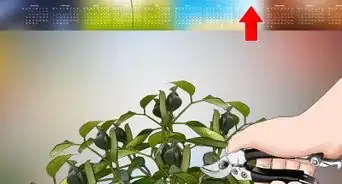
3Dig up bulbs gently to ensure their health. The trick with digging up bulbs is to avoid damaging the main bulb and to preserve as much of the root structure as possible.[2]
- This can be pretty hard to do.
- Gentle handling is always necessary when moving bulbs from place to place.
-
4Know how deep your bulbs are to avoid damaging them. When you plant a bulb, you should always do so at a depth of several times the height of the bulb. So when it comes to digging them up, that will give you an idea of how deep you need to dig to avoid damaging the bulb with your spade.
- Three times the height of the bulb is the usual depth for planting.
- Also, bulbs often wriggle deeper into the ground over time, which may add to the depth they were initially planted at.
- For example, larger bulbs such as tulips or daffodils will usually be planted to a depth of about 8 inches (20.3 cm). It’s best to assume they are at 12 inches (30.5 cm) depth to be on the safe side.
-
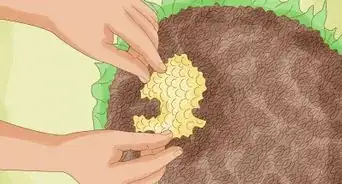
5Separate your bulbs before transplantation. Bulb plants reproduce by dividing the original ‘parent’ bulb into several ‘daughter’ bulbs, known as ‘offsets’. This happens over a period of years.
- If you observe that your bulb has formed a clump of smaller bulbs, gently separate these with your fingers.[3]
- The new bulbs can be planted separately and is a good way of increasing your bulb stock.
- This will also help avoid damaging neighboring bulbs by pulling apart their roots.
-
6Plant your bulbs in sunny and well-drained soil to let them flourish. Bulbs are usually fairly easy plants to grow, but they will appreciate well-drained soil and a sunny site.[4] Avoid planting bulbs any place where puddles form and don’t easily disperse after rainfall.
- Try squeezing a handful of damp earth.
- If it forms a sticky mass when squeezed, rather than crumbling, then your garden soil may be clay-heavy.
- If this is the case, it’s a good idea to incorporate lots of organic matter or grit into the soil to improve drainage.
- Do this well ahead of replanting the transplanted bulbs.
- Regardless of soil type, bulbs will appreciate plenty of organic matter such as well-rotted manure being incorporated at planting time.


Replanting Your Bulbs
-
1Store your bulbs properly to prevent rot. It’s always best to replant bulbs immediately after digging them up. If this really isn’t possible, you can store them for short periods. The trick is to avoid letting them rot.
- After lifting your bulbs, remove as much soil as is possible.[5]
- Trim any straggly roots and pick off any flaking layers from the bulb itself.
- Discard any diseased or rotting bulbs.
- Lay the bulbs on a tray or other flat surface and allow to dry out for a day or two.
- Then, put the bulbs into a container of sawdust or paper bags with some peat moss.
- Some gardeners use net bags of the kind used to store oranges.
- The trick is to allow dry air to circulate to prevent the bulbs from getting damp and rotting.
- For the reason, it’s best not to overcrowd bulbs and prevent them from touching each other as this can lead to rot spreading.
-
2Keep your bulbs in a cool, dry place to ensure their longevity. Keep your stored bulbs in a cool dry place such as an unheated garden shed where temperatures don’t fall below freezing.
- Spring flowering bulbs are best planted in the autumn; summer flowering ones in spring.
- You will hear of some gardeners dusting bulbs with fungicide ahead of storing them. This is always a good idea but isn’t essential.[6]
-
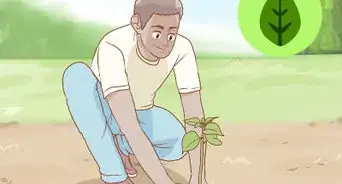
3Plant your bulbs at a depth equivalent to 3 times its height to ensure good growth. Aim to plant your bulbs at a depth of about 3 times the bulb’s height.[7] Bulbs should also be planted at least twice the width of the bulb apart.[8]
- This means a 2 inch (5.1 cm) bulb should be planted 6 inches (15.2 cm) deep and at least 4 inches (10.2 cm) from its neighbor.
- It’s a good idea to add a handful of compost to the bottom of the hole for the bulb to sit on.
- Put the bulb in the hole with the pointed end facing upwards and fill the hole in.[9]
- Water well and avoid treading down the earth with your foot as this can cause damage.
- Bulbs will do well planted under grass but remember not to mow the area over the bulbs until the foliage has withered away, usually in the late summer.
-
4Take additional steps for bulbs planted in containers. Bulbs will tolerate being replanted in a container. It’s a good idea to incorporate some grit into the compost at a ratio of 1 part grit to about 3 parts compost, to encourage the proper growth of contain-planed bulbs.
- Container bulbs need to be planted at a depth of three times their size but they will tolerate more crowding than ground-planted bulbs – an inch of separation is fine.[10]
- Avoid allowing the bulbs to touch. Feed container-planted bulbs regularly during the growing season (spring-summer).
-
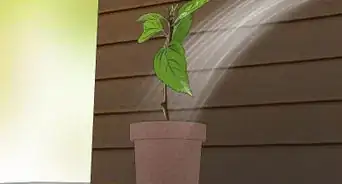
5Water container-planted bulbs to keep them hydrated. Container-planted bulbs will need watering throughout the growing season – this usually means spring and summer. Once the foliage starts to die back, cut back on watering as this will help the plant go dormant.
- Don’t let the container dry out completely, even when the bulbs are dormant over winter.


Community Q&A
-
QuestionWhen is the best time to transplant bulbs if I have seed pods on the stem?
 Community AnswerNot sure why this matters. Do you want the seed? Wait until the pod is dry. Otherwise, chop off all dead leaves and stems the instant they're dead, and mark where the bulbs are. Wait as long as possible --maybe a few weeks before your predicted first frost -- and then dig them up. Plant them after last frost in the new location. If you're somewhere warm, then dig them in October and stick them in the refrigerator for a couple of months and replant in December.


References
- ↑ https://www.hortmag.com/weekly-tips/movingflowerbulbs
- ↑ https://www.readersdigest.ca/home-garden/gardening/how-remove-bulbs-fuss-free/
- ↑ https://www.youtube.com/watch?v=KPUolOa4qIE
- ↑ Clark Hill. Plant Specialist & VP of Operations, Platt Hill Nursery.
- ↑ https://www.brecks.com/how_to_planting_care_of_bulbs_digging_storing
- ↑ https://www.brecks.com/how_to_planting_care_of_bulbs_digging_storing
- ↑ Clark Hill. Plant Specialist & VP of Operations, Platt Hill Nursery.
- ↑ https://www.purdue.edu/hla/sites/yardandgarden/autumn-time-to-plant-spring-flowering-bulbs/
- ↑ Clark Hill. Plant Specialist & VP of Operations, Platt Hill Nursery.
About This Article

If you're careful while transplanting your bulbs, your plants will stay happy and healthy. Transplant bulbs when they’re already visible above the ground so you don't risk damaging them. To dig one up, use a trowel or your hands to gently unearth the bulb. Aim to keep both the bulb and its root structure intact as much as possible. Once you’ve dug up the bulb, plant it in well-draining soil in a spot that gets plenty of sunlight. Try to place the bulb at a depth equivalent to 3 times its height to ensure it grows well. For instance, if your bulb is 2 inches, you should plant it 6 inches deep in the soil. To learn how to plant a bulb in a potting container, read on!