This article was co-authored by Bess Ruff, MA. Bess Ruff is a Geography PhD student at Florida State University. She received her MA in Environmental Science and Management from the University of California, Santa Barbara in 2016. She has conducted survey work for marine spatial planning projects in the Caribbean and provided research support as a graduate fellow for the Sustainable Fisheries Group.
There are 8 references cited in this article, which can be found at the bottom of the page.
This article has been viewed 74,630 times.
Starch tests are used to detect the presence of starch in leaves, foods, and liquids. The process is easy and can quickly tell you if a leaf has undergone photosynthesis by its starch levels or if a food or liquid contains starch. Using iodine to test for starch is a simple way to engage your students in a classroom experiment or create an educational afternoon at home.
Steps
Testing Leaves for Starch
-
1Collect a leaf that has been recently exposed to sunlight. Since this test will determine if photosynthesis has occurred in your leaf, make sure that the leaf you choose has had at least a few hours of recent exposure to sunlight.[1]
- Although you can use any green leaf for this experiment, hibiscus leaves tend to produce better results.[2]
-
2Boil 250 mL (8.5 fl oz) of water. Fill a beaker halfway with water, and allow it to come to a boil using a Bunsen burner or hot plate. Always use caution when working with heat by wearing gloves that protect against burns and other heat-related injuries. Make sure to keep your water at its boiling point.[3]
- A Bunsen burner is a type of gas burner that heats liquids and solids in chemical experiments.
Advertisement -
3Use your forceps to place your leaf in boiling water for 2 minutes. When placing your leaf into the boiling water, be sure to use your forceps (pincers, tongs or similar objects) to avoid any possible injury during this process. Boiling your leaf in the water will prevent any other chemical reactions from taking place in your leaf before you test for starch. This will allow you to get the most accurate results possible.[4]
-
4Use forceps to remove your leaf from the boiling water. Make sure to always use forceps or tweezers to remove your leaf from the boiling water. As you remove your leaf, make sure to turn off your Bunsen burner right away.[7]
- It is not necessary to turn off hot plates or electric water baths at this time.[8]
-
5Place the leaf into a boiling tube containing 90% ethanol. Try to get your leaf as close to the bottom of the boiling tube as possible. Keep your ethanol away from any open flames. Always wear safety goggles when using ethanol and other chemicals. Make sure that the amount of ethanol in the boiling tube is enough to completely cover your leaf.[9]
- A boiling tube is a cylinder tube of thin glass. It will be open on one end and will be able to withstand extreme temperatures. A test tube is suitable for this experiment.
-
6Boil your leaf for 10 minutes. While your leaf is in the boiling tube, place the tube in the hot water. You should let it boil for approximately 10 minutes, however, if your leaf decolorizes before that, go ahead and remove it from the heat.[10]
- It is better to use a hot plate or water bath for this step as ethanol is extremely flammable.
- You may need to replenish your ethanol levels if the ethanol is no longer covering your leaf completely.[11]
- Your leaf is done boiling when all of the green coloring is transferred to the ethanol, leaving your leaf colorless.[12]
-
7Remove your leaf from the boiling tube and rinse it with cold water. Use your forceps to gently remove your entire leaf from the boiling tube. Ensure that your leaf stays intact during the removal process and rinse with a tiny bit of cold water. Make sure you are wearing your protective goggles and heat-resistant gloves.[13]
- Boiling your leaf in ethanol will cause it to become brittle. By adding a small amount of cold water, it will help the leaf regain a soft texture.
-
8Use forceps to spread your leaf onto a white tile. Make sure that as you place your leaf on the tile that you are evenly distributing the area of your leaf. This will help provide clarity when looking at the results of your starch test.[14]
- You can also place your leaf in a petri dish, rather than placing it directly on the white tile.[15]
-
9
-
10Examine your leaf for a blue-black color, indicating starch. If starch is present in your leaf, the iodine solution will have changed color from brown to blue-black. If there was no change in your iodine solution and the liquid remains brown, there is no starch present in your leaf.[18]


Searching for Starch in Foods
-
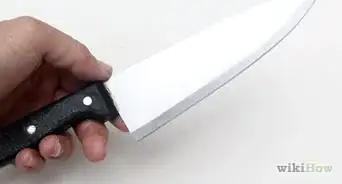
1Cut your food into small slices. You can test for starch in virtually any type of food. Many prefer to work with fruits and vegetables but you can also test for starch in breads and sugars. Also, grab a non-starchy food to act as your control. Use foods such as apples and cucumbers for your control samples. Make sure that your slices are thin.[19]
- Lighter colored foods will work best for this experiment.[20]
-
2Place your slices in a disposable, plastic cup. Small, disposable cups will help you keep your samples from crossing with other samples that could potentially skew your results. It will also help contain the iodine solution when you apply it to your samples.[21]
-
3Add 1 drop of water to the cup that holds your control sample. Making one of your samples your control means you will not be adding the iodine to it. This sample will be used to determine if your other sample has changed in the iodine.[22]
- Control samples are not required but can be very useful when analyzing your results.
-
4Add 1-2 drops of iodine to the sample being tested. Make sure to keep your control sample separate from the sample you are applying the iodine too. Do not use the sample you added water to.[23]
- You can add the iodine directly to your samples or place the iodine in the bottom of a cup, lay your sample on a paper towel, and place it on top of the iodine.[24]
- If you are unable to find an iodine solution you can also use Betadine (povidone-iodine mix), Lugol’s (a mixture of iodine and potassium), or a tincture (where the iodine is dissolved in water or alcohol).[25]
-
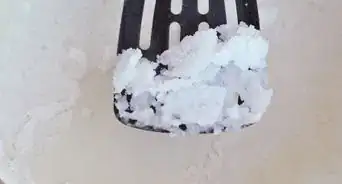
5Notice if your iodine has turned blue-black in color. If your sample has turned blue-black in color, then starch is present. When comparing your sample to the control, your control samples, even after adding the water, will have kept their original color. Your iodine will have turned blue-black if starch is present in your food. If your sample looks brown, then there is no starch present.[26]


Conducting a Liquid Starch Test
-
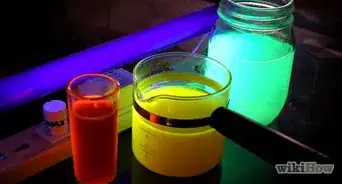
1Select light-colored liquids to test for starch. The iodine starch test can be run on almost any liquid. However, you should avoid using dark liquids as they will not allow you to observe the appropriate color change when determining your results.[27]
-
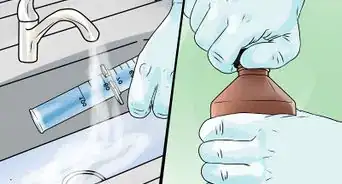
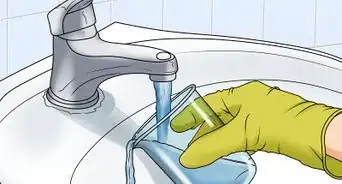
2Add 10 mL (0.34 fl oz) of your samples to clean test tubes. Adding your liquids to test tubes will make it easier keep the sample you are adding iodine to separate from your controls. When using more than one sample, this will also help you avoid cross-contamination.[28]
-
3Use a pipette to separate a small amount of liquid. You will need to fill your test tube at least a quarter of the way full, but do not exceed the halfway point when adding your sample.
-
4Add 1-5 drops of iodine solution to your test tube. The number of drops you add will depend on the amount of liquid you placed in your test tube.[29] For smaller samples add 1-2 drops of the iodine solution. Your iodine solution should be added directly to your liquid in the test tube. There is no need to stir the mixture, just allow the iodine to settle into your liquid.
- If you opted to place your liquid on a tile, add the drop of iodine directly to the liquid.
-
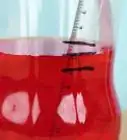
5Examine if your iodine has turned blue, meaning starch is present. Often there will be a black tint to the blue, which still indicates that your sample contains starch. If the color of the iodine has remained brown, starch is not present in your liquid.[30]


Expert Q&A
-
QuestionDoes cold pasta have resistant starch?
 Claudia Carberry, RD, MSClaudia Carberry is a Registered Dietitian specializing in kidney transplants and counseling patients for weight loss at the University of Arkansas for Medical Sciences. She is a member of the Arkansas Academy of Nutrition and Dietetics. Claudia received her MS in Nutrition from the University of Tennessee Knoxville in 2010.
Master's Degree, Nutrition, University of Tennessee KnoxvilleMaster's Degree, Nutrition, University of Tennessee KnoxvilleExpert AnswerNo, pasta is not a good source of resistant starch. Try eating corn and potatoes instead. -
QuestionWhat is the control for starch testing?
 Athena21Community AnswerThe control would be doing this procedure without the biotic element. For example, the control for testing for starch in a potato would be just putting iodine solution on a tile without the potato.
 -
QuestionHow do you differentiate blue, black and brown for this type of test?
 EthansciencelabCommunity AnswerBlue or black that means there is starch found, but brown means there is no starch.
Warnings
- Never allow your children to conduct this experiment unsupervised.⧼thumbs_response⧽
- Always keep ethanol away from open flames, unless it is held in a test tube.[31]⧼thumbs_response⧽
- Wash your hands immediately after using iodine as it can stain skin and clothing. Stains on the skin are temporary.⧼thumbs_response⧽
- Always wear eye protection while handling chemicals and around boiling liquids.[32]⧼thumbs_response⧽
- Always use heat-resistant gloves when dealing with open flames and hot plates.⧼thumbs_response⧽
Things You'll Need
Testing Leaves for Starch
- Bunsen burner or hot plate
- 250 mL (8.5 fl oz) beaker
- Boiling tube
- Forceps
- Test tube rack
- White tile
- A leaf to be tested
- 90% ethanol
- Iodine Solution
- Eye protection goggles
- Heat resistant gloves
Searching for Starch in Foods
- Dropping pipette
- Iodine Solution
- A starchy food such as a raw potato, pasta, or bread
- A non-starchy food such as apples, cucumbers, or pure sugar.
- Small, disposable, plastic cups
- Newspaper to cover your work area
Conducting a Liquid Starch Test
- A light-colored liquid
- Test tube
- Test tube rack
- Glass Rod to stir
- Dropping pipette
- Eye protection
- Iodine Solution


References
- ↑ https://practicalbiology.org/standard-techniques/testing-leaves-for-starch-the-technique
- ↑ https://www.youtube.com/watch?v=E9CSyXS3pXc
- ↑ https://practicalbiology.org/standard-techniques/testing-leaves-for-starch-the-technique
- ↑ http://www.preproom.org/practicals/pr.aspx?prID=1037
- ↑ https://www.youtube.com/watch?v=E9CSyXS3pXc
- ↑ https://practicalbiology.org/standard-techniques/testing-leaves-for-starch-the-technique
- ↑ https://www.youtube.com/watch?v=E9CSyXS3pXc
- ↑ https://practicalbiology.org/standard-techniques/testing-leaves-for-starch-the-technique
- ↑ https://www.youtube.com/watch?v=E9CSyXS3pXc
- ↑ http://brilliantbiologystudent.weebly.com/testing-a-leaf-for-the-presence-of-starch.html
- ↑ http://brilliantbiologystudent.weebly.com/testing-a-leaf-for-the-presence-of-starch.html
- ↑ http://brilliantbiologystudent.weebly.com/testing-a-leaf-for-the-presence-of-starch.html
- ↑ http://brilliantbiologystudent.weebly.com/testing-a-leaf-for-the-presence-of-starch.html
- ↑ http://brilliantbiologystudent.weebly.com/testing-a-leaf-for-the-presence-of-starch.html
- ↑ http://www.nuffieldfoundation.org/practical-biology/testing-leaves-starch-technique
- ↑ http://www.nuffieldfoundation.org/practical-biology/testing-leaves-starch-technique
- ↑ http://www.nuffieldfoundation.org/practical-biology/testing-leaves-starch-technique
- ↑ http://brilliantbiologystudent.weebly.com/testing-a-leaf-for-the-presence-of-starch.html
- ↑ http://kitchenpantryscientist.com/starch-test/
- ↑ http://kitchenpantryscientist.com/starch-test/
- ↑ http://www.webexhibits.org/causesofcolor/6AC.html
- ↑ http://kitchenpantryscientist.com/starch-test/
- ↑ http://www.webexhibits.org/causesofcolor/6AC.html
- ↑ http://www.webexhibits.org/causesofcolor/6AC.html
- ↑ http://www.webexhibits.org/causesofcolor/6AC.html
- ↑ http://kitchenpantryscientist.com/starch-test/
- ↑ http://brilliantbiologystudent.weebly.com/iodine-test-for-starch.html
- ↑ http://brilliantbiologystudent.weebly.com/iodine-test-for-starch.html
- ↑ http://brilliantbiologystudent.weebly.com/iodine-test-for-starch.html
- ↑ http://brilliantbiologystudent.weebly.com/iodine-test-for-starch.html
- ↑ http://www.preproom.org/practicals/pr.aspx?prID=1037
- ↑ http://www.preproom.org/practicals/pr.aspx?prID=1037
About This Article
To test foods for starch, start by cutting your food into small slices and placing them in disposable plastic cups to keep your samples clean. Once your test foods are ready, add 1 drop of water to the cup that contains your control sample. After you control sample is ready, add 1 to 2 drops of iodine to the sample being tested, putting the iodine directly onto your sample or placing it in the bottom of the cup. Notice if your iodine has turned blue-black in color, which indicates that starch is present. If, on the other hand, your sample looks brown, there’s no starch present. For more tips from our Science co-author, including how to test for starch in liquids, keep reading!


Medical Disclaimer
The content of this article is not intended to be a substitute for professional medical advice, examination, diagnosis, or treatment. You should always contact your doctor or other qualified healthcare professional before starting, changing, or stopping any kind of health treatment.
Read More...