This article was co-authored by Marvin Woo and by wikiHow staff writer, Hunter Rising. Marvin Woo is a licensed electrician and the Owner of Woo's Electrical & Appliance based in East O’ahu. With over two decades of experience, he specializes in troubleshooting issues and maintaining residential electrical systems. Marvin is both licensed and insured to complete electrical work in the state of Hawaii.
There are 13 references cited in this article, which can be found at the bottom of the page.
wikiHow marks an article as reader-approved once it receives enough positive feedback. In this case, 95% of readers who voted found the article helpful, earning it our reader-approved status.
This article has been viewed 203,723 times.
Soldering involves melting a low-temperature metal alloy over a joint or wire splice to secure 2 pieces together without the risk of them coming undone. If you want to combine 2 wires, you can easily use solder to make a connection that will last for a long time. Start by stripping the wires and wrapping them around one another to start the connection. After that, you can melt the solder directly onto the wires to secure them in place. Cover and waterproof the exposed wires to seal them and you’re finished!
Steps
Splicing Your Wires
-
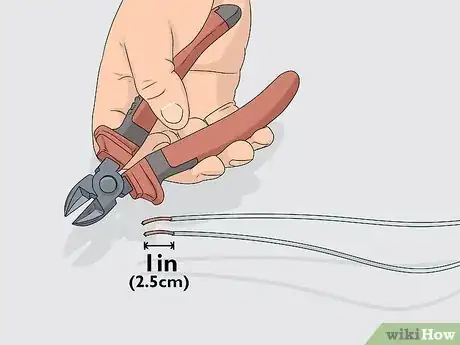
1Strip 1 in (2.5 cm) of the insulation off the end of each wire. Secure the jaws of a wire stripper 1 inch (2.5 cm) from the end of one of the wires you’re splicing together. Squeeze the handles together firmly together and pull the jaws toward the end of the wire to remove the insulation. Repeat the process on the end of the other wire you’re splicing as well.[1]
- You can get wire strippers from your local hardware store.
- If you don’t have a wire stripper, you can also slice through the insulation with a utility knife. Just be careful not to cut through the actual wire inside.
- If you accidentally break strands off of a stranded wire, then the wire could cause a fuse to blow. Cut any remaining strands on the wire and try stripping it again.
-
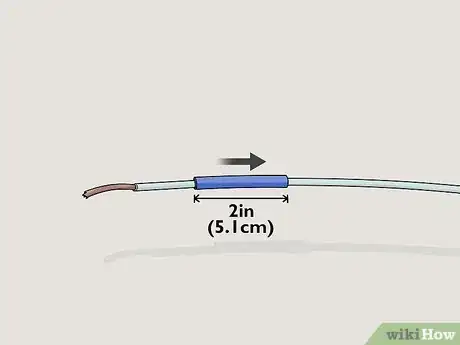
2Slide a piece of heat-shrink tubing onto one of the wires. Get heat-shrink tubing that’s a gauge larger than the wire you’re using so you can easily slide it on. Cut a piece of tubing that’s at least 2 inches (5.1 cm) long so it’s able to cover the splice and some of the insulation later on. Slide the heat-shrink tubing onto one of the wires and move it at least 1 foot (30 cm) away from the exposed end.[2]
- You can buy heat-shrink tubing from your local hardware store or online.
- Avoid using heat-shrink tubing that’s too large for the wire since you may not be able to secure it completely.
- Don’t keep the heat-shrink tubing near the area you’re soldering since it could shrink from the heat of your soldering iron.
Advertisement -
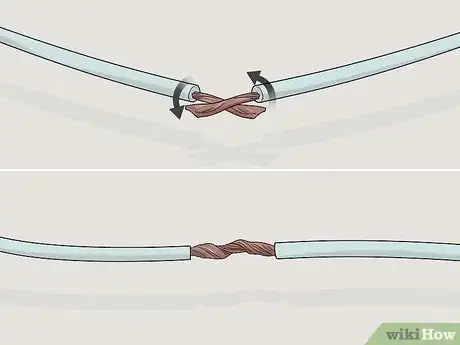
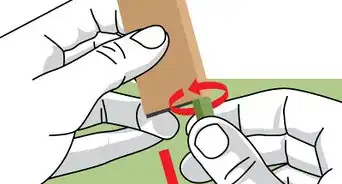
3Twist the ends of the wires together to combine them. Line up the centers of the exposed wires so they form an X-shape. Bend one of the wires down to twist it around the other wire as tightly as you can so it has a firm connection. Make sure the end of the wire doesn’t stick up or point away from the splice or else you won’t have as firm of a connection. Repeat the process with the other wire so your splice looks even on both sides.[3]
Tip: If you have stranded wires, you can also separate the individual strands and push the 2 wires together so the strands intermesh. Twist the strands together to make a solid connection.
Tip: If you you need to straighten out the wires so they're easier to line up with each other, use needle nose pliers or lineman pliers. Work at each wire in little sections at a time until it's straight again.
-
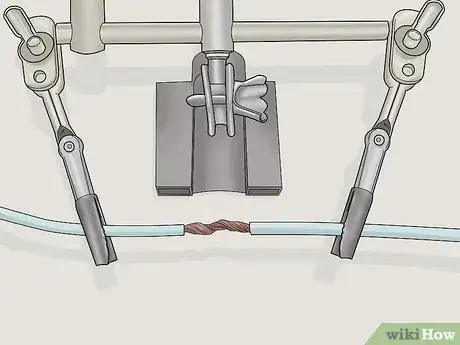
4Clamp the wires in alligator clips to keep them off of your work surface. Alligator clips are small metal grips that work well for holding wires in place without them moving around. Place the alligator clips vertically on a flat work surface so the jaws face up. Secure each of the wires into 1 alligator clip so the splice is supported off the work surface between them.[4]
- You can get alligator clips from your local hardware store.
- Make sure you work in a well-ventilated space since the fumes from the soldering iron can be harmful.
- Use a scrap piece of metal or a non-flammable material under the alligator clips to catch any solder spills.
-
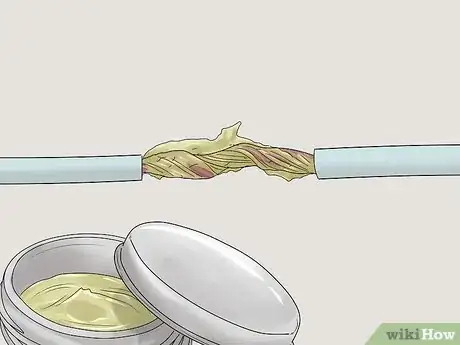
5Put rosin flux on the spliced wire to help the solder adhere better. Rosin flux is a compound that helps clean the wires and allows the solder to stick to them. Put a bead-sized amount of rosin flux on your finger and rub it over the exposed wires. Try to coat the wires as evenly as possible so there’s a thin layer of flux on them. Wipe any excess flux off of the wires with your finger or a paper towel.[5]
- You can buy rosin flux from your local hardware store.
Applying the Solder
-
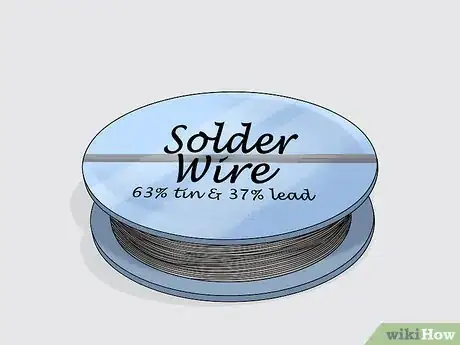
1Get 63/37 leaded solder for the easiest material to work with. Solder is usually made with a combination of metals that melt at a low temperature, like tin or lead. 63/37 solder is made of 63% tin and 37% lead, and it turns right from a solid to a liquid as soon as it reaches 361 °F (183 °C). Opt for 63/37 solder when you’re working with electronics so you can connect the wires together easily.
- Lead can be harmful if you consume it, so make sure to wash your hands thoroughly after you solder with it. You can wear gloves if you want, but they aren’t required since you won’t be working with the solder for very long.
- You can also get lead-free solder, but it may be more difficult to work with.
- Don’t use silver solder since it’s mainly used for plumbing and pipes.
-
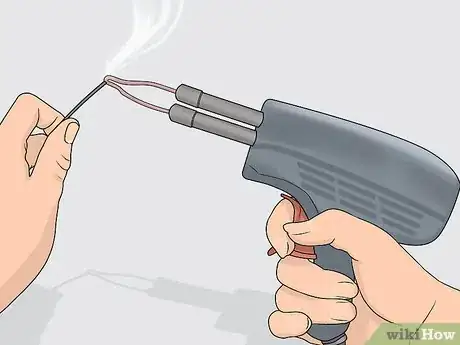
2Melt solder on the tip of your soldering iron to prevent oxidation. Put on a pair of safety glasses to protect your eyes. Turn on your soldering iron and let it heat up completely, which should only take a few minutes. Hold the end of your solder directly on the end of the iron so a thin layer of it melts onto the iron. Continue putting solder on the iron until it has a shiny appearance.[6]
- This process is known as “tinning” the iron and it stops oxidation, which can cause the iron to heat unevenly.
- Don’t touch the end of the soldering iron while it’s hot since it can cause severe burns.
-
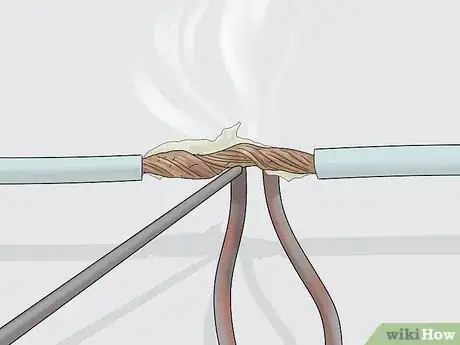
3Hold the soldering iron against the bottom of the splice to heat the flux. Keep the soldering iron turned on and place it on the bottom side of the wire splice. The heat will transfer from the iron and into the wires so the flux turns into a liquid. Once the flux starts bubbling, you can begin adding solder to the splice.[7]
- Thicker gauge wire may take longer to heat up than ones with lower gauges.
- Wear old clothes that you don’t mind getting singed if you accidentally touch them with the soldering iron or hot solder.
-
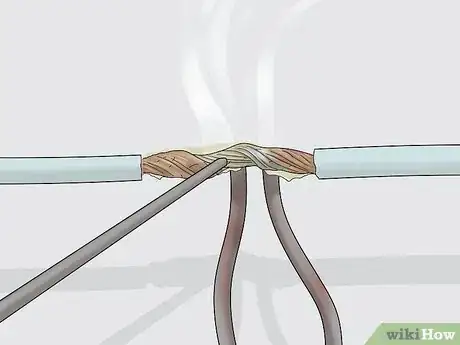
4Run the tip of the solder on top of the wire so it melts into the wires. Keep the soldering iron on the bottom of the wire to continue heating it. Tap the end of the 63/37 solder on top of the wire splice so the solder melts down into the wires. Run the solder over the entire splice so it can melt and travel into the gaps between the wires. Continue melting the solder until there’s a thin layer of solder covering all of the exposed wire.[8]
- Don’t breathe the fumes created by the solder since it can cause irritation and be harmful to your body. Work in a well-ventilated area to make sure the fumes don’t build up.
- You can choose to wear a face mask if you want, but it’s not required.
Warning: Don’t touch the solder directly to the soldering iron when you apply it to the wires since this creates a “cold solder,” which won’t as reliable of a connection and could cause a fuse to blow.
-
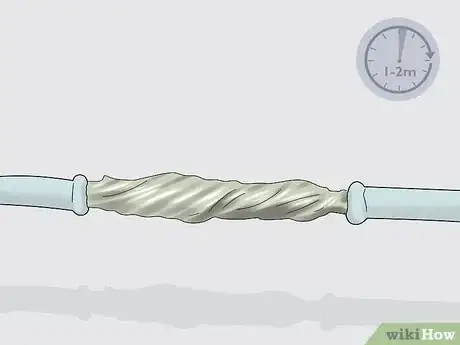
5Let the solder cool for about 1-2 minutes so it solidifies. Once you’re finished, pull the solder and iron away from the splice so it has a chance to cool. Don’t touch or disturb the wire while it’s drying since you could loosen the connection between them. After about 1-2 minutes, the solder will solidify and you can handle it again.[9]
Sealing the Connection
-
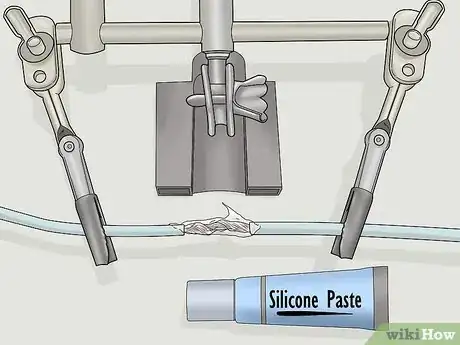
1Rub silicone paste on the soldered wire to make it waterproof. Silicone paste, also known as dielectric grease, prevents the metal wires from rusting and makes your splice completely waterproof. Use a bead-sized amount of silicone paste and spread it over the soldered wire with your finger. Make sure the wire has a thin, even layer of the silicone paste so it stays protected.[10]
- You can buy silicone paste from your local hardware store.
-
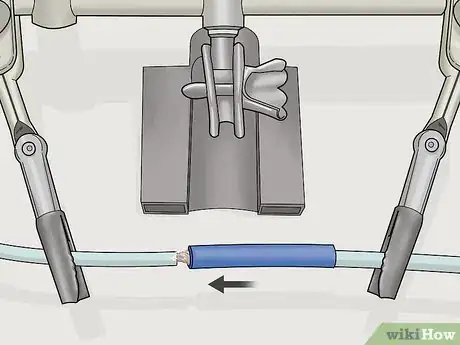
2Slide the heat-shrink tubing over the exposed wires. Take the heat-shrink tubing that you put on the wire earlier and move it back over the soldered wire. Make sure the edges of the heat-shrink tubing go over the insulation by at least 1⁄4 inch (0.64 cm) so there isn’t any exposed wire showing through.[11]
- It’s okay if some of the silicone oozes out from the heat-shrink tubing since there is still enough on the wires to protect them.
-
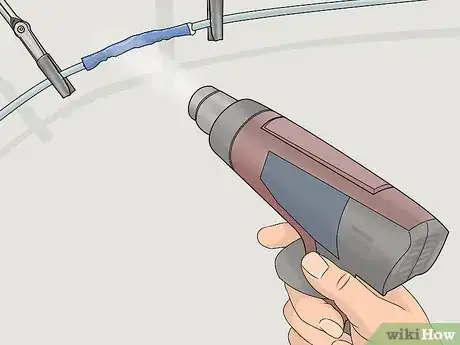
3Use a heat gun to shrink the tubing over the soldered wires. Hold a heat gun so it’s about 4–5 inches (10–13 cm) away from the tubing. Turn the heat gun onto the lowest setting and start applying heat to the center of the tubing. Work around the entire circumference of the wire, heating from the center to the edges so excess silicone paste oozes out of the sides. Once the heat-shrink tubing is tight on the wire, you can stop applying heat.[12]
- You can buy a heat gun from your local hardware store or online.
Tip: If you don’t have a heat gun, you can also use a lighter but it may not shrink the tubing as evenly.
-
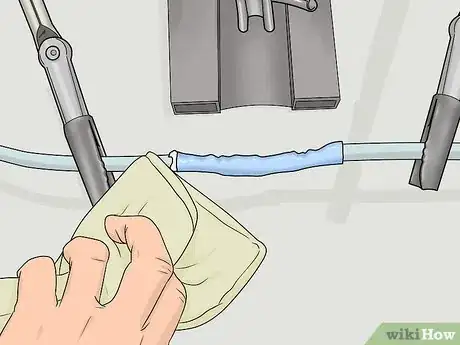
4Wipe off any excess silicone paste with a paper towel. There will be some silicone paste that leaks out the sides of the tubing as it shrinks. Once the wire and tubing are cool to the touch, use a piece of paper towel to wipe the silicone off of the wires so they’re clean. Once you remove the silicone paste, your wires are finished![13]
Community Q&A
Did you know you can get answers researched by wikiHow Staff?
Unlock staff-researched answers by supporting wikiHow
-
QuestionHow do you get solder to stick to wire?
 wikiHow Staff EditorThis answer was written by one of our trained team of researchers who validated it for accuracy and comprehensiveness.
Staff Answer wikiHow Staff EditorStaff AnswerIf the solder isn’t sticking, it might mean that the wires need to be cleaned. Swish your wire around in a little vinegar with salt dissolved in it to get rid of grime and corrosion, then dip it in a solution of baking soda and water to neutralize the acid of the vinegar. Wipe the wires dry with a clean, lint-free cloth.
 -
QuestionCan you use glue instead of solder?
 wikiHow Staff EditorThis answer was written by one of our trained team of researchers who validated it for accuracy and comprehensiveness.
Staff Answer wikiHow Staff EditorStaff Answer
 -
QuestionHow do you solder really small wires?
 wikiHow Staff EditorThis answer was written by one of our trained team of researchers who validated it for accuracy and comprehensiveness.
Staff Answer wikiHow Staff EditorStaff Answer
Warnings
- Be sure to work in a well-ventilated area so the fumes from the solder don’t build up.⧼thumbs_response⧽
- Don’t touch the soldering iron while it’s still hot since it could burn you.⧼thumbs_response⧽
- Avoid breathing in the fumes from the solder since it can be harmful.⧼thumbs_response⧽
- Wash your hands thoroughly after handling leaded solder, since the lead can make you sick if you consume it.⧼thumbs_response⧽
Things You’ll Need
- Wire strippers
- Heat-shrink tubing
- Alligator clips
- Rosin flux
- 63/37 leaded solder
- Soldering iron
- Safety glasses
- Silicone paste
- Heat gun
- Paper towel
References
- ↑ https://youtu.be/Q9G9gaokqvM?t=179
- ↑ https://youtu.be/Q9G9gaokqvM?t=192
- ↑ https://youtu.be/Zu3TYBs65FM?t=458
- ↑ https://www.onthehouse.com/electrical-solder-wire/
- ↑ https://youtu.be/Zu3TYBs65FM?t=532
- ↑ https://www.mediacollege.com/misc/solder/tinning.html
- ↑ https://youtu.be/Zu3TYBs65FM?t=577
- ↑ https://youtu.be/Zu3TYBs65FM?t=594
- ↑ https://youtu.be/qxqZJH3SfN4?t=272
