This article was co-authored by wikiHow staff writer, Darlene Antonelli, MA. Darlene Antonelli is a Technology Writer and Editor for wikiHow. Darlene has experience teaching college courses, writing technology-related articles, and working hands-on in the technology field. She earned an MA in Writing from Rowan University in 2012 and wrote her thesis on online communities and the personalities curated in such communities.
This article has been viewed 13,806 times.
Learn more...
Since the taskbar in Windows 10 may be set to automatically hide when it's not the main focus, you might want to change that. This wikiHow will teach you how to set the taskbar to always show in Windows 10. If you need to access the Start menu, but don't know how to find it without the taskbar, press the Windows key and you'll see the same menu as well as your taskbar.
Steps
-
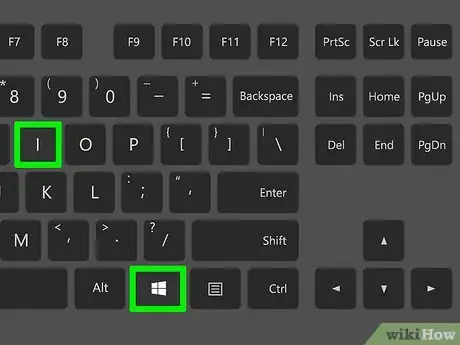
1Open Settings. Press Win + I or go to the Start menu and click the gear icon. You can also skip the next two steps by right-clicking on your taskbar and clicking Taskbar settings.
-
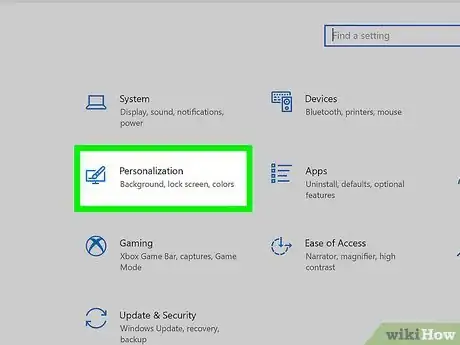
2Click Personalization. It's next to an icon of a paintbrush and monitor.Advertisement
-
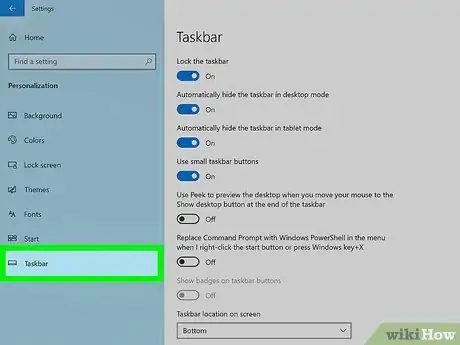
3Click Taskbar. You'll see this at the bottom of the menu in the panel on the left.
-
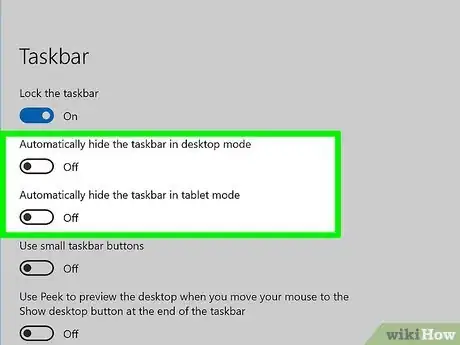
4Click the switch next to "Automatically hide the taskbar in desktop mode" to turn it off . If you want your taskbar to display while you're using your laptop in tablet mode, turn the switch off next to "Automatically hide the taskbar in tablet mode." A black switch indicates that the feature is off and your taskbar will no longer auto-hide.[1]
References
About This Article
1. Open Settings.
2. Click Personalization.
3. Click Taskbar.
4. Click the switch next to "Automatically hide the taskbar in desktop mode" to turn it off.

-Step-17.webp)


-Step-17.webp)
