This article was written by Gonzalo Martinez and by wikiHow staff writer, Darlene Antonelli, MA. Gonzalo Martinez is the President of CleverTech, a tech repair business in San Jose, California founded in 2014. CleverTech LLC specializes in repairing Apple products. CleverTech pursues environmental responsibility by recycling aluminum, display assemblies, and the micro components on motherboards to reuse for future repairs. On average, they save 2 lbs - 3 lbs more electronic waste daily than the average computer repair store.
There are 8 references cited in this article, which can be found at the bottom of the page.
This article has been viewed 12,110 times.
Services like iCloud, Google Drive, and Dropbox are all cloud services that will allow you to save data in a remote location. This wikiHow will show you how to save your photos to the cloud platforms including iCloud, Google Drive, and Dropbox. Before you get started, you'll need to have an account with whichever platform you are going to use.
Steps
Using iCloud On iOS
-
1
-
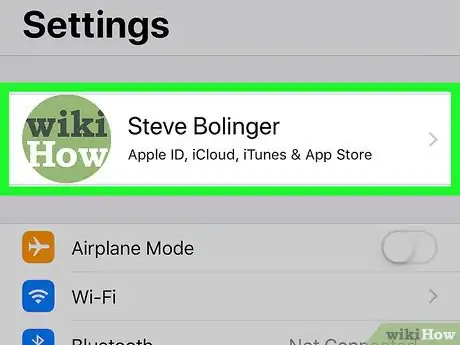
2Tap your name and picture. This is your Apple ID profile that the phone is signed in with. To access the pictures in iCloud, you'll need to log in to this Apple ID.Advertisement
-
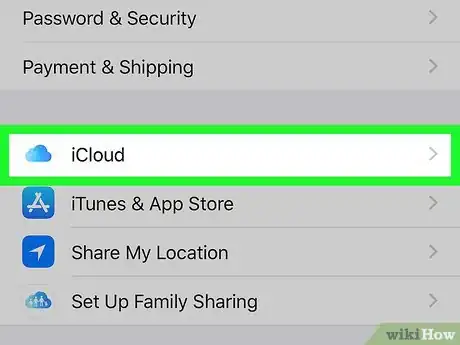
3Tap iCloud. This is usually the first listing in the second grouping. Tapping it will open your options for iCloud, including how much space is used and available as well as which apps are currently syncing with iCloud.
-
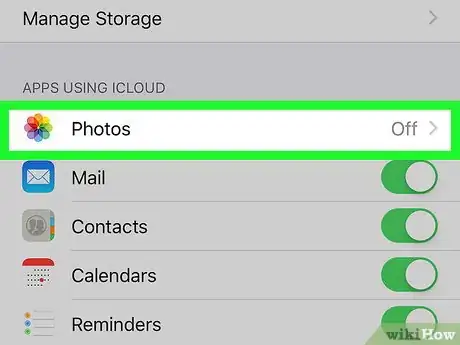
4Tap Photos. This is usually the first listing in the results.
-
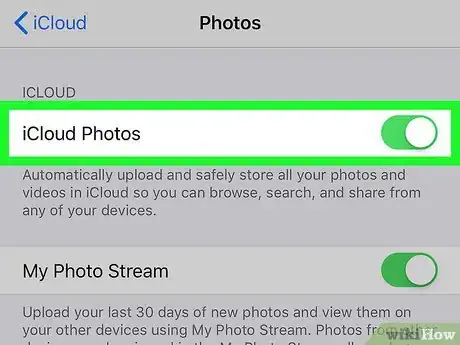
5Tap the switch on next to "iCloud Photos." It will take a few moments for your past pictures to sync with iCloud, but current pictures will show up in iCloud automatically.
- Save space on your phone or tablet by tapping Optimize iPhone Storage.
- You can opt to activate and use My Photo Stream or Shared Albums.[1]
Using iCloud On Desktop
-
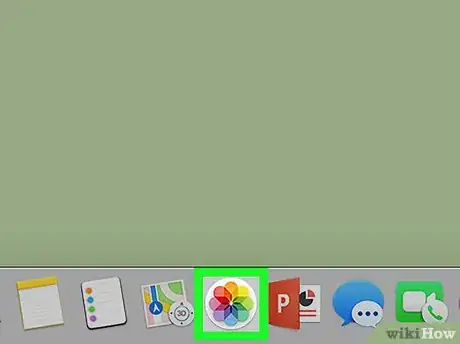
1
-
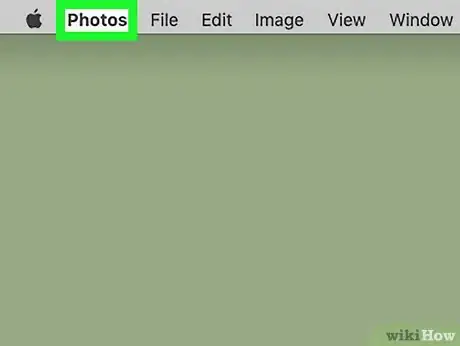
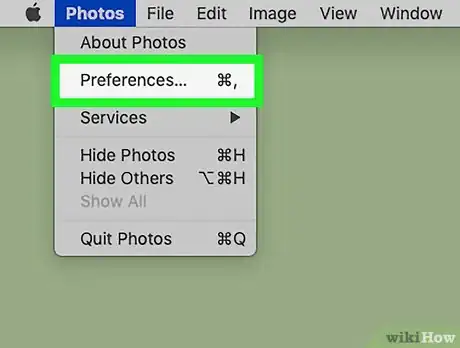
2Click the Photos menu tab. You'll see this next to the Apple logo in the top left corner of your screen. A menu will drop-down.
-
3Click Preferences. This is usually the second listing the dropdown menu. A window will pop up.
-
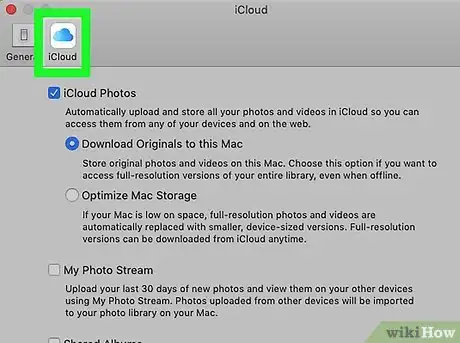
4Click the iCloud with the icon of a cloud tab. This is usually to the right of the "General" tab.
-
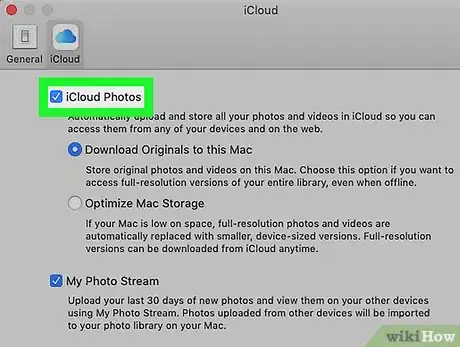
5Click to select the box next to "iCloud Photos." This activates more features. It will take a few moments for your past pictures to sync with iCloud, but current pictures will show up in iCloud automatically.
Using Google Photos On Mobile
-
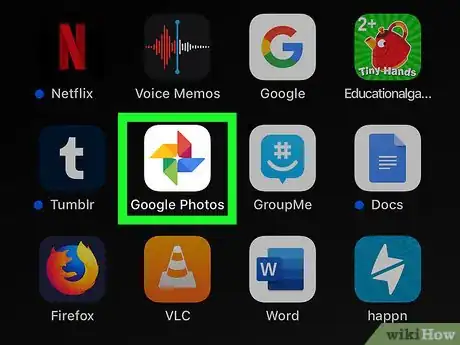
1Download and open the Google Photos app. You can get it for free from the Google Play Store or App Store.
- You'll need to have a Google account or make one to use Google Photos.
- Videos larger than 10GB, photos larger than 75MB or 100MP, and items smaller than 256x256 will not be backed up.
- If you're using an iPhone or iPad, your Live photos will be backed up in Google Photos.[4]
- Sign in to Google Photos if prompted.
-
2Tap ☰. You'll see this toward the top left corner of the app.
-
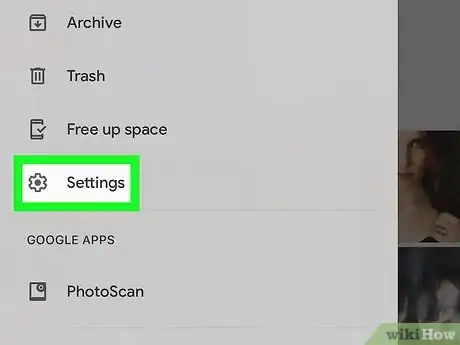
3Tap Settings. This is usually the last listing on the menu.
-
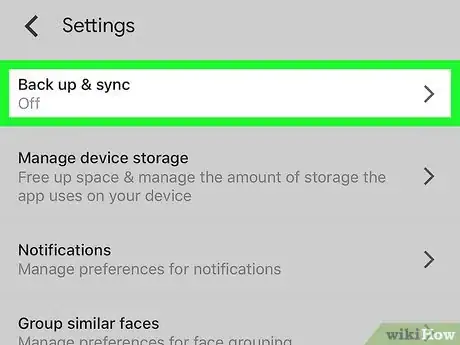
4Tap Back up & sync. This is usually the first listing on the menu.
-
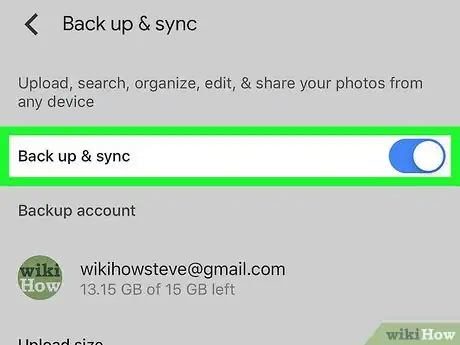
5Tap the toggle next to "Back up & sync" to turn it on. The process of syncing your past photos to Google Photos may take a while depending on how many photos and videos you have and your internet speed, but all your current photos will automatically be in Google Photos.
Using Google Photos In a Browser
-
1Go to https://photos.google.com/ in a web browser. You can use a computer or mobile device to access the mobile site.
- This method will not automatically save new photos into Google Photos.
- Log in if prompted.
-
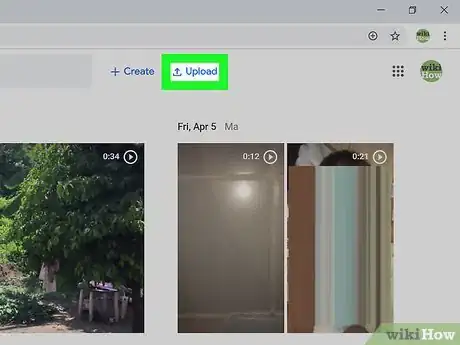
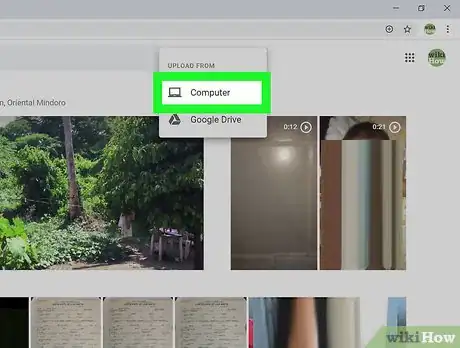
2Click Upload. You'll see this along the top of the page towards the right side, next to "Create." A menu will drop-down.
-
3Click Computer. Your file browser will pop up.
- You can also drag and drop your pictures into the Google Photos browser window to upload them.
-
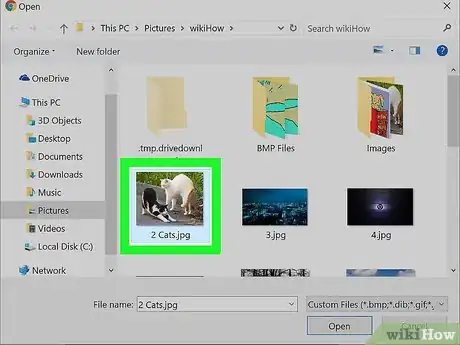
4Navigate to and double-click the photo you want to upload. The file browser window will disappear and you will get a pop-up window of your photo when it's done uploading into Google Photos.[7]
Using Backup & Sync On Desktop
-
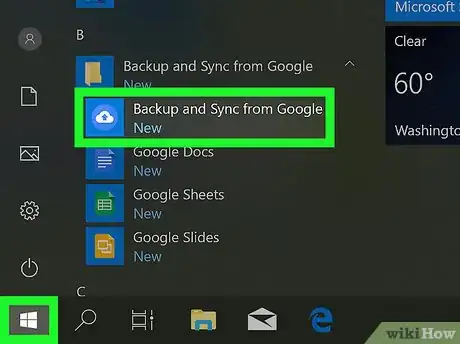
1Download and install Backup & Sync from https://photos.google.com/apps. You can download the application with either a Mac or Windows computer.
- Use this method if you have an SD card or a connected camera or prefer using an application over a browser window.
-
2Open Backup & Sync. You'll need to be signed in to your Google account to proceed.
-
3Select to backup photos, videos, or files. You can opt to backup all photos, videos, and files, or you can specify only to backup videos.
-
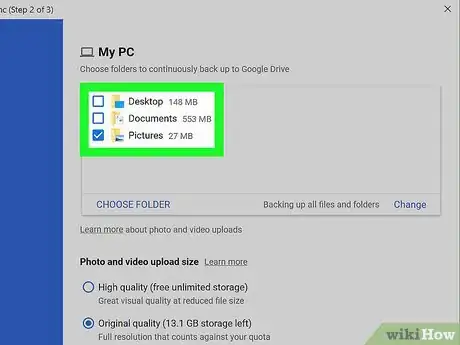
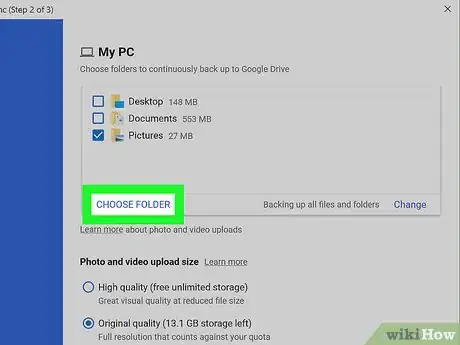
4Select if you want to backup folders. You can specify if you want to backup a certain folder.
-
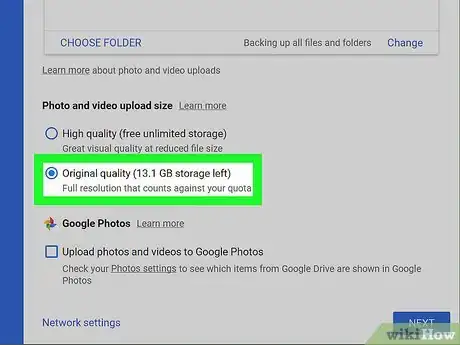
5Select the upload size. If you want to backup high-quality or compressed images, choose here.[8]
-
6Click Start. The process of syncing your past photos to Google Photos may take a while depending on how many photos and videos you have and your internet speed, but all your current photos will automatically be in Google Photos.[9]
Using Dropbox On Mobile
-
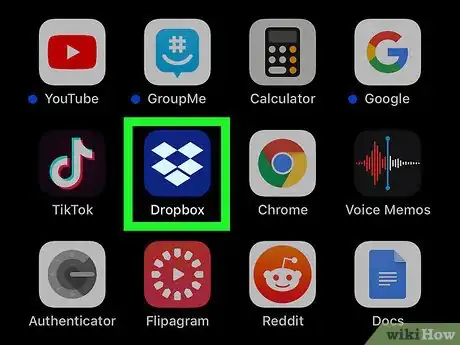
1Download and open the Dropbox app. You can get it for free from the Google Play Store or App Store.
- You'll need a current or you can create a new Dropbox account.
-
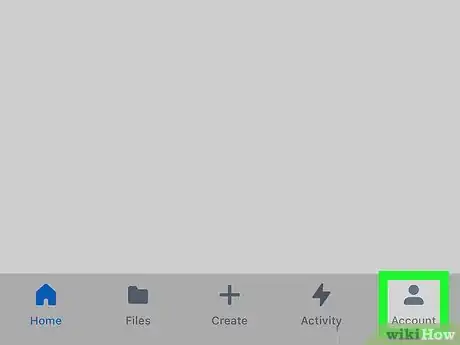
2Tap ☰ (Android) or Dropbox (iOS). You'll find the menu button on the top left corner of your screen, but the Dropbox button at the bottom of the screen.
- If you're using iOS, you can also click the settings icon in the top right corner of your screen.
-
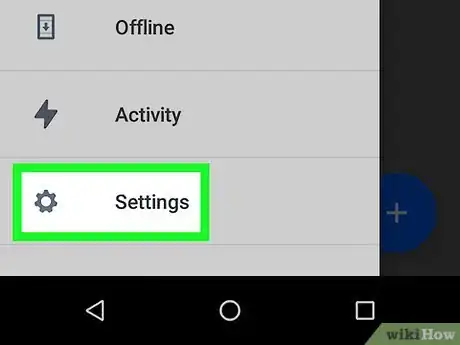
3
-
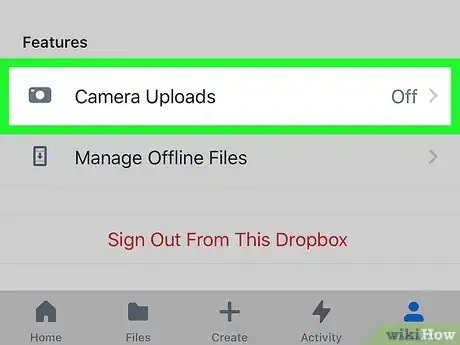
4Tap Camera Uploads (iOS only). Only iOS will have to go through an extra menu to enable the feature to upload from the camera.[10]
-
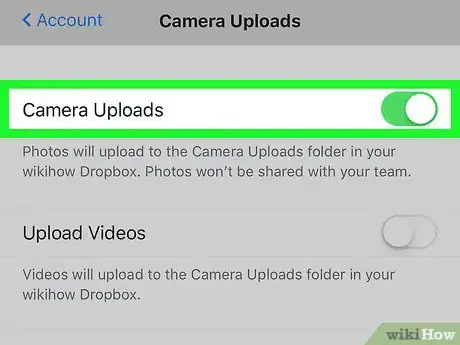
5Tap the switch next to "Camera Uploads" on (iOS) or tap Turn on camera uploads (Android). You can tap again to turn the feature off. Both iOS and Android have similar features for camera uploads, including the ability to upload only photos or videos, which data to use when uploading to Dropbox (cellular or Wi-Fi), and if the app should continue to upload while in the background[11]
Using Dropbox On Desktop
-
1Download and install the desktop app from https://www.dropbox.com/install. You can use this app on either a Mac or Windows computer.
-
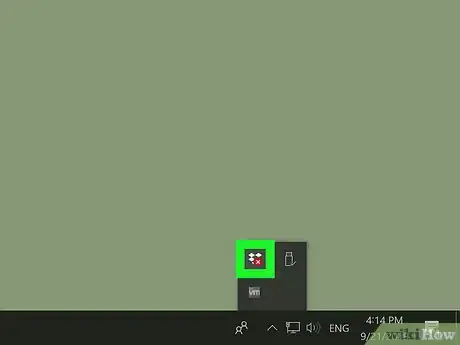
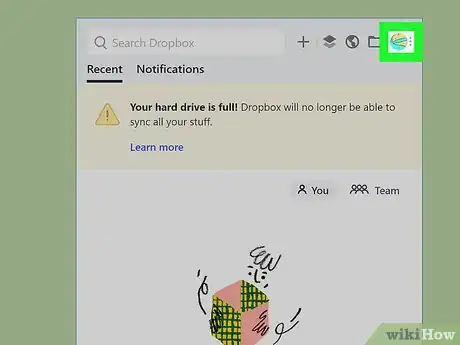
2Click the Dropbox app icon on your system tray (Windows) or menu bar (Mac). The app will open.
-
3Click your profile picture.
-
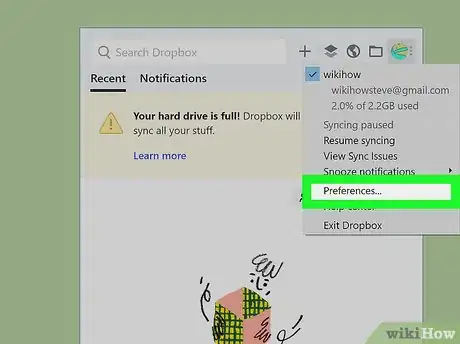
4Click Preferences. A window will pop up.
-
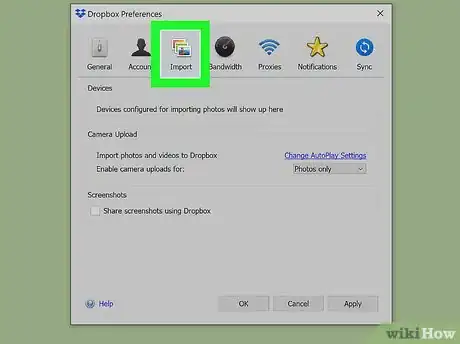
5Click the Import tab. This is along the top of the pop-up window with General, Account, Network, Notifications, and Sync.
-
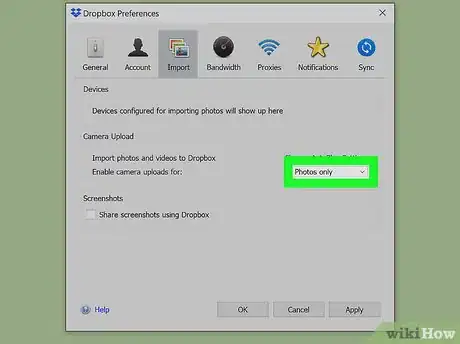
6Click to check the box next to "Enable camera uploads for." The drop-down menu next to that checkbox will activate.
-
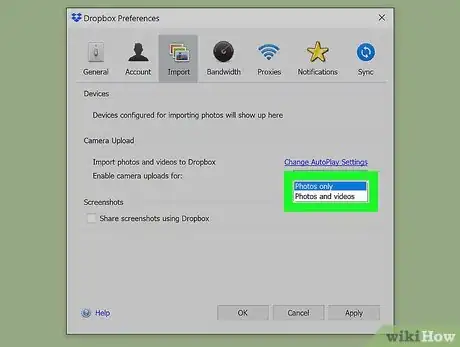
7Choose Photos Only or Photos and Videos. Videos are generally larger and take up more space, so you might run out of free space quickly if you upload videos as well as photos.
-
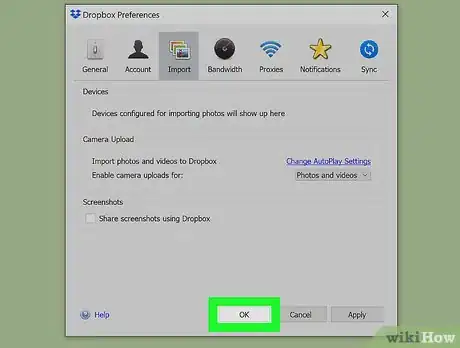
8Click Apply or Save. The process of syncing your past photos may take a while depending on how many photos and videos you have and your internet speed, but any current photos or videos will appear automatically in your Dropbox.[12]
References
- ↑ https://support.apple.com/en-us/HT204264
- ↑ https://support.apple.com/en-us/HT204264
- ↑ https://www.youtube.com/watch?v=ELpw1jxFxnE
- ↑ https://support.google.com/photos/answer/6193313?co=GENIE.Platform%3DiOS&hl=en&oco=0
- ↑ https://support.google.com/photos/answer/6193313?co=GENIE.Platform%3DAndroid&hl=en&oco=0
- ↑ https://support.google.com/photos/answer/6193313?co=GENIE.Platform%3DiOS&hl=en&oco=0
- ↑ https://support.google.com/photos/answer/6193313?co=GENIE.Platform%3DDesktop&hl=en&oco=0
- ↑ https://support.google.com/photos/answer/6220791
- ↑ https://support.google.com/photos/answer/6193313?co=GENIE.Platform%3DDesktop&hl=en&oco=0
About This Article
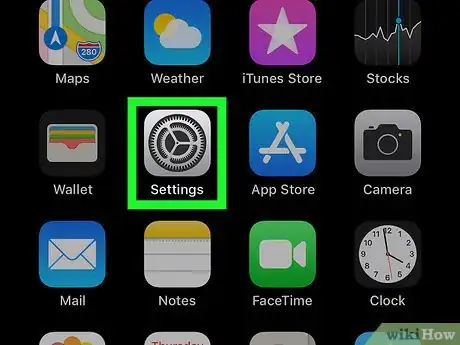
1. Open Settings.
2. Tap your name and picture.
3. Tap iCloud.
4. Tap Photos.
5. Tap to turn the switch on next to "iCloud Photos."
