This article was co-authored by wikiHow staff writer, Jack Lloyd. Jack Lloyd is a Technology Writer and Editor for wikiHow. He has over two years of experience writing and editing technology-related articles. He is technology enthusiast and an English teacher.
The wikiHow Tech Team also followed the article's instructions and verified that they work.
This article has been viewed 807,571 times.
Learn more...
This wikiHow teaches you how to rip a DVD's audio into an MP3 file on your Windows or Mac computer. You can use VLC media player to perform this whole process, though the resulting audio is often distorted or choppy. For optimal results, you can use a free program called HandBrake to rip the DVD into an MP4 file and then use VLC to turn the MP4 file into an MP3.
Steps
Using VLC on Windows
-
1Insert the DVD into your computer's DVD drive. The DVD should go logo-side-up.
- If your computer has a CD drive instead of a DVD drive, you may not be able to rip the DVD's audio. You can ensure that you have a DVD drive by looking for the "DVD" logo on the drive's tray.
- If you either don't have a DVD drive or don't have a space for your disc at all, you'll need to use an external USB DVD drive.
-
2Open VLC. Its app icon resembles an orange-and-white traffic cone.Advertisement
-
3Click Media. It's a tab in the top-left corner of the VLC window. A drop-down menu will appear.
-
4Click Open Disc…. You'll find this option in the drop-down menu.
-
5Check the "No disc menus" box. It's in the upper-left side of the window.
-
6
-
7Click Convert. It's in the drop-down menu. This will open a new page.
-
8Change the output file type to MP3. Click the "Profile" drop-down box, then click Audio - MP3 in the drop-down menu.
-
9Click Browse. It's in the lower-right side of the window. Doing so opens a pop-up window.
-
10Enter a file name. In the "File name" text box, type in whatever you want to name your ripped DVD file.
-
11Select a save location. Click a folder in the left-hand sidebar to select it as the save location for your MP3 file.
-
12Click Save. It's in the bottom-right corner of the window.
-
13Click Start. This option is at the bottom of the window. Your DVD will begin ripping.
-
14Allow your DVD to rip. Depending on the DVD's size, this can take anywhere from half an hour to well over an hour. Once VLC finishes ripping your DVD, the completed MP3 file will be in your selected save location.
- If prompted, click Keep to prevent your MP3 file from getting overwritten.


Using VLC on Mac
-
1Insert your DVD into your Mac's DVD player. The DVD should go logo-side-up.
- Since most Macs don't ship with DVD drives included, you'll probably need an external USB DVD drive to plug into your Mac.
-
2
-
3Click File. This menu item is in the top-left corner of your Mac's screen.
-
4Click Open Disc…. It's in the File drop-down menu. Doing so will open a settings window with your DVD's information.
-
5Click Disable DVD menus. This button is in the upper-right side of the window.
-
6Check the "Stream output" box. This option is in the bottom-left corner of the window.
-
7Click Settings. It's on the right side of the window. Your video's conversion settings will open.
-
8Check the "File" box. This option is at the top of the page.
- If both "File" and "Stream" are checked, click the "File" checkbox again to make sure it's the only output.
-
9Click Browse…. It's in the upper-right side of the window. A pop-up window will open.
-
10Enter a name. Type a name for your DVD file into the "Save As" text box, then type in .mp3 after the name.
- If you want to name your MP3 file "The Blair Witch Project", for example, you would type in The Blair Witch Project.mp3 here.
-
11Select a save location. Click the "Where" drop-down box, then click a folder (e.g., Desktop) in the drop-down menu.
-
12Click Save. It's at the bottom of the window.
-
13Uncheck the "Video" box. This is in the middle of the page.
-
14Indicate that you want to include audio. Check the "Audio" box, then click the "Audio" drop-down box and click MP3 in the resulting menu.
-
15Click OK twice. Doing so prompts VLC to begin ripping your DVD into an MP3 file.
-
16Allow your DVD to rip. Depending on the DVD's size, this can take anywhere from half an hour to well over an hour. Once VLC finishes ripping your DVD, the completed MP3 file will be in your selected save location.
- If prompted, click Keep to prevent your MP3 file from getting overwritten.


Combining VLC and HandBrake
-
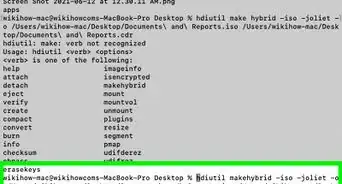
1Download and install HandBrake. HandBrake is a free program for Windows and Mac computers that can be used to rip an MP4 file from a DVD:
- Go to https://handbrake.fr/ in your computer's web browser.
- Click Download HandBrake.
- Double-click the downloaded setup file.
- Follow the on-screen instructions.
-
2Insert the DVD into your computer's DVD drive. The DVD should go logo-side-up.
- You can ensure that your computer has a DVD drive (not just a CD drive) by looking for the "DVD" logo on the drive tray. If you don't have a DVD drive, you may not be able to rip your DVD.
- If your computer doesn't have a DVD drive, you'll need to buy an external one and plug it into one of your computer's USB ports.
-
3Open HandBrake. Its app icon resembles a pineapple next to a fruity drink.
-
4Click the DVD option. It's a disc-shaped icon with your DVD's name in the upper-left side of HandBrake.
- If you don't see the DVD icon, close and then re-open HandBrake.
-
5Change the conversion settings if necessary. HandBrake will typically default to an MP4 conversion, but you should double-check the following aspects before continuing:
- File format — Make sure the "Container" box has "MP4" in it. If it doesn't, click the box, then click MP4.
- File resolution — Click Presets, then click a quality (e.g., 1080p) on the right side of the window.
-
6Click Browse. It's to the right of the "Save As" text box. A pop-up window will appear.
-
7Enter your file's save details. Select a save location, enter a file name in the "File name" (Windows) or "Name" (Mac) text box, and click Save.
-
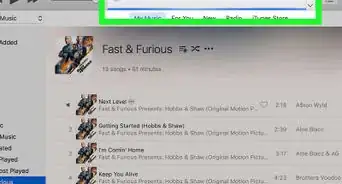
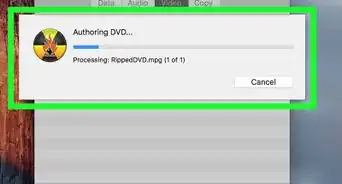
8Click Start Encode. It's a green button at the top of the HandBrake window. Clicking it will prompt HandBrake to begin converting your DVD into an MP4 file. Once the MP4 has successfully been ripped, you can proceed.
- On Mac, you'll just click Start here.
- DVDs can take anywhere from half an hour to several hours to rip into an MP4 file, so make sure your computer is charged and/or plugged in and well-ventilated.
-
9Open the MP4 file in VLC. Open VLC by clicking (or double-clicking) its app icon, then do the following:
- Click Media (Windows) or File (Mac).
- Click Convert / Save in the drop-down menu.
- Click the File tab.
- Click Add, then select your MP4 and click Open.
-
10Click Convert / Save. It's at the bottom of the window.
-
11Change the conversion file type to MP3. Click the "Profile" drop-down box, then scroll down and click Audio - MP3 in the resulting drop-down menu.
- On Mac, you may instead just check the "Audio" box and make sure that the "Video" box is unchecked.
-
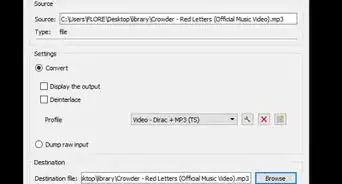
12Select a name and save location. Click Browse near the bottom of the window, then type in a file name, click the folder in which you want to save your audio file, and click Save.
-
13Click Start. It's at the bottom of the window. VLC will begin converting your MP4 file into an MP3 file.
-
14Force-quit VLC if necessary. Occasionally, VLC will end up in a loop where it attempts to overwrite your file repeatedly. You can solve this problem by force-quitting VLC:[1]
- Windows — Press Ctrl+⇧ Shift+Esc simultaneously, find VLC on the Processes tab, click VLC, and click End task in the bottom-right corner.
- Mac — Click the Apple menu , click Force Quit, click the VLC option, click Force Quit, and confirm your decision if prompted.


Community Q&A
-
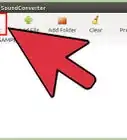
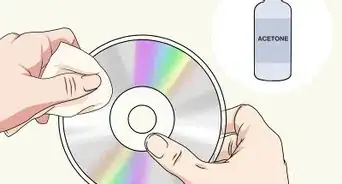
QuestionHow do I burn my MP3s to CD?
 Community AnswerDownload your MP3 files onto your computer. You need to have decoding software on your computer to expand the compressed MP3 file -- if you don't, there are free trials of such software available online. Then, collect the files into a directory and write them to a writable CD using your computer's CD burner.
 -
QuestionOnce I finish converting to the audio, am I able to delete the video file?Community AnswerYes, once Handbrake and VLC have completed, you may safely delete the the video file. It will not effect your mp3s.
-
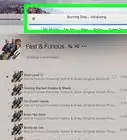
QuestionCan I convert the video files to separate MP3 tracks instead of one big track?
 Community AnswerSee step 6 regarding chapters. If you select each chapter individually, that will create separate files.
Warnings
- Your computer may overheat during the ripping process. To avoid this, make sure it is in a cool, well-ventilated area while using VLC and/or HandBrake.⧼thumbs_response⧽


References
About This Article
1. Open VLC.
2. Click Media.
3. Click Open Disc.
4. Select No disc menus.
5. Click the down-arrow next to "Play."
6. Click Convert.
7. Select Audio – MP3 as the output file type.
8. Click Browse.
9. Enter a file name and click Save.
10. Click Start.