This article was co-authored by wikiHow staff writer, Travis Boylls. Travis Boylls is a Technology Writer and Editor for wikiHow. Travis has experience writing technology-related articles, providing software customer service, and in graphic design. He specializes in Windows, macOS, Android, iOS, and Linux platforms. He studied graphic design at Pikes Peak Community College.
This article has been viewed 14,663 times.
Learn more...
Do you want to create a looping video clip in Premiere Pro? Looping footage of a single clip can be useful to use as background footage in a larger composition. Alternatively, posting looping videos on social media like TikTok, Instagram, or YouTube Shorts can be a great way to increase audience retention. This wikiHow article teaches you how to create looping videos in Adobe Premiere Pro. Even though this is specifically about Premiere Pro, you can use these concepts in just about any video editing software suite.
Steps
Looping a Single Clip With a Cross Dissolve
-
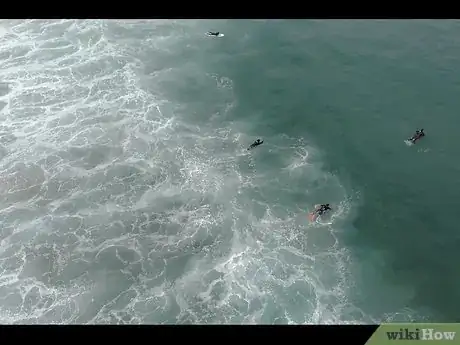
1Understand what types of video footage you can apply this method too. For this method to work, the video footage will need to have been shot on a tripod with no camera movement. The scene should be relatively calm (i.e. ocean waves), or incredibly chaotic (i.e. timelapse footage of traffic).
-
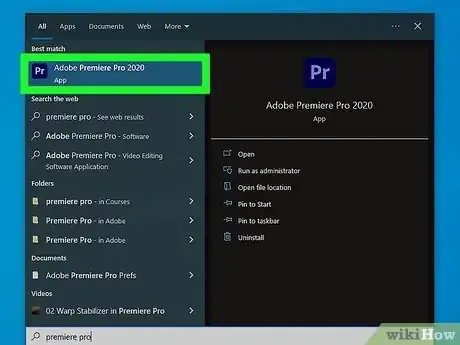
2Open Adobe Premiere Pro. Adobe Premiere Pro has a purple icon that says "Pr" in the middle. Click the Adobe Premiere Pro icon to open Premiere Pro. Click New Project to open a new Project. Select Open Project to open an existing project. If opening a new project, enter a name for your project and click Ok.
- Adobe Premiere Pro is part of the Adobe Create Cloud. You can download and install Creative Cloud applications from Adobe's official website or the Creative Cloud desktop app. You can start a free trial of Adobe Premiere Pro at https://www.adobe.com/products/premiere.html.
Advertisement -
3Import a video clip into your project. This adds the video clip to your project library. To do so:
- Click File in the menu bar at the top.
- Click Import.
- Select the video clip you want to create a loop with and click Open.
-
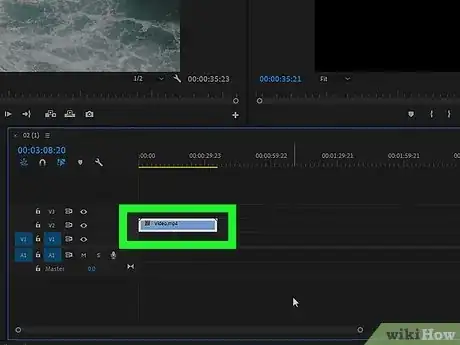
4Drag the video clip into your timeline. The timeline is the area that displays all your video and audio clips, along with the time. It's below the preview screen. Click and drag the video clip from your Project window into your timeline.
- If you don't see the Project window, click Window in the menu bar at the top and then click Project.
-
5Split the clip somewhere in the middle. To do so, click the icon that resembles a razor blade in the toolbar, or press "C" on your keyboard to select the razor tool. Click the clip somewhere in the middle to split the clip into two clips.
-
6Move the first clip to the end. You should now have two clips in the timeline. Click and drag the first clip and place it right at the end of the second clip. Then hold Shift and click both clips to select them and drag both clips back to the start of the timeline.
-
7Trim the end of the first clip and the beginning of the second clip. To do so:
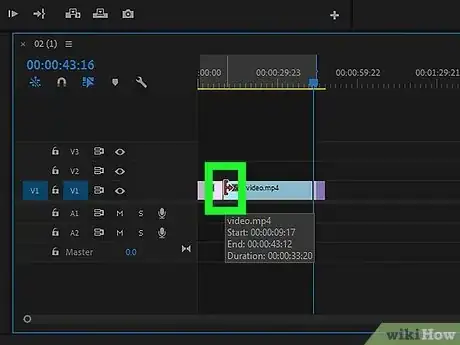
- Place the mouse cursor right at the end of the first clip in your timeline. The mouse cursor should turn into an icon that resembles a bar with arrows pointing left and right.
- Click and drag to remove some excess off the end of the first clip.
- Do the same at the beginning of the second clip.
- Click and drag the second clip and place it right up against the end of the first clip.
-
8Preview the two clips. Click the play triangle icon below the preview screen to preview the two clips back-to-back.
- You will probably notice a hard break when the first clip ends and the second clip begins.
- Check to make sure that any moving objects in the scene appear in the same place, or as close as possible.
-
9Adjust the trim of the two clips.
- Click and drag the second clip away from the first clip.
- Click and drag the edge of the two clips to increase or decrease the trim as needed.
- Move the second clip back up against the first clip and click the play button to preview them.
- Try to get any moving objects in the scene to align as much as possible. For example, if your clip is of a sprinkler, try to get the motion of the sprinkler in the first clip to line up with the motion of the sprinkler in the second clip as much as possible.
- Make sure you leave some excess trim before the start of the second clip. You'll need this in the next step.
-
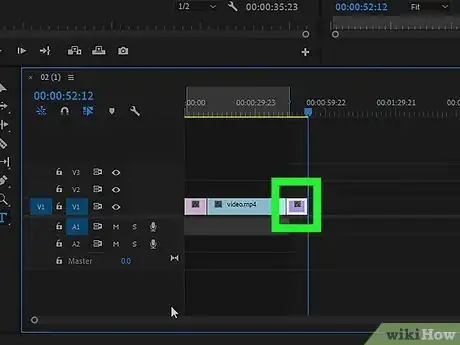
10Apply a cross-dissolve in between the two clips. Cross Dissolve is one of the video transitions. Use the following steps to apply a cross-dissolve:
- Expand the "Video Transitions" folder in the Effects window. Then expand the "Dissolve" folder.
- Click and drag the "Cross Dissolve" effect and place it right in the middle of the two clips so that it starts towards the end of the first clip and ends towards the beginning of the second clip.
- A cross-dissolve effect fades out the first clip while fading in the second clip. This blends the two clips together and obscures the breaking point.
- You can adjust the length of the cross-dissolve by clicking and dragging the edges of the cross-dissolve effect in the timeline. Making the cross-dissolve effect longer will probably do a better job of blending the two clips.
-
11Preview the video on a loop. To do so, click the icon that resembles a play triangle at the top of a looping rectangle in playback controls. Then click the Play icon to play the video clips on a loop.
- If you don't see the loop icon in your playback controls, click the plus (+) icon to the right of the playback controls. Then click and drag the loop icon into your playback control panel.
-
12Copy and paste both clips. To do so:
- Hold Shift and click both clips. Then press Ctrl + C (or Command + C on Mac) to copy the clips.
- Then, click and drag the playhead line in the timeline to the end of the second clip.
- Press Ctrl + V (or Command + V on Mac) to paste the clips at the end of the first clip.
- Repeat as many times as you want the clips to repeat.
- Alternatively, you can render the two clips by themselves and post them to a looping social media platform, or render them as a GIF animation.
Looping a Single Clip Using Reverse
-
1Understand what types of video footage you can apply this method too. This method works for clips that are shot with some slight camera motion or no motion at all. The clip should have no forward motion (i.e. people walking, cars moving) in which it would appear obvious in a clip that has been reversed.
-
2Open Adobe Premiere Pro. Adobe Premiere Pro has a purple icon that says "Pr" in the middle. Click the Adobe Premiere Pro icon to open Premiere Pro. ClickNew Project to open a new Project. Select Open Project to open an existing project. If opening a new project, enter a name for your project and click Ok.
-
3Import a video clip into your project. To do so, click File in the menu bar at the top. Then click Import. Select the video clip you want to create a loop with and click Open. This adds the video clip to your project library.
-
4Drag the video clip into your timeline. The timeline is the area that displays all your video and audio clips, along with the time. It's below the preview screen. Click and drag the video clip from your Project window into your timeline.
- If you don't see the Project window, click Window in the menu bar at the top and then click Project.
-
5Copy and paste the clip. To do so:
- Click the clip in the timeline to select it.
- Press Ctrl + C (or Command + C on Mac) to copy the clip.
- Click and drag the playhead line to the end of the clip and press Ctrl + V (or Command + V on Mac) to paste the clip.
-
6Reverse the second clip. After you paste the clip, use the following steps to reverse the second clip in the timeline.
- Right-click the second clip in your timeline.
- Click Speed/Duration.
- Click the checkbox next to Reverse Speed.
- Click Ok.
-
7Preview the video on a loop. To do so, click the icon that resembles a play triangle at the top of a looping rectangle in playback controls. Then click the Play icon to play the video clips on a loop. You should see the clip play through, reverse back to the beginning and then start again.
-
8Copy and paste both clips. To do so:
- Hold Shift and click both clips.
- Press Ctrl + C (or Command + C on Mac) to copy the clips.
- Click and drag the playhead line in the timeline to the end of the second clip.
- Press Ctrl + V (or Command + V on Mac) to paste the clips at the end of the first clip.
- Repeat as many times as you want the clips to repeat.
- Alternatively, you can render the two clips by themselves and post them to a looping social media platform, or render them as a GIF animation.
Looping an Entire Project
-
1Set up your project for looping. This method is for looping an entire project with multiple audio and video clips. To set this up properly:
- Your project should have an intro clip with a little bit of excess trim before the video begins. If your project has background music you'll want to have some excess trim before the start of the music too. You'll also want to have some audio lead out at the end of the project.
- One way to do this is to record your outro and intro in the same clip. Start with your outro and then record your intro immediately after in the same shot. Then you can use that one clip to create a seamless loop.
-
2Mark the end of your project. To do so, click and drag the playhead in your timeline to the end of your project. Then press O on your keyboard to mark the output of your project.
-
3Copy and paste the intro clip. To do so:
- Click the intro clip to select it.
- Press Ctrl + C (or Command + C on Mac) to copy the intro clip.
- Place the playhead at the end of your project and press Ctrl + V (or Command + V on Mac) to paste intro video at the end of the project.
-
4Move the trim back to the last video in the project. Once you have your intro video placed at the end of the project, click and drag the left edge of the clip to move the trim. Drag the trim all the way back to the previous video in the project.
-
5Trim the intro clip after the project output mark. To do so, click and drag the right edge of the intro clip and drag it back to the output mark you created. If you preview your project on a loop, it should seamlessly loop back to the intro clip.
- To preview your project on a loop, click the icon that resembles a play triangle at the top of the looping rectangle. Then click the Play icon below the preview screen.
-
6Copy and paste the background music. To do so:
- Click the background music audio clip to select it.
- Press Ctrl + C (or Command + C on Mac) to copy the intro clip.
- Place the playhead at the end of your project and press Ctrl + V (or Command + V on Mac) to paste the audio clip at the end of the project.
-
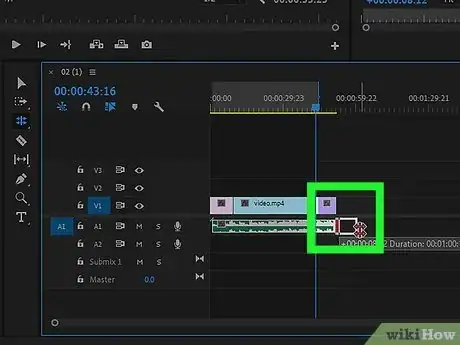
7Use the rolling edit tool to adjust the audio trim. To do so:
- Click the icon that resembles a bar with four arrows pointing inward in the toolbar, or press N on the keyboard to select the rolling edit tool.
- The rolling edit tool shrinks the trim of one clip while expanding the trim of the clip next to it. Click the edge of the audio clip after the project ends and drag it to a place where the music transition doesn't sound too abrupt.
- Finding a transition spot between two audio clips can be challenging. Try to find an area where the music is quiet, the narrator is speaking loudly, or there is excessive foreground noise. You can also look for a spot where the beat is irregular and syncopated.[1]
-
8Remove the excess audio clip after the project. Click the edge of the background music clip after the project output marker and drag it back to the output marker line. If you preview your project on looping mode, it should seamlessly repeat.
-
9Copy and paste your entire project. To do so:
- Press Ctrl + A (or Command + A on Mac) to select all clips in your project.
- Press Ctrl + C (or Command + C on Mac) to copy the clips.
- Place the playhead at the end of your project and press Ctrl + V (or Command + V on Mac) to paste all the clips at the end of your project.
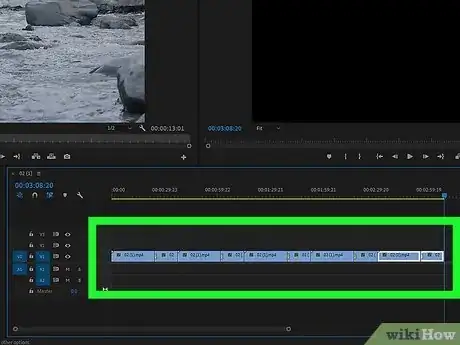
- Repeat for as many times as you want your videos to repeat.
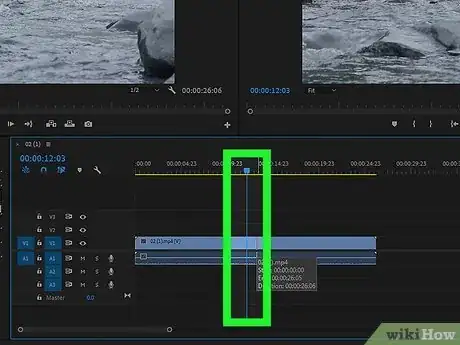
- Alternatively, you can render the two clips by themselves and post them to a looping social media platform or render them as a GIF animation.


