This article was co-authored by Ashley Matuska. Ashley Matuska is a Professional Cleaner at the Founder and Owner of Dashing Maids in Denver, Colorado. Ashley has over seven years of experience in the cleaning industry. She and her team specialize in offering sustainable deep cleaning and maintenance cleaning services.
There are 9 references cited in this article, which can be found at the bottom of the page.
This article has been viewed 28,415 times.
Burn marks on your stovetop can make it look dirty even when you just cleaned it, and they can be challenging to get rid of with only soap and water. Thankfully, even severe marks are removable with some elbow grease and a more intense cleaning process. Within 30 minutes, you should have a clean, unblemished stovetop just waiting for your next cooking session.
Steps
Gas Stove
-
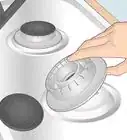
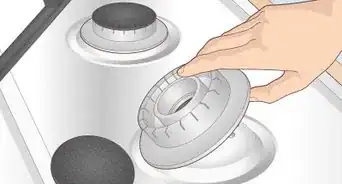
1Remove the grates and caps and soak them in soapy water. Fill an empty sink with warm water and some dish soap, and let the removable parts soak while you clean the rest of the stove. This is a great way to loosen stuck food and grease.[1]
- Caps are small, circular covers that lay over the heat source; the grates sit overtop of the caps. Some stovetops have connected caps and grates, but some are separate. Regardless of which type you have, simply lift the grates and the caps to remove them.
- The actual knobs that control the heat level can stay in place.
- Always wait to clean your stove until the burners are completely cooled if you cooked on them recently.[2]
-
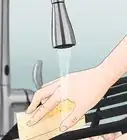
2Wipe down the surface of the stove with a wet, soapy sponge. Clean away any easily-removable bits of food or grease splatters. As you wipe the stovetop, rinse out and re-wet your sponge as needed. Repeat the process until the surface is as clean as possible.[3]
- This part of the process clears away the excess grime so you can clearly see where your stove is burnt and needs some TLC.
Advertisement -
3Make a paste out of equal parts salt, baking soda, and water. This mixture is best for ceramic stovetops. For ones made of glass or stainless steel, omit the salt.[4] This deep-cleaning paste should remove tough stains and marks from your stovetop. Mix everything in a small bowl.[5]
- You could also use a commercial cleaner especially made for a stovetop, but natural ingredients should work just as well. Plus, it could save you a trip to the store if you already have salt and baking soda in your cupboard.
-
4Spread the paste over any burn marks and let it rest for several minutes. The great thing about this cleaning method is that it works for burn marks, stains, and hardened food bits. Feel free to put it on anything stuck to your stovetop![6]
- To give the paste enough time to saturate the mark, spend a few minutes on another task. You could clear out old leftovers from the fridge, sweep the floor, or empty the dishwasher while you wait.
-
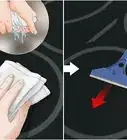
5Rub the burn mark with a sponge or washcloth until it disappears. Wet the sponge or washcloth and wring it out so it isn’t dripping wet. Use a little elbow grease to buff the spot until all the paste is gone, and the mark has disappeared. Rinse and re-wet your sponge as needed.[7]
- For severe marks, repeat the process a second time.
-
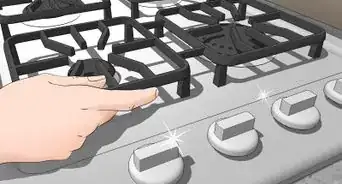
6Buff the stovetop with a clean, dry towel until all the residual water is gone. After scrubbing the scorch marks away, thoroughly wipe down the stovetop with a fresh, clean towel. Don’t neglect the edges and corners![8]
- This should leave your stovetop looking beautifully shiny and clean.
-
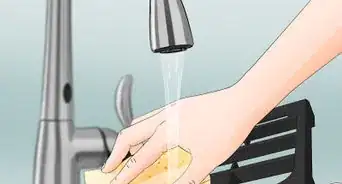
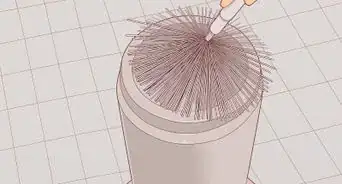
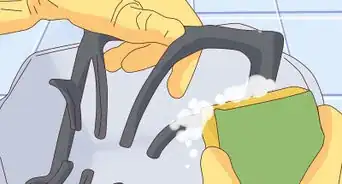
7Take a few minutes to scrub the grates and caps soaking in the sink. Run a scrub brush over the pieces in the sink to dislodge any loose gunk. Rinse them off with fresh water to get rid of all the suds.[9]
- For tough stains, you could use the baking soda paste on the grates and burners, too.
-
8Let the grates and caps dry before placing them on the stovetop. Use a towel to dry off the pieces or rest them on a drying pad or rack until all the water has evaporated. If you’re cleaning your stove after dinner, you could leave them overnight and replace them in the morning.[10]
- Always make sure the burners are completely dry before replacing them. If they’re still wet, they could cause problems when you turn on the burners.[11]


Electric Stovetop
-
1Let the stovetop cool down completely before cleaning it. A recently used stovetop could easily burn you. Also, some cleaning materials could burn if they come into contact with hot surfaces, which would create more problems and more to clean up.[12]
- If you’re waiting for the stovetop to cool, take a few minutes to do some other kitchen task. For example, you could do the dishes, clean out the microwave, wipe down the counters, or sweep the floor.
-
2Remove and clean the burner coils with a baking-soda paste. If your stovetop has removable burner coils (not all electric stovetops do), gently tug and pull them upward to remove them. Mix 1/2 cup (115 grams) of baking soda with 2 to 3 tablespoons (30 to 44 mL) of water. Spread the paste over the burners and set a timer for 20 minutes. Wipe the paste off with a wet towel when the timer goes off.[13]
- Some electric stovetops are made of completely flat ceramic, while others have metal coils that conduct electricity.
- If the coils are stuck, reference the user’s manual. If you don’t have one, search for a copy online.
- If your burners aren’t too dirty, you can wipe them down with a soapy, wet dishrag. Dry them with a lint-free towel and set them to the side.
- Use the 20-minute wait time to clean the rest of the stovetop.
-
3Remove crumbs from the stovetop with a dry microfiber cloth. Take a minute and quickly wipe down the stovetop's entire surface area to get any lingering crumbs or bits of food out of the way. This will make it easier to see any areas that need special treatment and also makes the stovetop easier to clean.[14]
- Catch the crumbs in your hand so they don’t go all over the floor.
-
4Sprinkle baking soda over the entire stovetop and spray it with vinegar. There’s no need to use an entire box of baking soda but use enough to coat the whole surface area lightly. Then, take a bottle of white vinegar and use it to saturate the baking soda. Pay particular attention to dirty spots, burns, and stains.[15]
- You can still make this work even if you don’t have a spray bottle filled with vinegar. Just cover the cap of an opened bottle of white vinegar with your thumb and carefully drizzle the vinegar over the baking soda.
- Avoid using glass cleaner on your electric stovetop. It’s a little too abrasive and could damage the surface.
-
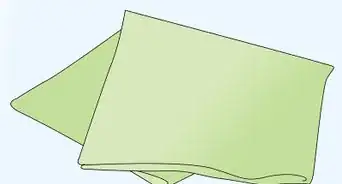
5Lay a damp, soapy towel over the stovetop for 15 minutes. Drizzle a little dish soap on a clean kitchen towel and get it wet so that it starts to get sudsy. Wring the towel out so it’s damp but not dripping. Then, lay it over the surface of your stove—if needed, use 2 towels.[16]
- This process keeps the baking soda from drying out and helps stains break down more quickly.
- If you happen to leave the kitchen for longer than 15 minutes, no worries! The baking soda-vinegar mixture won’t hurt your stovetop at all.
-
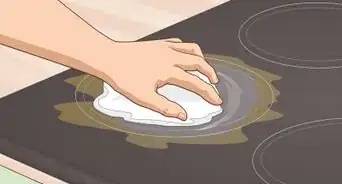
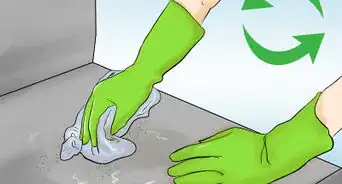
6Buff the stovetop with the dishtowel to remove burns, stains, and crud. Start wiping away the baking soda with the damp kitchen towel, paying particular attention to burn marks and deeply soiled areas. Use a little elbow grease to work on those tough spots.[17]
- If there are stubborn stains or burns, try repeating the baking soda-vinegar-damp towel process a second time.
-
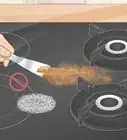
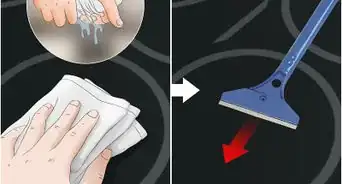
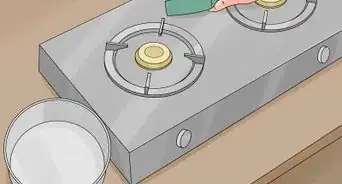
7Use a razor to remove really tough marks. You may need to scrape away intense burn marks if they aren’t coming loose from a good deep cleaning. Wet a razor blade, then hold it against the surface of the stove at a low angle.[18] Slowly and carefully scrape the burn mark with the razor blade, then wipe the area with a soapy sponge. Repeat until the area is completely smooth.[19]
- A wet pumice stick can be very effective at removing stains from an oven, as well.[20]
- You could use a bench scraper or spatula for this process, too. Just be careful not to gauge the surface with the tool’s sharp corners.
-
8Spray the stovetop with vinegar and buff it with a microfiber cloth. Once your stovetop is clean and all the burn marks and stains are gone, give it a final spritz with white vinegar. Use a clean, dry microfiber cloth to wipe away the vinegar and shine the stovetop.[21]
- Don’t forget to wipe down all the crevices and corners, too.


Expert Q&A
Did you know you can get expert answers for this article?
Unlock expert answers by supporting wikiHow
-
QuestionHow do you get burn marks off a ceramic stovetop?
 Ashley MatuskaAshley Matuska is a Professional Cleaner at the Founder and Owner of Dashing Maids in Denver, Colorado. Ashley has over seven years of experience in the cleaning industry. She and her team specialize in offering sustainable deep cleaning and maintenance cleaning services.
Professional CleanerSpray the surface of the stovetop with an all purpose cleaner and wet a razor blade. Then, hold the blade at a low angle to the stove and slowly scrape across the burn mark. As long as you keep the angle low and move carefully, you shouldn't scratch the surface or hurt yourself.
Support wikiHow by unlocking this expert answer.
Warnings
Things You’ll Need
Treating Burns on a Gas Stove
- Dish soap
- Sponge
- Salt
- Baking soda
- Small bowl
- Towels
- Scrub brush
Cleaning an Electric Stovetop
- Small bowl
- Dish soap
- Baking soda
- Towels
- Microfiber cloth
- White vinegar
- Bench scraper or razor (optional)

References
- ↑ https://www.bobvila.com/articles/how-to-clean-a-stovetop/
- ↑ https://www.bobvila.com/articles/how-to-clean-stove-burners/
- ↑ https://www.thekitchn.com/how-to-clean-a-greasy-gas-stovetop-with-just-soap-and-water-cleaning-lessons-from-the-kitchn-139438
- ↑ https://www.bobvila.com/articles/how-to-clean-stainless-steel/
- ↑ https://www.bobvila.com/articles/how-to-clean-a-stovetop/
- ↑ https://www.bobvila.com/articles/how-to-clean-a-stovetop/
- ↑ https://www.bobvila.com/articles/how-to-clean-a-stovetop/
- ↑ https://www.thekitchn.com/how-to-clean-a-greasy-gas-stovetop-with-just-soap-and-water-cleaning-lessons-from-the-kitchn-139438
- ↑ https://www.bobvila.com/articles/how-to-clean-a-stovetop/
- ↑ https://www.thekitchn.com/how-to-clean-a-greasy-gas-stovetop-with-just-soap-and-water-cleaning-lessons-from-the-kitchn-139438
- ↑ https://www.bobvila.com/articles/how-to-clean-stove-burners/
- ↑ https://www.thekitchn.com/how-to-clean-glass-stovetop-267467
- ↑ https://www.bobvila.com/articles/how-to-clean-electric-stove-top/
- ↑ https://www.thekitchn.com/how-to-clean-glass-stovetop-267467
- ↑ https://www.thekitchn.com/how-to-clean-glass-stovetop-267467
- ↑ https://www.thekitchn.com/how-to-clean-glass-stovetop-267467
- ↑ https://www.thekitchn.com/how-to-clean-glass-stovetop-267467
- ↑ Ashley Matuska. Professional Cleaner. Expert Interview. 15 April 2019.
- ↑ https://www.thekitchn.com/how-to-clean-an-electric-glass-stovetop-cleaning-lessons-from-the-kitchn-204578
- ↑ Ashley Matuska. Professional Cleaner. Expert Interview. 15 April 2019.
- ↑ https://www.thekitchn.com/how-to-clean-glass-stovetop-267467
- ↑ https://www.bobvila.com/articles/how-to-clean-electric-stove-top/
- ↑ https://www.bobvila.com/articles/how-to-clean-stove-burners/
- ↑ https://www.bobvila.com/articles/how-to-clean-a-stovetop/
- ↑ https://www.cleanipedia.com/gb/kitchen-cleaning/oven-cleaning-tips-how-to-clean-an-oven.html
- ↑ https://www.thekitchn.com/how-to-clean-glass-stovetop-267467
About This Article