This article was co-authored by Mark Spelman. Mark Spelman is a General Contractor based in Austin, Texas. With over 30 years of construction experience, Mark specializes in constructing interiors, project management, and project estimation. He has been a construction professional since 1987.
This article has been viewed 673,027 times.
When remodeling a bathroom or kitchen, the hardest part can be removing the grout from pre-existing tile. Grout is made from water, cement and sand, which hardens over time to form a rock-like material. The strength of grout is what makes tile so highly desired, as it prevents the tile from shifting. Learning how to remove grout can save you a lot of money that you would otherwise have to pay to a contractor.
Steps
Preparing Before Removal
-
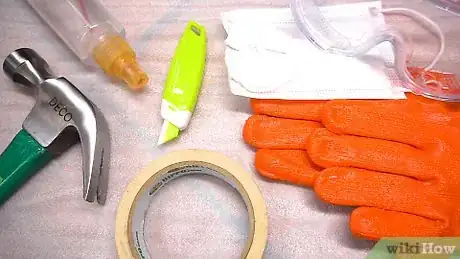
1Get the necessary tools. There are a number of tools which you can use to remove the grout. Those you choose will depend on how much money you wish to spend, how much and which type of grout you need to remove, and how often you intend to remove grout.[1]
- You can use power tools. There are a variety of tools, called grout removal tools or re-grout tools, which will help you remove grout quickly and with much less effort. These are helpful if you have a large amount of grout to remove or remove grout often.
- You can use manual tools as well. If you for some reason cannot use power tools but find that you have a reasonable amount of grout to remove, use a manual grout removal tool. This will look like a small trowel.
- If you only have a small amount of grout to remove or it is something soft like rubber grout, you can use a standard razor blade, like an exacto knife or a utility knife.
-
2If you are planning to keep the tiles and removing just the grout, cover the edges of each tile with painter's tape.
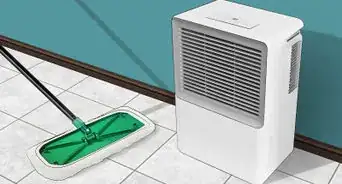
- Cover the surfaces of the appliances you are planning to keep. As the grout is removed, flying debris can cause damage. Drape a large blanket or drop cloth over the appliances, making sure they are fully covered.
- If necessary, use tape to secure the edges of the protective covering and make sure to cover drains completely.
Advertisement -
3Don protective clothing before starting the grout removal process. This should include safety glasses, dust mask and cut resistant gloves. For the purpose of comfort, consider wearing knee pads, as it can take a while to remove grout. Make sure to wear pants and boots as well.[2]
Carrying Out the Removal Process
-
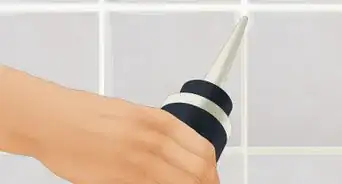
1Make the center incision. Make an incision down the middle of each grout line using a grout saw, preferably one with a carbide blade. Do this to all the grout lines that you want to remove.[3]
-
2Remove the grout. Remove the grout from between the pieces of tile with a grout scraper, using the incision as a starting point. Insert the triangular tip of the grout scraper into the incision you made with the grout saw. Apply firm pressure and drag the scraper along the grout line about the length of one tile, but be very careful to avoid scraping the tile. Lift out the grout scraper, return to the starting point and repeat the process until you have removed all the grout in that area.
- If you do not have a grout scraper, use a small, cold chisel and hammer or a knife blade. Angle the chisel away from the edge of the tile and tap if with the hammer until the grout is freed from the floor and edges of the tile.
-
3Finish the edges. Clean up the edges of the tile by chipping out any remaining grout remnants. Hold the chisel so that it is parallel to the floor and the cutting edge of the chisel is touching the edge of the tile. Lightly tap the end of the chisel with the hammer until the grout is loosened. Sweep up the broken pieces of grout from between the crevices using a dust broom or a shop vacuum.[4]
Cleaning Up After Removal
-
1Remove tape and clean grout lines. Peel off the painter's tape from the edge of the tile, then wash out the grout lines with soap and water. You may need a scouring pad to scrub away any remaining grout from the edges of the tile. Gently scrub the edges of the tile until the grout has been completely removed.[5]
-
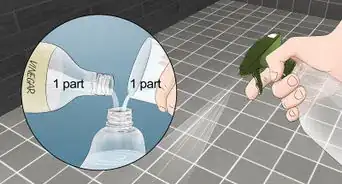
2Clean the tile. Wipe down the tile immediately if you are planning on keeping it, and then buff the area out a few times. Grout residue can quickly harden onto the tile, making it difficult to remove without damage. Fill a spray bottle with half vinegar and half water. Spray the tile and allow the solution to sit for a couple of minutes before wiping it away with a clean cloth.
- If dried grout reside does harden onto the tile, you can try to remove it using vinegar, a chisel, or a diluted sulfamic acid solution.
Expert Q&A
Did you know you can get expert answers for this article?
Unlock expert answers by supporting wikiHow
-
QuestionWhere can I purchase a manual grout saw?
 Mark SpelmanMark Spelman is a General Contractor based in Austin, Texas. With over 30 years of construction experience, Mark specializes in constructing interiors, project management, and project estimation. He has been a construction professional since 1987.
Construction Professional
-
QuestionWhat is the best way to remove cement stains from tiles?
 Mark SpelmanMark Spelman is a General Contractor based in Austin, Texas. With over 30 years of construction experience, Mark specializes in constructing interiors, project management, and project estimation. He has been a construction professional since 1987.
Construction Professional
-
QuestionMy contractor left large amounts of grout in the corners. Is there a way to remove this without messing up the porcelain tile?
 Mark SpelmanMark Spelman is a General Contractor based in Austin, Texas. With over 30 years of construction experience, Mark specializes in constructing interiors, project management, and project estimation. He has been a construction professional since 1987.
Construction Professional
wikiHow Video: How to Remove Grout
Warnings
- Always wear eye protection when attempting to remove grout. Pieces of grout and flecks of tile can cut your eyes when flying at high rates of speed.⧼thumbs_response⧽
- Carbide blades are very smooth. Always wear cut resistant gloves as you risk losing a finger should the saw slip.⧼thumbs_response⧽
Things You'll Need
- Drop cloth
- Safety glasses
- Dust mask
- Cut resistant gloves
- Grout saw with carbide blade
- Grout scraper
- Chisel and hammer
- Dust broom
- Shop vacuum
- Soap
- Scouring pad
- Spray bottle
- Vinegar
References
- ↑ https://www.youtube.com/watch?v=yzKtgalbaic
- ↑ https://www.familyhandyman.com/tiling/grouting/how-to-remove-grout/view-all
- ↑ https://www.familyhandyman.com/tiling/grouting/tips-for-removing-grout/view-all
- ↑ https://www.youtube.com/watch?v=yzKtgalbaic
- ↑ https://www.todayshomeowner.com/grouting-over-existing-grout-in-a-tile-floor/
About This Article
The easiest way to remove grout is using a rotary grout removal power tool. Before you get started, put on a pair of thick gloves and some protective eyewear. If you're planning on keeping your original tiles, line the edges of each tile with painter’s tape. Then, set the tool to the lowest setting, and cut a line through the center of the grout. Carefully guide the saw back and forth with the blade parallel to the length of grout. As you get close to the edge of the tile, work slowly and carefully to carve the grout out in thin layers. You can also remove grout using a manual grout removal tool, but keep in mind that it will take longer. To use a manual grout removal tool, drag the blade through the center of each line of grout that you want to remove. Then, scrape along the sides of the tile to carve the grout away. If necessary, hold the grout scraper in place with your nondominant hand and strike the back with a hammer to use it as a chisel. Continue scraping until you remove all of the grout. To get the grout out, use a broom to brush the dust to the nearest flat floor and sweep it up. Use a damp cloth to absorb any hard-to-remove dust. When you’re done removing grout, peel away any painter’s tape you used and vacuum up the remaining grout. Use a damp cloth or scraper to gently wear away any residue that's sticking to the tile, and you're done! To learn more from our Contractor co-author, like what protective clothing you should wear while you're working, keep reading!
