X
wikiHow is a “wiki,” similar to Wikipedia, which means that many of our articles are co-written by multiple authors. To create this article, volunteer authors worked to edit and improve it over time.
wikiHow marks an article as reader-approved once it receives enough positive feedback. In this case, 93% of readers who voted found the article helpful, earning it our reader-approved status.
This article has been viewed 26,371 times.
Learn more...
Metal cans can be used in all kinds of garden projects. The possibilities are endless so long as you use a little creativity. From garden ornaments to flower planters, cans can be very versatile.
Steps
Method 1
Method 1 of 4:
Making Soda Can Wreaths
-
1Wear protective gear when cutting cans. For this project, and others listed in this article, you will cut soda cans and turn them into lovely garden ornaments. However, these garden ornaments can turn deadly if you are cut by the sharp edges of the can. Because of this, it is important to wear sturdy work gloves when you cut cans.
- You will also need heavy-soled shoes.
-
2Collect some empty soda cans. Consider using different kinds of soda cans to make your metal flowers more versatile and colorful.
- However, in a pinch, working with the same sort of cans can look just as nice.
Advertisement -
3Cut the cans. Use a box cutter (which is also known as a craft knife) to make vertical slits down the side of the can. Leave about three-fourths of an inch in between each slit.
- Make the slits all the way around the can, being sure to leave space between each slit.
-
4Squash the cans. Wearing heavy-soled shoes (work boots work well), squish the top of the can down to the base. Doing this will form the slits you have made into flower petals.
- You should end up with a squashed can that looks like a flower.
-
5Glue the ‘flowers’ to a wreath. Your wreath can be a circle made of wire, or an actual wreath purchased at an arts and crafts store. Use a hot glue gun to glue the metal flowers to the wreath.
- If you don’t have a wreath, consider getting a pool noodle at the dollar store. Bend it so that is forms a circle and then connect the two ends with duct tape. Wrap a ribbon around that section of the pool noodle to hide the duct tape.


Advertisement
Method 2
Method 2 of 4:
Making Flowers Out of Cans
-
1Gather empty tin cans. These can be food cans with their lids removed. The size of the can is up to you. Just remember to wear sturdy work gloves, as these cans have a tendency to be very sharp.
-
2Cut the cans. Use aviation snips to make vertical slits down the side of the can. Start at the open rim and cut the can down to the base. Repeat this process all the way around the can.
- Make sure to leave 1.5 inches (3.8 cm) between each cut.
-
3Trim the ends of the ‘petals’. Using the aviation snips, trip the ends of each of the metal strips so that they are round and petal-like. Again, use caution, as these cans are very sharp. Bend the petals out so that the can looks like a flower.
- Consider painting the ‘flowers’. If you do not know how to paint metal cans, refer to Method 4.
-
4Consider attaching the flowers to garden canes. To give the flower a stem, you can attach it to a garden cane. Punch two holes in the center of the flower and run a bit of wire through the holes.
- Loop the wire around the garden cane and secure it to the back of the cane.


Advertisement
Method 3
Method 3 of 4:
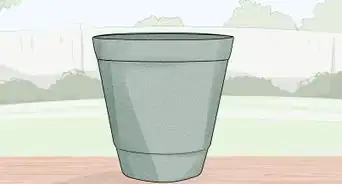
Creating Can Planters
-
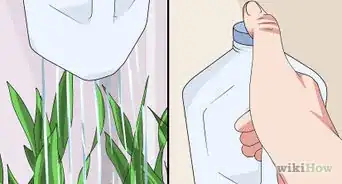
1Collect some large catering-sized cans. Large cans used by restaurants can make great planters. However, be sure to clean the can thoroughly to remove any traces of oil or food products.
-
2File the edges of the can to make them safe. You can file the edges of the cans down, or you can pinch the metal at the edge of the can so that it becomes flat; use metal pliers to do this.
- You can also put silicon sealant along the sharp edges.
-
3Add drainage holes. Most plants do not like soggy roots, so it is important that your can planters have some drainage holes. To make them:
- Use an electric drill, or a hammer and sharp nail. If you use a hammer and nail, turn the can upside down so that the sharp sides of the holes you make face inward.
- Consider painting your can. If you do not know how to do that, see the next section.
-
4Add some material to the bottom of the can to help it drain. In addition to making drainage holes, you should also lay some gravel at the bottom of the can before you put the soil in. The grave will help to improve the can’s drainage.
-
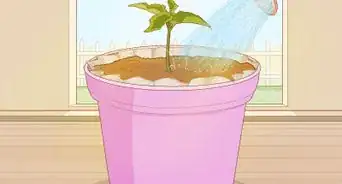
5Plant your cans. Fill the can with soil and pick out plants to fill your can planter with. The plants you choose are up to you; just keep in mind that you should pick out a soil that the plants will do well in. If your plants like acidic soil, make sure that the soil you buy is acidic.


Advertisement
Method 4
Method 4 of 4:
Painting Metal Cans
-
1Wash your can before painting. Make sure to wash your can with soap and water before you paint it. This will help to remove the label and any residual food or oils. Let the can dry completely once you have washed it.
- You can also wash your can with diluted vinegar to remove any persistent oil residues.
-
2Use steel wool to soften the metal. Purchase a piece of steel wool and rub it against the can. This will help to roughen up the metal, which in turn will help the paint to stick to the otherwise slippery metal surface.
-
3Apply a primer intended for metal such as Rust-oleum and let it dry. After the primer has dried you can paint the can with acrylic paint. Try to mix some all purpose sealer into the base coat. Apply several layers of paint.
- After the last paint layer has dried, apply a coat of clear acrylic sealer to make the paint last.


Advertisement
Warnings
- Metal cans tend to have sharp edges. It’s important to file down or flatten any raised edges to prevent people from cutting themselves. You can also try taping down the edges with water resistant tape or piping silicon sealant over the sharp edge but be very careful as this may become dislodged over time.⧼thumbs_response⧽
- Remember that punctured holes in metal cans can raise sharp ridges in the metal.⧼thumbs_response⧽
- Metal food cans aren’t intended for use out of doors. Over time they may become rusty. Rust edges can be abrasive to the skin. You may also see rust staining if you hang a can on a wooden fence or place it on wooden decking.⧼thumbs_response⧽
Advertisement


About This Article
Advertisement