X
This article was co-authored by wikiHow staff writer, Jack Lloyd. Jack Lloyd is a Technology Writer and Editor for wikiHow. He has over two years of experience writing and editing technology-related articles. He is technology enthusiast and an English teacher.
The wikiHow Tech Team also followed the article's instructions and verified that they work.
This article has been viewed 215,731 times.
Learn more...
This wikiHow teaches you how to embed a Word document in your website. On Google Sites, you can embed an image of the Word document directly into the page, while WordPress and self-hosted sites will require you to upload the Word document and then place a link to it in your webpage's text.
Steps
Method 1
Method 1 of 3:
Using Google Sites
-
1Open Google Drive. Go to https://drive.google.com/ in your web browser. This will open your Google account's Drive contents if you're logged in.
- If you aren't logged in, enter your email address and password first.
- You may need to click Go to Google Drive before proceeding.
-
2Click NEW. It's a blue button in the upper-left corner of the page. A drop-down menu will appear.Advertisement
-
3Click File upload. This is in the drop-down menu. Doing so will open a window.
-
4Select your Word file. Double-click the Word file that you want to embed on your website. This will prompt it to upload into Google Drive.
- It shouldn't take more than a few seconds for most Word documents to upload to Drive.
-
5Open Google Sites. Go to https://sites.google.com/new in your web browser.
- If you aren't logged into your Google account when you do this, you'll be prompted to enter your email address and password before continuing.
-
6Select your Google Site. Click on the Google Site on which you want to insert the Word document.
-
7Go to the page that you want to use. Scroll down until you arrive on the page on which you want to insert the Word document.
-
8Click the INSERT tab. It's in the upper-left side of the Google Sites window.
-
9Click From Drive. This option is below the "Google Drive" heading near the top of the page.
-
10Select the document. In the right-hand column, click the document that you want to insert.
-
11Click INSERT. It's in the lower-right corner of the page. This will place the Word document on your website.
-
12Resize the document. Click and drag the top or bottom of the document to adjust its vertical size, or click and drag one of its sides to adjust the overall size of the document on your site.
-
13Click PUBLISH. It's the purple button in the top-right corner of the page. This will update your website with your uploaded document; you should now be able to see your Word document embedded in your Google Site.


Advertisement
Method 2
Method 2 of 3:
Using WordPress
-
1Open WordPress. Go to https://wordpress.com/ in your web browser. While you can't embed an image of your document on a WordPress domain, you can embed a link that downloads the WordPress file when clicked.
- If you aren't logged into your WordPress account, first click Log In in the top-right corner of the page, then enter your email address and password.
-
2Click My Site. It's in the upper-left corner of the WordPress page. Doing so will load your site's page.
-
3Click View Site. This option is in the upper-left side of the page.
-
4Click Visit Site. It's in the upper-right side of the page. This will take you to your site.
-
5Go to the page that you want to use. Click the tab for the page on which you want to insert your Word document link; you'll usually find these tabs at the top of the page.
-
6Click Edit. You'll find this option in the bottom-right side of the page.
-
7Choose a place for your link. Click on the page the place in which you want to insert a link for your Word document.
-
8Click + Add. This is a button on the left side of the page. A pop-up menu will appear.
-
9Click Media. It's an option near the top of the pop-up menu. Doing so opens a page with all of your website's stored media.
-
10Click Add New. This is in the upper-left side of the page that opens.
-
11Select a Word document. Click the Word document that you want to use on your site, then click Open in the bottom-right corner of the window. This will upload the Word document to the storage section of WordPress.
-
12Select the uploaded document. Click the Word document to do so.
-
13Click Insert. It's in the bottom-right side of the window. This will insert a link to your Word document.
-
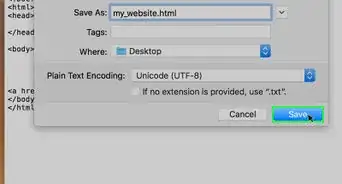
14Change the link text. If you want the link text to say something other than the Word document's name, select the link once, click the pencil-shaped icon next to the link that appears, change the text in the "Link Text" field, and click Save.
-
15Click Update. It's a blue button in the top-right corner of the page. This will update your website with your uploaded document, allowing you to click the embedded link to download the Word document.


Advertisement
Method 3
Method 3 of 3:
Using a Hosted Website
-
1Upload the Word document to your website's root folder. When hosting your own website, you should have a folder that contains the resources (e.g., pictures) that appear on your website. You'll need to place your Microsoft Word document in this folder.
- This step will depend heavily upon the software that you use to host your website.
-
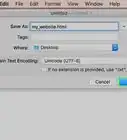
2Copy the Word document's address. Again, this step will depend on the software that you use to host your website, but you can usually find the address in a URL bar at the top of the page. Click and drag your mouse across the address to select it, then press Ctrl+C (Windows) or ⌘ Command+C (Mac).
-
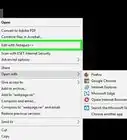
3Open your website's code document. Open the text or HTML document in which your website's code is stored.
-
4Select a place for the link. Find the place in which you want to insert the link for your Word document, then click that place.
-
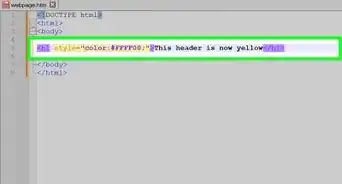
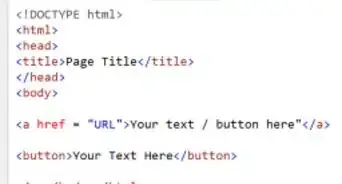
5Create the HREF tag. Type in <a href= into your text editor.
-
6Paste in the Word document's address. Press Ctrl+V (Windows) or ⌘ Command+V (Mac).
-
7Close the HREF tag. Type in > to close the tag. You should now have a line of text that reads<a href=link> here.
-
8Enter the link text. Type in the text that you want to use as the link on which someone clicks. You'll do this immediately after the closed HREF tag.
- For example, if you want people to click on a link that says "click here", you'd have <a href=link>click here written.
-
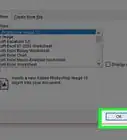
9Add the closed link tag. On the right side of the link text that you want to use, type in </a> and press ↵ Enter. This completes the link.
- Your line of text should now look like this: <a href=link>click here</a>
-
10Refresh your website. Once the website's code is updated, you should be able to click the link that you just introduced to download the Word document.


Advertisement
Community Q&A
-
QuestionCan I have my website open a word document in a separate tab?
 Community AnswerTry putting target="_blank" as one of the attributes in your tag if you have one.
 -
QuestionHow do I attach a medical certificate to a form?
 Community AnswerIt depends. If the form is online and has an "attach" option, you can scan a copy of the medical certificate and attach the file there. If the form is being submitted via email, you can attach a copy of the certificate like you would any other attachment. If the form is being submitted in person or by mail, you can just use a paperclip to attach the certificate to the form.
Advertisement


About This Article
Jack Lloyd
wikiHow Technology Writer
This article was co-authored by wikiHow staff writer, Jack Lloyd. Jack Lloyd is a Technology Writer and Editor for wikiHow. He has over two years of experience writing and editing technology-related articles. He is technology enthusiast and an English teacher. This article has been viewed 215,731 times.
How helpful is this?
Co-authors: 26
Updated: June 3, 2021
Views: 215,731
Categories: Creating and Enhancing a Website
Advertisement