This article was co-authored by wikiHow staff writer, Nihal Shetty. Nihal Shetty is a Writer and Editing Fellow at wikiHow who splits his time between Michigan and Mexico City. Before his role at wikiHow, he was an instructor of Russian literature at the University of California, Berkeley. Nihal received a BA in Comparative Literature from Columbia University and an MA in Russian at Berkeley.
There are 8 references cited in this article, which can be found at the bottom of the page.
This article has been viewed 37,538 times.
Learn more...
Got a sleek new car with a built-in garage door opener, but not sure how to set it up? In recent years, plenty of newer cars have come with the convenience of garage door openers, often Homelink systems. Getting your built-in garage door opener set up is both easy and quick, and we’ll walk you through every step. Plus, we’ve also got you covered with information on programming a remote control for your garage door opener. Here’s our complete guide on how to program a garage door opener for your car.
Steps
Programming Your Car’s Garage Door Opener
-
1Clear your car opener’s memory. Even if you’ve just picked up this car, clear its opener’s memory so that you’re starting the pairing process on a clean slate. Put your car into accessory mode (the mode where your car, but not its engine, is turned on). Then, press the leftmost and rightmost buttons on the panel for 30 seconds. The system’s data is now cleared.[1]
- If you aren’t sure where the garage door opener is in your car, try checking the area above the driver’s seat, including below the rear view mirror. It may also be on a panel next to the steering wheel.
-
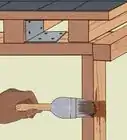
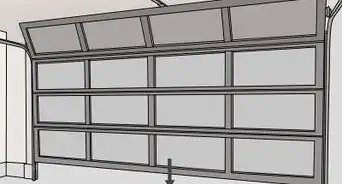
2Press the “Learn” button on your garage door opener unit. Find the “Learn” button on the back or side of your garage door opener unit (the big box hanging from your garage’s ceiling). It will be placed next to a small LED light. Once you’ve located the “Learn” button, press it to switch the garage door opener into pairing mode.[2]
- To access the “Learn” button, you may need to remove the unit’s light lens, which covers the light bulb inside the unit. In some models, you can open the lens by lightly pressing on it until it swings open. Other models may require a screwdriver.[3]
- You may need a ladder to reach your garage door opener unit. Be careful to keep your balance.
Advertisement -
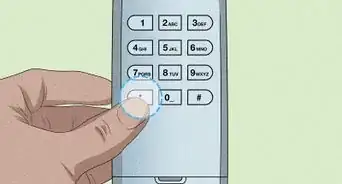
3Press and hold a programmable button in your car. When you’ve pressed the “Learn” button, you’ll have about 30 seconds to get in your car and select the button you want to program to your garage door. Hold this button until the lights of your garage door opener unit flash or you hear 2 clicks.[4]
- Since it can be a little dangerous rushing from a ladder to your car, we recommend that you ask a friend to help you out with this step.
-
4Test and troubleshoot any issues with the opener. By pressing the button you’ve programmed in your car once more, your garage door should open or close. If not, take some of the following steps while troubleshooting:[5]
- Check that there’s nothing obstructing the garage door from opening or closing
- Be sure that your car is close to the garage door opener unit, parked either right outside the garage or inside it
- Check that your car was turned on during the pairing process
- Re-do the pairing process once more
- If you’re still having trouble, check the manuals for your car and garage door
-
5Program your car with a remote control, as an alternative. In older garage door models, it’s possible to directly program your car garage door opener with a previously programmed remote control opener. Just hold the remote control next to the car’s garage door opener, and press both the button on the remote control that’s programmed to your door and the button in your car you’d like to program simultaneously. If the light by or on your car’s button begins beeping, then turns solid, you’ve successfully programmed your car.[6]
- Newer models of garage doors have security features that no longer let you do this. If you have a newer model, try the steps above, instead.
- For certain kinds of garage doors with the Genie brand, you may have to hold the button on your Genie garage door remote control for 10 seconds before pressing the button in your car.[7]


Programming a Remote Control for Your Garage Door
-
1Press the “Learn” button on your garage door opener unit. Locate this button on the back or side of your garage door opener unit (the big box hanging from your garage’s ceiling). It may be next to a small LED light and antenna. Once you’ve located the “Learn” button, push it to switch the garage door opener into pairing mode.[8]
- To access the “Learn” button, you might have to remove the unit’s light lens, which covers the light bulb inside the unit. In some units, you can open the lens by lightly pressing on it until it swings open. Other models may require a screwdriver.[9]
- You might need a ladder to reach the garage door opener unit. Be sure to keep your balance while on it.
-
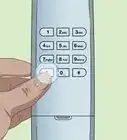
2Press a programmable button on your remote. After putting the garage door opener in pairing mode, you’ll have about 30 seconds to press a programmable button on the face of your remote control. Push this button to program it to the garage door opener.[10]
-
3Troubleshoot the opener to fix any remaining issues. Push the button on your remote control once again to test the garage door. If everything’s gone according to plan, the door should now open or close. If not, troubleshoot the issue by following these steps:
- Check to see if the remote’s battery is dead
- Make sure that there are no obstructions around the garage door
- Repeat the pairing process
- Consult the manuals for your garage door and remote control if you’re still having trouble


References
- ↑ https://youtu.be/sleBZyEa4rI?t=91
- ↑ https://manuals.plus/chamberlain/universal-wireless-keypad-manual-2
- ↑ https://support.geniecompany.com/app/answers/detail/a_id/1234
- ↑ https://www.devancocanada.com/files/manuals/855LM:Programming-instructions.pdf
- ↑ https://youtu.be/sleBZyEa4rI?t=149
- ↑ https://youtu.be/sleBZyEa4rI?t=107
- ↑ https://www.geniecompany.com/homelink-programming
- ↑ https://manuals.plus/chamberlain/universal-wireless-keypad-manual-2
- ↑ https://support.geniecompany.com/app/answers/detail/a_id/1234
About This Article