This article was co-authored by wikiHow Staff. Our trained team of editors and researchers validate articles for accuracy and comprehensiveness. wikiHow's Content Management Team carefully monitors the work from our editorial staff to ensure that each article is backed by trusted research and meets our high quality standards.
This article has been viewed 23,094 times.
Learn more...
Online patterns are becoming increasingly popular. Instead of having to print and ship patterns out, many designs opt for selling PDF patterns instead that their customer downloads instead. Printing these patterns can seem tricky, but it is really quite simple. There is a trick to getting them printed just right, however; if you don't pay attention to the scale, you could end up with a pattern that is too small or too big!
Steps
Printing the Pattern
-
1Download the PDF file if you have not already. If the file won't download, check your browser settings, and make sure that "Internet Downloading" is enabled.[1]
-
2Open the pattern in a PDF reading program. Make sure that you have the newest version of Adobe Reader installed. If you do not have Adobe Reader, make sure that your program will be able to read the pattern files.[2]Advertisement
-
3Read the instructions, if included. Every pattern will be a little different.[3] Some patterns will need to be assembled first, while others will need to be cut first. Some may even have specific scaling instructions.
- If your pattern's instructions are different from the ones in this article, you should follow them instead.
-
4Review the pattern and decide what to print. Some patterns will include extra information that you do not absolutely have to print out. This includes things like other sizes, cover pages, and variations. You can also save time, paper, and ink by not printing those. You can also handwrite the material list before taking it to the store, and you can always read the instructions from your computer.
-
5Check the printer settings. Make sure that the printer is set to 100%, full scale, or no scale. Do not select "shrink to fit" or "fit to page." The pattern will print on multiple pages, which is fine.
- Pay attention to the layout. Some patterns need to be printed Portrait style while others need Landscape.[4]
-
6Print the size confirmation. Most patterns will have a 1 to 2-inch (2.54 to 5.08-centimeter) box that you need to print out. You can find this within the first few pages of the document. Find the page that contains this and print it out. Do not print the entire pattern out just yet.[5]
- Some patterns will have a set of arrows or a black bar instead.
-
7Measure the printed test square, arrow, or bar with a ruler. These items will usually have a measurement printed on them or right next to them. Measure the item with a ruler first, then compare that measurement to what's printed on the page. The measurements need to match up exactly.[6]
-
8Make any adjustments, if necessary. If the actual measurements of the test square did not match up with what's printed on the page, you will need to check your printer settings and make any necessary adjustments.
- If your measurement is bigger than the printed measurement, your pattern will be too big and needs to be scaled down.
- If your measurement is smaller than the printed measurement, your pattern will be too small and needs to be scaled up.
-
9Print the pattern. Now that you know what you need to print and that your pattern is scaled properly, go ahead and print out your pattern. Remember to print only what you need. Don't print out all of the sizes and variations unless you need to.
- Most patterns will print out in the order that they need to be assembled. Pay attention to this.[7]


Assembling then Cutting the Pattern (Option 1)
-
1Find a space big enough to work on. In this method, you will be assembling the pattern first, then cutting it out. It will work just like a store-bought pattern, which comes on a big sheet. This will take up a lot of space. Find a large table to work on, or clear some space on your floor.
-
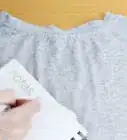
2Match the pieces together. Most patterns will have little symbols, letters, or numbers along the joining edges that you have to line up. You should match up like symbols with like symbols, such as 1a with 1a and 1b with 1b.[8]
- Most instructions will have a diagram of what the completed pattern pieces should look like. Check your pattern pieces against this diagram.
-
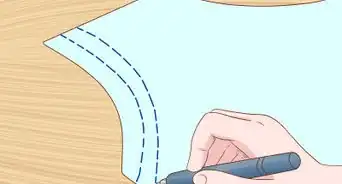
3Overlap the pattern pieces, if necessary. Some pattern pieces need to be overlapped while others don't Take a look at your pattern pieces. If the lines extend to the edges of the paper, then they should be aligned edge-to-edge. If there is a space or margin, then you should overlap them.
- Sometimes, the spaces or margins need to be trimmed off. If they cover part of the pattern, you will need to trim them off.
-
4Tape the pattern pieces together. If the patterns are butted up against each other, with no overlap, lay down a long strip of tape across the seam.[9] If the pattern pieces overlap, connect them using a glue stick or strip of double-sided tape.
- Consider applying another layer of tape across all of the seams on the back of the entire pattern page. This will give it extra stability.[10]
-
5Cut the pattern pieces out. Pay attention to the different sizes. Many patterns include multiple lines, one for each size. Also, pay attention to the seam allowances. Some patterns include them while others don't.


Cutting then Assembling the Pattern (Option 2)
-
1Clear some space on your floor or table. In this method, you will be cutting out all of the pieces first, then putting them together. Depending on the type of pattern you are working with, you might need a lot of space. For example, a long skirt will require a lot more space than a pair of gloves.
-
2Cut the pattern pieces out. Keep like pieces together with like pieces. For example, if you are cutting a princess dress, keep all of the sleeve pieces together, all of the skirt pieces together, and all of the bodice pieces together.
-
3Match the pieces together. PDF patterns will usually have little symbols along the edges that you have to line up. Match up like symbols with like symbols. For example, you should match up single arrows with single arrows, and double arrows with double arrows.
-
4Overlap the pattern pieces, if needed. If the pattern's edges have a space or margin, then they need to be overlapped. If the pattern's lines extend all the way to the cut edges, then they don't need to be overlapped. They should be placed side-by-side instead.
-
5Tape the pattern pieces together. If the pieces overlap, join them using a glue stick or a piece of double-sided tape. If the pattern pieces don't overlap, connect them with a strip of tape placed across the seam.


Warnings
- Don't change the scale. Print the pattern at full scale or 100%.⧼thumbs_response⧽
- Avoid printing from Google Drive, Mac Preview, or similar. Many people find that there are scaling issues. Download the file to your computer first, then open it in a PDF reader.[12]⧼thumbs_response⧽
Things You'll Need
- Computer
- PDF reader
- Printer
- A4 or US letter paper
- Scissors
- Glue stick, double-sided tape, or regular tape

References
- ↑ http://www.sew4home.com/tips-resources/sewing-tips-tricks/how-successfully-print-and-assemble-pdf-patterns
- ↑ http://www.sew4home.com/tips-resources/sewing-tips-tricks/how-successfully-print-and-assemble-pdf-patterns
- ↑ http://so-sew-easy.com/print-assemble-pdf-pattern/
- ↑ http://www.sew4home.com/tips-resources/sewing-tips-tricks/how-successfully-print-and-assemble-pdf-patterns
- ↑ http://www.sew4home.com/tips-resources/sewing-tips-tricks/how-successfully-print-and-assemble-pdf-patterns
- ↑ http://www.sew4home.com/tips-resources/sewing-tips-tricks/how-successfully-print-and-assemble-pdf-patterns
- ↑ http://so-sew-easy.com/print-assemble-pdf-pattern/
- ↑ http://www.tillyandthebuttons.com/2013/01/how-to-use-digital-sewing-patterns.html
- ↑ http://www.sew4home.com/tips-resources/sewing-tips-tricks/how-successfully-print-and-assemble-pdf-patterns
About This Article