This article was co-authored by wikiHow staff writer, Nicole Levine, MFA. Nicole Levine is a Technology Writer and Editor for wikiHow. She has more than 20 years of experience creating technical documentation and leading support teams at major web hosting and software companies. Nicole also holds an MFA in Creative Writing from Portland State University and teaches composition, fiction-writing, and zine-making at various institutions.
This article has been viewed 78,223 times.
Learn more...
This wikiHow teaches you how to print a mirrored (flipped) version of an image or text using common Windows and macOS apps. Printing in mirror-image format can be useful for creating iron-on clothing transfers, as well as for signs and art that will be viewed through mirrors. In most cases, you can print mirror images by selecting the Flip Horizontally option in the app you're using. Depending on your printer and the app you're using, you may also be able to choose a mirroring option in your printer settings.
Things You Should Know
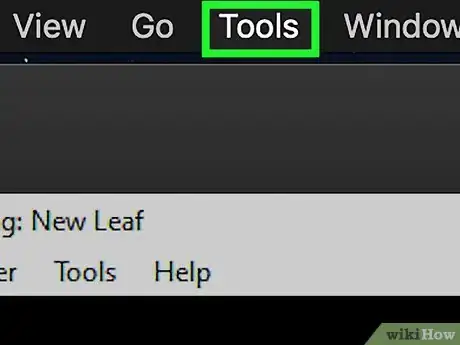
- When using Mac Preview, click the "Tools" menu and select "Flip Horizontal."
- In Windows Photos, click the "Edit" menu and select "Flip."
- You can also use your PC or Mac's Print dialog to choose the "Flip" or "Mirror" option before printing in any app.
Steps
Printing Mirrored Images on a Mac
-
1
-
2Click the Tools menu. It's in the menu bar at the top of the screen.Advertisement
-
3Click Flip Horizontal on the menu. This flips the entire image, which makes it easy to print a mirrored copy.
-
4Print your image. Now the photo or graphic is flipped, click the File menu and select Print. Once you've selected your printer and preferences, click Print to print your mirrored image.
Printing Mirrored Images on a Windows PC
-
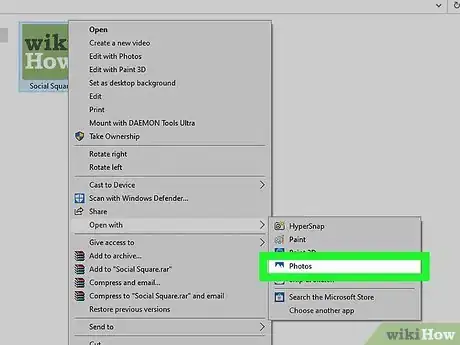
1Open the photo or graphic in Microsoft Photos. A quick way to do this is to right-click the image, select Open With, and then choose Photos.
- Use this method to print most common image formats, including JPG, BMP, PNG, and TIFF.
-
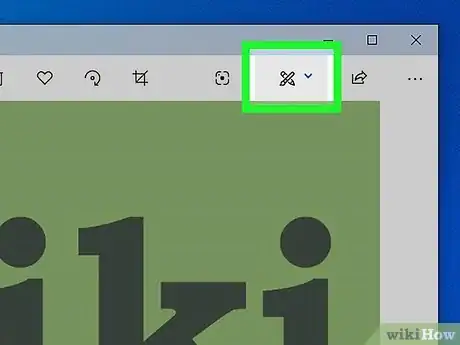
2Click Edit & Create. It's near the top-right corner of the window.
-
3Click Edit at the top of the menu. Some basic editing tools will appear.
-
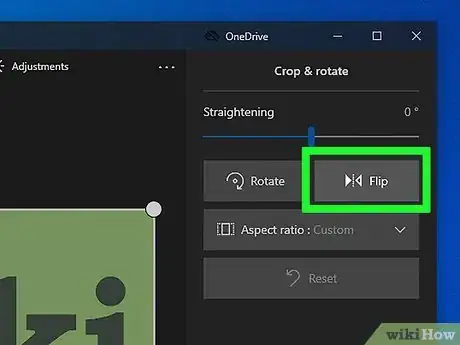
4Click Flip on the right panel. It's the option with a triangle split in two. The image will now flip, mirror-style.
-
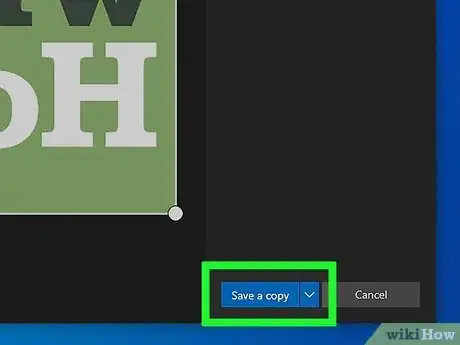
5Click the Save a copy button. It's at the bottom of the right panel. This creates a new file for the flipped image so you don't lose your original. It also brings you back to the regular Photos window.
-
6Print your image. Now the image is flipped, click the printer icon near the top-right corner to open your print preferences, choose a printer and your preferences, and then click Print.
Mirroring Text & Objects in Microsoft Word, Excel, or PowerPoint
-
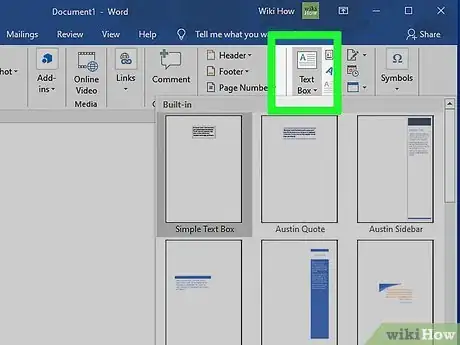
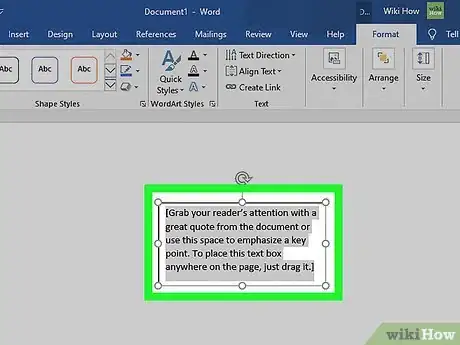
1Insert your text into a text box. If you want to print text (not an image), you'll need to add the text to an object called a text box. To do so:[3]
- Click the Insert menu at the top.
- Click Text Box.
- Enter and format your desired text.
- Click outside of the text box to close it.
-
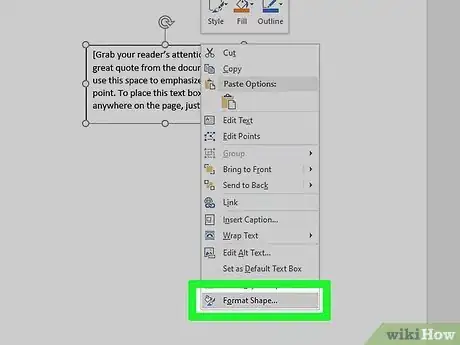
2Right-click the image or text box you want to mirror. A menu will expand.
- For example, if you want to print an image or logo, right-click that image. If you have some text in a text box, right-click the text box.
-
3Click Format Shape on the menu. This will open the Format Shape panel at the top of the app (2013 and later) or a dialog box (2010).
-
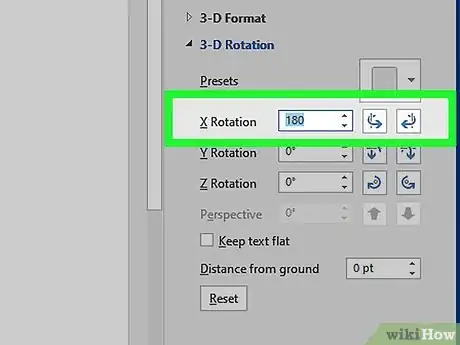
4Click Effects (2013 and later) or 3-D Rotation (2010).
-
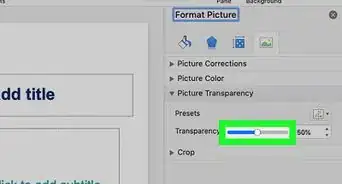
5Type 180 into the "X Rotation" box. The selected image or text now appears mirrored.
- If your text box somehow filled with a color during this process, right-click the text box, click Shape Options (2013 and newer) or Shape Fill (2010), select Fill & Line (2013 and newer only), and then click No Fill.
- To hide the outline of a text box in the final print job, you can remove it. Just right-click the text box, click Outline (2013 and later) or Shape Outline (2010) and select No Outline.
-
6Print your document. Now that your object is mirrored, you can print normally using your computer's default print settings. Click the File menu at the top-left corner, select Print, select your printer and preferences, and then click Print to confirm.
Printing from Other Apps on a Mac
-
1Choose the Print option in your desired program. If you're working with a file that can't be opened in Preview and you're not sure how to print it mirrored, use this method. This will work for any text editing app, including Pages and TextEdit, as well as many (but not all) graphics editors.
-
2Select the printer you want to use. You can do so by clicking the "Printer" menu and then selecting the printer's name.
-
3Click Show Details if you see it. If you see "Hide Details" at the bottom of the window instead, just skip to the next step.
-
4Select Layout on the unnamed menu. This menu is not named, but it appears below the separator bar below the "Pages" section.[4] Layout is one of the options in the menu.
-
5Select Flip Horizontally. This option will only appear if the app supports it. If you don't see the option, you won't be able to use this method to print a mirrored version of the document.
-
6Print the document. If you need to customize any additional options for your print job (such as page or color preferences), make your selections and then click Print. Your finished document will be sent to the selected printer.
Printing from Other Apps on a Windows PC
-
1Choose the Print option in your desired program. If you want to mirror an entire document and the feature is supported by your printer, you can choose the Flip or Mirror option during the printing process in many apps. This is helpful if you need to mirror a file whose native app doesn't have a built-in "mirror" or "flip" option.
-
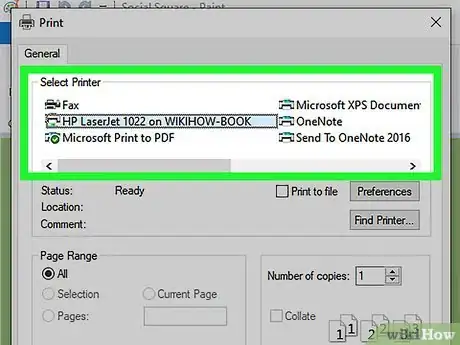
2Select the printer you'd like to use. The option to mirror a print is actually in the printer's settings, not the Windows settings.
-
3Click Printer Properties on the print screen. The location will vary, but it'll usually be somewhere near the printer drop-down menu. Sometimes the option is just called Properties.
-
4Look for a "Mirror" or "Flip Horizontally" option. Some printers will display an option to enable or disable mirrored prints on the Properties screen, but others will not. If you see such an option, enable or select it now. The name of the option will vary slightly.
- Make sure you're not choosing a "Rotate" option—the one you need will nearly always contain the word "Mirror."
-
5Click Advanced if there's no mirror option. The location of Advanced varies, and it may have a different name (often Features). You'll know you've found the right option when you click it and a window called "(Your Printer Name) Advanced Options" opens.
-
6Select the "Mirrored" or "Flip Horizontally" option if displayed. Again, the name varies. If your printer didn't have a mirror option before, you may see one on the current screen. You'll usually need to click a link and choose Yes or On from a menu.
- If you don't see one of these options, your printer cannot mirror-print this document.
-
7Click OK to save your changes.
-
8Click OK again to close your print settings. This takes you back to the screen on which you selected your printer.
-
9Choose your print preferences and click Print. Your finished document will be sent to the selected printer.
-
10Disable mirrored printing. If you don't turn off the mirroring feature, your printer may continue to mirror all print jobs. To ensure this doesn't happen, press Ctrl+P to return to the print screen, navigate back to the menu on which you changed your mirroring preferences, and change it back to what it was before.
Mirroring Text and Objects in Microsoft Publisher
-
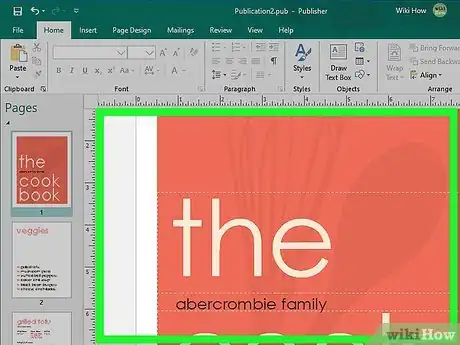
1Click the object you want to flip. Publisher allows you to flip any selected object or text in your project so you can print a mirror image.
- If there's more than one object in the project (such as multiple images, or images and text) that you want to print mirrored, you can group those objects together so that flipping one object flips them all. To do this, hold Ctrl as you click each object you want to group, click the Home menu, then click Group.[5]
- You can ungroup objects at any time by selecting the objects, clicking Home, and then selecting Ungroup.
-
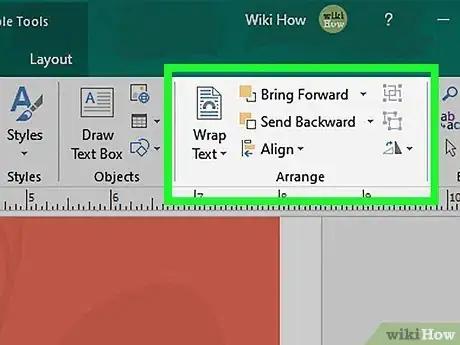
2Click the Arrange menu. It's in the toolbar at the top of Publisher.[6]
-
3Select Rotate or Flip on the menu. Some orientation options will appear.
-
4Click Flip Horizontal. This flips the selected object(s) so that it's now reversed/mirrored.
-
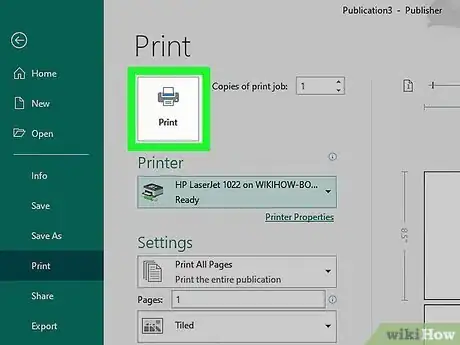
5Print your document. Now that your object is mirrored, you can print normally using your computer's default print settings. Click the File menu at the top-left corner, select Print, select your printer and preferences, and then click Print to confirm.
References
- ↑ https://support.apple.com/guide/preview/view-pdfs-and-images-prvw11470/mac
- ↑ https://support.apple.com/guide/preview/welcome/mac
- ↑ https://support.office.com/en-us/article/reverse-or-mirror-text-f3875692-7646-4be4-815f-4f531bbeff74#ID0EAACAAA=Office_2010
- ↑ https://support.hp.com/us-en/document/c04701747
- ↑ https://support.office.com/en-us/article/group-and-ungroup-text-boxes-pictures-and-other-objects-in-publisher-47bce524-4369-46a6-be63-cf8884466dfd
- ↑ https://support.office.com/en-us/article/rotate-or-flip-objects-ae350290-b652-4c8c-80bf-316631cb5a0f#ID0EAABAAA=Newer_versions
About This Article
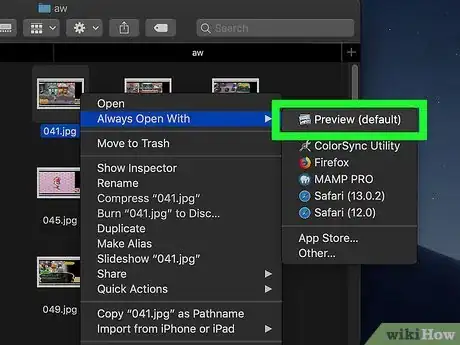
1. Open the image in Preview.
2. Click Tools.
3. Click Flip Horizontal.
4. Print the image.











-Step-4Bullet1.webp)
