wikiHow is a “wiki,” similar to Wikipedia, which means that many of our articles are co-written by multiple authors. To create this article, volunteer authors worked to edit and improve it over time.
The wikiHow Video Team also followed the article's instructions and verified that they work.
This article has been viewed 56,073 times.
Learn more...
The art of preserving leaves dates back to when botanists traveled the world in search of new plant species. They needed some way to preserve the specimens on site for further studies when they got back to homeland. When they pressed the flowers or leaves, they'd get very brittle and discolored. However, with wax paper and an iron, you can preserve leaves that will last almost indefinitely.
Steps
Gathering the Materials
-
1Look for leaves that are still fresh. If collecting autumn or fallen leaves, stay away from those that are crumbly and papery, as these will break apart extremely easy and be destroyed by the heat. Fresh leaves that are still soft and moist will last indefinitely.
-
2Consider thickness. Thick leaves, like large succulents, have to be ironed around the leaf design to create a seal around them, not directly on them. Smaller thick leaves (like croton or magnolias) should only be lightly ironed, or not at all, to prevent crushing and breaking.
- Also consider ironing only the edges or tips of the leaves. Experiment with the techniques that follow, depending on which leaves you pick.
Advertisement -
3Include stems, if you'd like. Whole stems and branches can be preserved this way simply by ironing the leaves and not the stem. If the stem is herbaceous and soft just iron it like a regular leaf.
-
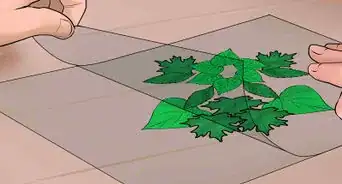
4Separate out leaves if they form in a mound. Some leaves (and flowers like poinsettias that are like leaves) form in a high mound which is too thick for this technique. Dissect the cluster and arrange the individual leaves in a flat design, instead.
-
5Avoid leaves with very hard thorns which will tear the wax paper. Some plants, like Thistles, have spines which are not hard but bristly which are suitable. Many spiny grasses and plants, like pineapples, are spiny but flat like a knife, which also is good for this project. Others, like aloes and many spiny succulents, are not suitable.
-
6Obtain wax paper and an iron. These are very inexpensive and easy to find.
-
7Gather anything else you might need. You might want markers, frames, labels, paper for labeling and crafting, and any other craft items for displaying or crafting with the finished project.


Preserving the Leaves
-
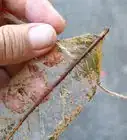
1Place the leaves in between two sheets of wax paper, with the waxed side facing inside. If you place the waxed side on the outside, the result will be a waxy, sticky, mess on anything it touches.
- The waxed side will have a slick slightly sticky feel like a crayon drawing. The non-wax side is smooth and even.
- Don't be afraid to get creative with designs and arrangements for the leaf display.
-
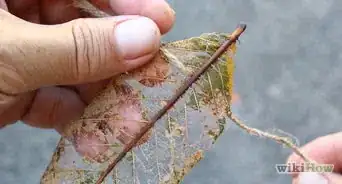
2Iron the leaves and wax paper "sandwich" on a low setting. Work in one direction with slow, even strokes. This will help avoid air bubbles and uneven areas.
- For thicker leaves, like oaks, let the iron stay on one spot for a few seconds. The paper will turn from translucent to slightly transparent, and the leaves will flatten and may give off a leafy smell, depending on the species.
-
3Let the project cool off and set before handling. If you try to handle it too soon, the wax will have no time to cure and it'll probably peel apart. Also, it will too hot to handle. Let it cool and the wax will form a barrier and soak into the leaf tissues to preserve it.
Displaying Your Leaf Design
-
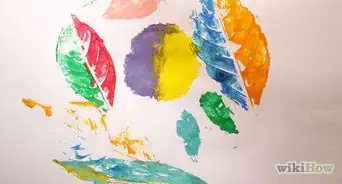
1Mount your finished piece in a picture frame as a work of custom art. Just frame it up like a traditional painting. The result will resemble the ones in interior decoration boutiques that cost hundreds, if not thousands, of dollars.
-
2Display a collection of leaves in a binder or art folder. Get a nice office binder and sturdy paper. Use office plastic sheet protectors, white printing paper or card stock and tape the pressed leaf project onto the paper. Use labels to keep track of species, locations, dates and other notes. These waxed leaves also can make excellent scrap-booking materials.
-
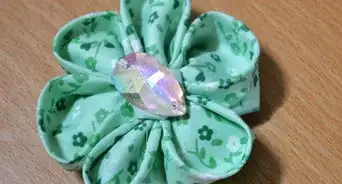
3Use your leaves as ornaments. Poke a hole or punch in an area of the preserved leaf that has no air pockets. Dusty miller and other silvery plants make really attractive "snowflake" ornaments.
- Don't display the leaves in full sun or they will either fade or get scorched.
Warnings
- Don't iron the leaves at too high a setting or iron the project too long. Wax and leaves will burn.⧼thumbs_response⧽
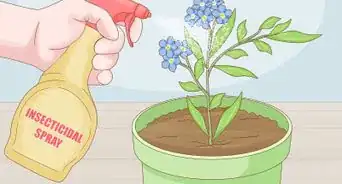
- Some plants are poisonous; do not eat or touch those! Also some have flammable sap that can catch fire or emit fumes.⧼thumbs_response⧽
- Be sure leaf collecting is allowed on the property or of the species. It's illegal to collect leaves and flowers of an endangered species. Also neighbors and city parks may not want people collecting branch tips and living leaves off plants. Ask for permission first.⧼thumbs_response⧽

About This Article
Ironing leaves between wax paper sheets is a quick and easy way to preserve their beauty. Place your leaf between 2 sheets of wax paper with the waxy sides facing in. With your iron on a low setting, gently press the leaves between the pieces of paper using even strokes that move in one direction. If the leaves are thick, you may need to keep the iron in one spot for a few seconds to flatten the leaf. When you’re done, let the paper and leaves cool for a few minutes to give the wax time to bind to the surface of the leaf. For tips on how to select the best kinds of leaves for this project, keep reading!