This article was co-authored by wikiHow staff writer, Travis Boylls. Travis Boylls is a Technology Writer and Editor for wikiHow. Travis has experience writing technology-related articles, providing software customer service, and in graphic design. He specializes in Windows, macOS, Android, iOS, and Linux platforms. He studied graphic design at Pikes Peak Community College.
This article has been viewed 845,061 times.
Learn more...
Deleting files from your computer doesn't erase them completely, so what can you do if you're trying to protect sensitive or personal information? Luckily, we can show you some easy tricks to permanently wipe anything secure off your hard drive.
Steps
Boot and Nuke Method
-
1Go to http://www.dban.org/ in a web browser. This is the website to download Darik's Boot and Nuke (DBAN). Darik's Boot and Nuke is free software that supports multiple disk wiping methods. It operates from inside the computer's RAM, which allows it to thoroughly scrub the disk at a remove. This method will allow you to reuse your hard drive.[1]
-
2Click Download. It's in the upper-right corner of the DBAN website. This takes you to a download page for DBAN. Wait a few seconds for the download to start. DBAN is an ISO file, so there is no need to install anything. By default, downloaded files can be found in your Downloads file.Advertisement
-
3Download and install Rufus (USB boot only). In order to use DBAN, you will need to burn the DBAN ISO file to a CD, DVD or USB thumb drive. If you plan on using a USB thumb drive, you will need a program called RUFUS to install the ISO file to the USB drive. Use the following steps to download and install RUFUS.
- Go to https://rufus.ie/ in a web browser.
- Scroll down and click Rufus [version number].
- Open the Rufus ".exe" file once it finishes downloading.
-
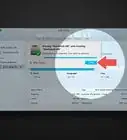
4Burn DBAN to a CD or USB drive. Since DBAN is an ISO file (also known as CD images), you will need to burn the software to a CD or USB drive. If you are using Windows 7 or higher, simply insert a burnable CD/DVD into your CD/DVD-R drive and double-click the DBAN ISO file. On Mac, you can use Disk Utility to burn an ISO file to a CD oruse the terminal to create a bootable USB drive, on Windows, you can use the followings to create a bootable USB drive using Rufus:[2]
- Insert the USB drive. Make sure it has no data you want to keep.
- Open Rufus.
- Use the drop-down menu below "Devices" to select the USB drive.
- Use the drop-down menu below "Boot Selection" to select Disk or ISO image.
- Click Select to the right of the drop-down menu.
- Select the DBAN ISO file and click Open.
- Click Start.
- Click Ok to confirm that it will erase all data on the USB.
-
5Boot from the CD or USB. Insert the DBAN CD, DVD, or USB drive in the computer with a hard drive you want to erase and power it on. If it doesn't boot up from the CD or USB automatically, you will need to adjust the boot order in the BIOS. On an Apple Mac, you may need to hold down the "C" key while the computer starts up. Each computer is different so consult the user's manual or manufacturer's web page for your computer to learn how to boot from a CD, DVD or USB drive.
-
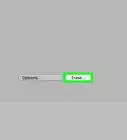
6Press ↵ Enter. When your computer boots from the DBAN disk, press the Enter key to start the wipe process.
-
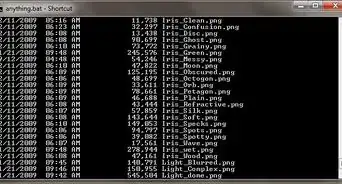
7Select the drive(s) you want to wipe and press Spacebar. You can normally identify a hard drive by it's name and/or the capacity of the drive. Use the arrow keys on the keyboard the highlight the drives you want to erase and press the spacebar. Hard drives slated to be wiped will say "Wipe" to the left of them. Be careful not to select a hard drive you want to keep. You will not be able to recover data from the hard drive once it's deleted.
- You can also press "M" on the keyboard to change the deletion method. More passes during deletion means it does a better job of wiping the hard drive.
-
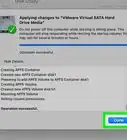
8Press F10. This will delete all the data on the hard drive. This process may take a while to complete. When it is finished, the computer should be safe to sell or dispose of.


Physical Destruction Method
-
1Power down and unplug the computer. Before tampering with your computer, it is important to make sure the computer is powered down and unplugged.
-
2Open the computer. Each computer is different. Consult your user's manual or manufacturer's web page to learn how to open your computer to access the hard drive.
- For desktop PCs, you can generally remove the side panel of the computer tower.
- For laptop computers, you can generally remove the bottom of the computer below the keyboard.
-
3Disconnect the cables connected to the hard drive. In some cases, a hard drive may have a ribbon cable, and a power cable attached to the motherboard. In other cases, the hard drive may be directly attached to a port on the motherboard. If it has any cables attached, detach them. If the hard drive is connected to the motherboard, pry it loose from the port it's connected to.
- If you want to salvage any of the other computer parts, be sure to touch something metal or wear static wrist bands to prevent static discharge that can damage the inside of the computer
-
4Remove the hard drive. The hard drive is generally housed in it's own compartment. It may be held in place with screws. If so, remove the screws and then slide the hard drive out of it's compartment.
-
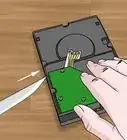
5Take apart the hard drive. Unscrew all the screws holding the top on. You will need the T-9 sized wrench for most hard drives. Sometimes there's an air seal. You will need to remove this.
-
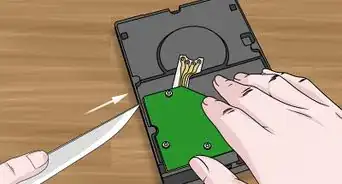
6Destroy the platters. Once you get the top off you will see two or three stacked, silver disks (called platters). Put scratches on the surface of the platters with the Torx wrench. Now start smashing it with the hammer. Do this outside on a hard surface (such as concrete). Be sure to wear safety glasses to protect against flying debris. Glass platters (found on newer drives) will shatter. If you have a large hammer (a 10 lb sledge for instance): you can forgo opening the drive - a few good hits with a big hammer can split open the metal casing and mangle the platters, even on old full-height 5.25" drives with metal (rather than glass) platters.
- Solid-state drives (SSDs) do not have platters on the inside. For these drives, you will need to smash the drive as much as possible.


Community Q&A
-
QuestionCan I erase individual files from my hard drive?
 Community AnswerYes, you can. There are programs out there to overwrite the single file you have over and over to permanently remove the file from the drive.
 -
QuestionIf you use DBAN for wiping your data, can the drive be used again?
 UK_Gamer05Community AnswerThe drive can be used again, but you can't recover your files, you'll just need to reformat the drive.
 -
QuestionHow can I erase data on my mobile?
 Community AnswerYou could remove items from your history folder, or you could reset your mobile device.
Warnings
- Do not use fire to destroy the drive. The fumes can be toxic!⧼thumbs_response⧽
- Do not microwave hard drives.⧼thumbs_response⧽
- If you try to erase single files, you might not actually be successful because of the way modern computer file systems work. You should use the Boot and Nuke method and/or physical destruction methods if data security is really a concern.⧼thumbs_response⧽
- Remember that once you do this, there is NO WAY to recover your data (especially with physical destruction methods).⧼thumbs_response⧽


References
About This Article

1. Download DBAN from http://www.dban.org/.
2. Burn the DBAN ISO file to a CD or USB drive.
3. Insert the CD or USB drive in the computer with hard drive you want to erase.
4. Boot the computer from the CD or USB drive.
5. Press Enter.
6. Select the drive(s) you want to erase and press Spacebar.
7. Press F10.