This article was co-authored by Jeanine Hattas Wilson and by wikiHow staff writer, Jessica Gibson. Jeanine Hattas Wilson is a Professional Painter and the President of Hattas Public Murals, Inc. With nearly 20 years of experience, Jeanine specializes in creating, overseeing, designing, and painting murals. Jeanine holds a BA in Advertising from Marquette University and a Studio Painting Minor from The Milwaukee Institute of Art & Design. She has studied at The Atelier Artien in Paris, France, Los Angeles Academy of Figurative Art, and under renowned artists such as Robert Liberace, Michael Siegel, and William Cochran. To date, Hattas Public Murals has painted nearly 5,000 commissioned works of art in homes and commercial and public spaces.
There are 13 references cited in this article, which can be found at the bottom of the page.
This article has been viewed 21,806 times.
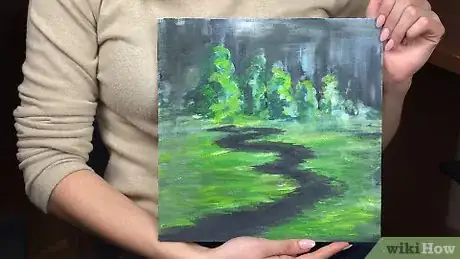
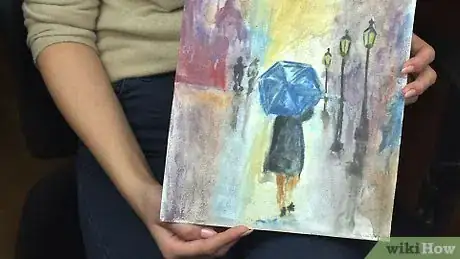
If you've always wanted to create a moody painting with rain, get to your canvas! You can add rain to any type of painting, an acrylic street scene or watercolor landscape, for instance. As long as your painting is dry before you add streaks of rain, the paint won't blend or blur your scene. Then, you can go back and add drops of rain that stand out to your viewer.
Steps
Adding Rain to an Acrylic Painting
-
1Paint a picture and let it dry completely before adding rain to the foreground. Since rain is added to a finished painting, choose a landscape, cityscape, or subject to paint with acrylics. Once you're happy with the acrylic painting, set it aside to dry. It's important to let it it dry completely so you don't smear the acrylic paint when you paint the rain on top.[1]
- You might choose a busy street scene with lampposts and people holding umbrellas or a country setting with storm clouds on the horizon, for instance.
- In general, it will take about 30 minutes for an acrylic painting to dry.
Tip: To help your painting dry faster, put it in a warm room with good circulation.
-
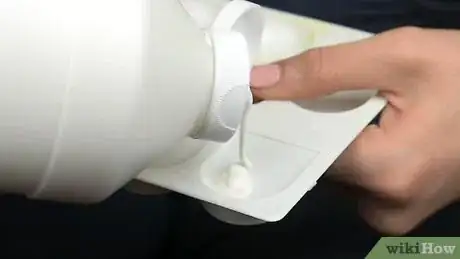
2Put transparent mixing white onto your palette. If you use titanium white to paint the rain, it will cover too much of your painting and make it look as though the rain is sitting on top of the painting. To help the rain blend into your work, squirt transparent mixing white onto the palette instead.
- Transparent mixing white isn't as opaque as titanium white so you'll be able to see the acrylic painting underneath it.
Advertisement -
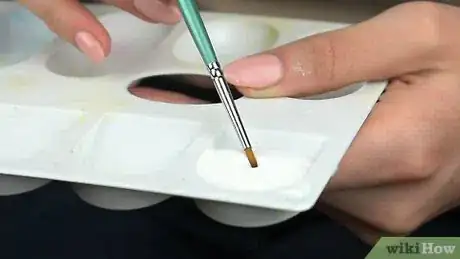
3Dip a dry flat brush into the transparent mixing white. Take a 3 to 4 in (7.6 to 10.2 cm) wide flat brush and touch just the edge of the bristles into the transparent mixing white. Then, hold the brush vertically and tap it onto your palette a few times to distribute the white.[2]
- If your brush is still wet, it will just smear the transparent mixing white, which will make your painting appear cloudy.
-
4Swipe the brush diagonally across your painting to create sheets of falling rain. If you want to give your painting the appearance of a rainstorm with sheets of rain falling in waves, drag your brush at an angle from the top corner of your canvas down to the bottom.[3] Use a light touch to lightly cover your painting with rain falling at an angle.[4]
- If you're painting a heavy storm, you may want to go over the canvas a few times.
-
5Use a small round brush to add individual streaks of rain. To make rain in the foreground stand out more, switch to a small flat brush with firm bristles. Dip it into the transparent mixing white and use a light touch to draw a dashed line. Each of the short strokes you make in the line will look like rain that's blurring as it falls to the ground.[5]
- Paint the streaks in the same angle.
- To make streaks in the foreground stand out more, you could mix a little titanium white into the transparent mixing white so it's more opaque.
-
6Add raindrops to subjects that are close in the foreground. To give your painting a realistic look, paint raindrops that have landed on these subjects. Use your liner brush to paint a tiny circle that's a little darker than the subject's color. Then, mix a little white into the paint and use it to paint a sliver on the bottom 1/2 of the circle. Add a dot of pure white near the top of the circle.[6]
- The dot will make the circle look like light is reflecting off of the raindrop.
-
7Paint splash marks where the rain might hit a hard surface. If you painted a water source, such as a pond or river, or made a street or sidewalk, you'd see rain bounce off of that surface. Take a tiny liner brush and dip it into the transparent mixing white. Then, make a few vertical flecks or "V" shapes to indicate water splashing up.[7]
- You don't need to paint splash marks on grass since the ground would absorb the rain.
Creating Rain on a Watercolor Painting
-
1Paint a watercolor picture and let it dry completely. It's important to make your watercolor painting on a thick material that can withstand a lot of moisture. Then, take the time to let the watercolor dry thoroughly or you'll accidentally make the paint run when you add the rain.[8]
- You can add rain to any type of painting, a city scene with towering buildings, a rural lane near a river, or a person walking with an umbrella, for instance.
- To speed up the drying process, hold a warm blowdryer about 3 inches (7.6 cm) from the surface of the painting. Avoid using high heat which could cause the paper to curl.
-
2Splatter drops of water to create large drops of rain on your painting. If you'd like to give the effect that you're looking through a rain-splattered window, dip your hand into plain water and flick your fingers in front of the painting. The drops of water hitting the watercolor will cause them to run a little, which will look like drops of rain sliding down.[9]
- If you want smaller drops of rain, dip a small round brush into plain water. Then, pull back the bristles with your thumb so the water splatters onto the painting.
-
3Squirt white gouache onto a palette. It's difficult to add watercolor paint on top of a watercolor painting without reactivating the paint. Since watercolor is transparent, you wouldn't be able to see rain. Fortunately, you can use gouache, which is like a heavier, more opaque version of watercolor paint.[10]
- You could add a touch of grey gouache paint if you want your rain to look dull.
Did You Know? Although you can dilute gouache paint as you do with watercolor, avoid diluting the gouache for your rain. This will help it sit on top of the painting and stand out.
-
4Dip a round size 0 paintbrush into the gouache. Put just enough paint to cover the tip of the brush without loading the center of the bristles with paint. This will make it easier to lightly paint the streaks of rain.[11]
- If you don't have a size 0 brush, you could use a 1 but you'll have to use an even lighter touch when you apply the paint.
-
5Make short strokes in a line to create streaks of rain. Place your paintbrush where you'd like to make the rain on your scene. Start near the top of your paper or canvas and make tiny, quick strokes down and at an angle.[12] Move your paintbrush over and make more rain streaks that are at the same angle.[13]
-
6Flick the paintbrush on the canvas to make splash marks. Look for hard surfaces or water sources in your painting since rain would bounce up off of them. Take a flat paintbrush loaded with white gouache and hold it over the painting where you want the splash marks to be. Then, use your thumb to pull back the bristles and slowly let go. The paint will spatter and create tiny splash marks as it lands.[14]
- Cover any part of the painting that you don't want to spatter with a piece of paper. This will give you more control over where the paint lands.
- You can also use an old toothbrush instead of a paintbrush.
Expert Q&A
-
QuestionHow do you paint realistic droplets?
 Jeanine Hattas WilsonJeanine Hattas Wilson is a Professional Painter and the President of Hattas Public Murals, Inc. With nearly 20 years of experience, Jeanine specializes in creating, overseeing, designing, and painting murals. Jeanine holds a BA in Advertising from Marquette University and a Studio Painting Minor from The Milwaukee Institute of Art & Design. She has studied at The Atelier Artien in Paris, France, Los Angeles Academy of Figurative Art, and under renowned artists such as Robert Liberace, Michael Siegel, and William Cochran. To date, Hattas Public Murals has painted nearly 5,000 commissioned works of art in homes and commercial and public spaces.
Professional Painter Dip a paintbrush into some white or gray paint, depending on the color scheme of your painting. Then, wipe the paint off with a rag. Drag your dry brush vertically down the canvas to create subtle, realistic hints of rain falling down.
 -
QuestionHow do you paint rain puddles?
 Jeanine Hattas WilsonJeanine Hattas Wilson is a Professional Painter and the President of Hattas Public Murals, Inc. With nearly 20 years of experience, Jeanine specializes in creating, overseeing, designing, and painting murals. Jeanine holds a BA in Advertising from Marquette University and a Studio Painting Minor from The Milwaukee Institute of Art & Design. She has studied at The Atelier Artien in Paris, France, Los Angeles Academy of Figurative Art, and under renowned artists such as Robert Liberace, Michael Siegel, and William Cochran. To date, Hattas Public Murals has painted nearly 5,000 commissioned works of art in homes and commercial and public spaces.
Professional Painter Paint a dark reflection of something into the puddle. Then, move your brush horizontally across that reflection to give the puddle a more distorted look.
Things You'll Need
Adding Rain to an Acrylic Painting
- Acrylic painting
- Paintbrushes
- Palette
- Transparent mixing white
Creating Rain on a Watercolor Painting
- Watercolor painting
- Small round paintbrush
- Palette
References
- ↑ https://youtu.be/0_4ghkAaEzw?t=391
- ↑ https://youtu.be/PSJqKB20P54?t=1602
- ↑ Jeanine Hattas Wilson. Professional Painter. Expert Interview. 11 May 2021.
- ↑ https://youtu.be/PSJqKB20P54?t=1627
- ↑ https://youtu.be/0_4ghkAaEzw?t=427
- ↑ https://youtu.be/UNockuYHw-o?t=110
- ↑ https://youtu.be/0_4ghkAaEzw?t=448
- ↑ https://watercolorpainting.com/blowdryer/
- ↑ https://youtu.be/PvYQnAoC3Cw?t=273
- ↑ https://www.creativebloq.com/illustration/how-paint-gouache-21619154
- ↑ https://www.dickblick.com/info/brushpdf/brushsizing.pdf
- ↑ Jeanine Hattas Wilson. Professional Painter. Expert Interview. 11 May 2021.
- ↑ https://youtu.be/ubnEnKCngws?t=955
- ↑ https://youtu.be/129suvTDvyc?t=153
