This article was co-authored by Ez's Painting LLC. Ez's Painting LLC is a team of Painting Professionals based in Olympia, Washington. With more than twelve years of experience, the EZ's Painting team specializes in both commercial and residential painting projects. Ez's Painting LLC holds a contractor license in the state of Washington.
There are 12 references cited in this article, which can be found at the bottom of the page.
This article has been viewed 20,009 times.
When you want a completely smooth and professional-looking finish on your painted furniture, using a paint sprayer is the way to go. A spray gun might be just what you’re looking for to transform an old end table, chair, or dresser and give it a fresh new look. You’re sure to be pleased with how much quicker and more convenient using a spray gun is compared to those messy brushes and rollers you’re used to!
Steps
Safety and Furniture Prep
-
1Put on protective eyewear and a respirator. Wear a pair of safety glasses or goggles to cover your eyes and keep dust and paint out of them. Use a respirator mask to protect your lungs from dust and fumes while you work.[1]
- If you don’t have protective eyewear and a respirator, put on a pair of old sunglasses and a disposable facemask to provide at least some protection.
-
2Set up a drop-cloth-covered paint station in a well-ventilated area. Work somewhere like an open garage, a driveway, or a yard. Lay down a plastic or canvas drop sheet on the ground to protect it from paint.[2]
- If you’re working outdoors, make sure the weather is dry and there isn’t a lot of wind.
- If you’re working inside, cover any nearby items you don’t want to get any paint on by accident with plastic or canvas drop cloths as well. Alternatively, hang drop cloths up to create a makeshift paint booth.
Advertisement -
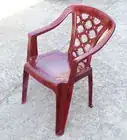
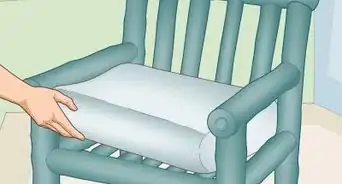
3Remove all hardware from the furniture. Unscrew hardware like handles, knobs, and hinges. Place all the hardware in a safe place, such as a bowl, a jar, or another type of container.[3]
- This ensures you don’t get any paint on the hardware and that it doesn’t get in the way of a smooth, even finish.
-
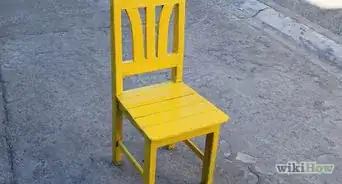
4Sand your piece of furniture if it is wooden.[4] Start with coarser-grit sandpaper, such as 120-grit sandpaper. Put a piece of the sandpaper on a sanding block and move it back and forth over all the furniture’s surfaces, going with the grain of the wood, to rough it up. Repeat the process with finer-grit sandpaper, such as 220-grit sandpaper, to smooth the wood out.[5]
- Sanding the wood helps the paint adhere and results in a smoother finish.
-
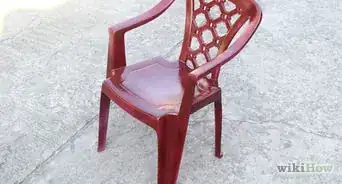
5Use a wire brush and 220-grit sandpaper to smooth out metal furniture. Scrub all the surfaces of the metal piece of furniture vigorously with a wire brush to remove any bits of rust, flaking paint, and other debris. Put a piece of 220-grit sandpaper on a sanding block and rub it all over the metal furniture, using circular motions, to smooth out the surfaces.[6]
- If there are any hard-to-reach nooks and crannies on your metal furniture, fold up a piece of sandpaper into a small square and use it to sand in these spots to ensure you smooth them out as well.
-
6Clean up sanding dust with a tack cloth and a shop vac. Wipe your piece of furniture down thoroughly with a tack cloth to remove dust from sanding.[7] Use a shop vac to suck up piles of dust from the ground.[8]
- Any sanding dust left behind may end up finding its way into your paint finish, so be thorough about cleaning it up.
- If your piece of furniture is metal, dampen the tack cloth first or use a damp microfiber cloth to wipe down the surfaces after sanding. Let the metal dry completely before you proceed to paint it.


Paint and Spray Gun Setup
-
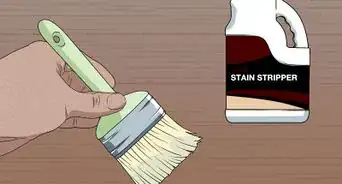
1Choose a stain-blocking primer for any wood furniture.[9] A Stain-blocking primer creates a barrier between the wood and the paint that prevents tannins from the wood from bleeding through into the paint. Use a water-based primer if you’re using water-based paint or use an oil-based primer if you’re using oil-based paint.[10]
- If you don’t use a stain-blocking primer, tannins that bleed through the paint can result in discoloration on the paint’s surface.
-
2Pick water-based latex paint for wood furniture that gets used lightly. Latex paint is very affordable and is convenient to use because it dries the fastest out of all types of paint. However, it is not as durable as other types of paint, so don’t use this type of paint on furniture that gets used frequently.[11]
- For example, avoid using water-based latex paint on a coffee table or dinner table that you use daily. Something like a table or shield that just holds decorative items might be a better candidate for latex paint.
-
3Select alkyd-based oil paint for wood furniture that gets used heavily. Oil-based paints are much harder and more durable than water-based paints. These types of paints will protect furniture that gets used a lot against scuffs, paint chips, and other damage.[12]
- Note that alkyd-based oil paints dry more quickly than plant-based oil paints, which is why they are a better choice for painting furniture.[13]
-
4Opt for primer and paint formulated for metal if your furniture is metal. Choose oil-based paint for outdoor items or indoor items that get used heavily. Pick water-based paint for indoor items that don’t get used a lot. Make sure your primer and paint match in type.[14]
- Paints that aren’t formulated for metal don’t adhere well to metal surfaces, so always use metal-specific paint and primer.
-
5Strain your paint through a paint strainer and thin it with water or paint thinner. Pour the paint from the can straight through a paint strainer into a clean container to filter out lumps and impurities. Thin your paint by mixing it with about 5-15% water for water-based paint and 5-15% paint thinner for oil-based paint so it works smoothly in the paint gun.[15]
- Refer to your paint gun’s owner’s manual for any specific manufacturer recommendations about thinning your paint.
- Do this for both your paint and your primer if you’re planning to spray on the primer as well.
-
6Connect your spray gun to an air compressor and turn it on. Screw the compressed air hose onto the hole in the handle of the spray gun. Turn on the air compressor at the PSI specified by your spray gun’s manufacturer and wait for the pressure to build up to the correct PSI range.[16]
- This applies to compressed air-powered paint sprayers, such as an HVLP spray gun.
- If you’re working with an airless paint sprayer, turn on the spray gun’s motor instead of using an air compressor.


Primer Application
-
1Pour primer into the paint gun’s paint cup until it’s 2/3 of the way full. The paint cup is the canister that screws onto the paint gun. Lock the cup tightly into place on the paint gun after you pour the primer in.[17]
- Alternatively, prime your furniture with a brush or roller instead of using your spray gun. That way, you don’t have to clean the spray gun after you prime the furniture.
-
2Hold the paint gun about 12 in (30 cm) away from the furniture. Point the nozzle straight at the surface of the furniture, starting at one end of the piece. Avoid angling the tip of the gun or the finish will be uneven.[18]
- Don’t start spraying until you have the spray gun in the correct position.
-
3Press the trigger and spray across the whole surface from 1 end to the other. Hold down the trigger and move the nozzle of the spray gun across the whole piece of furniture in 1 long, even stroke. Release the trigger when the tip of the gun passes the other end of the furniture.[19]
- If you want to test the spray gun out first, do so on a piece of cardboard or a scrap piece of wood to get a feel for it.
-
4Cover the whole piece of furniture in primer using overlapping passes. Press down the trigger again and move the gun across the furniture back in the other direction, overlapping the first section you painted. Release the trigger when the nozzle passes the other end of the furniture. Repeat this process until you cover the whole piece in an even coat of primer.[20]
- The ideal amount of overlap between passes is about 1 in (2.5 cm). This avoids any uneven spots in the coat.
-
5Rinse the paint gun’s parts out with water or paint thinner. Use water to clean up water-based primers and use paint thinner to clean up oil-based primers. Remove the paint gun’s nozzle and soak it in a container of the solvent. Rinse out the paint cup and run solvent through the lines of the sprayer to clean everything out.[21]
- If you let primer or paint dry in your spray gun, it clogs it up and causes it to sputter and spatter paint instead of spray smoothly and evenly.
- Refer to your paint gun’s owner’s manual for specific cleaning instructions.
-
6Let the primer dry then sand it lightly with 800-grit sandpaper. Wait at least 30 minutes to 1 hour for the primer to dry, or however long the manufacturer recommends. Put a piece of 800-grit sandpaper on a sanding block and sand with the grain of the wood all over the piece to smooth out any bumps in the primer. Wipe off dust with a tack cloth.[22]
- This applies to both metal and wood furniture. Always sand using fine-grit sandpaper between coats of primer and paint.
- The goal here isn’t to sand off much of the primer, it’s just to get rid of any air pockets and roughness in the application.
- If your piece of furniture has an underside, flip it over and repeat the process to apply a coat of primer to the bottom, then clean out your spray gun again and wait another 30-60 minutes before you sand the whole piece of furniture.


Paint Coats and Final Touches
-
1Apply a coat of paint the same way you applied the primer. Fill your paint gun’s paint cup about 2/3 of the way with the paint. Aim the nozzle straight at the furniture, about 12 in (30 cm) away, and spray it all over using long, even strokes. Overlap each pass by about 1 in (2.5 cm) to ensure an even finish.[23]
- If you applied primer with a brush or roller instead of with your sprayer, refer to the primer application instructions in the section above for more detailed paint application techniques. Spraying on paint works just like spraying on the primer.
-
2Clean out your paint gun with water or paint thinner. Use water for water-based paints and paint thinner for oil-based paints. Empty out any leftover paint from the paint cup and fill it up with the water or paint thinner. Spray the liquid out until it runs clear.[24]
- If the liquid doesn’t run clear, repeat the process or take the sprayer apart and rinse the parts separately.
-
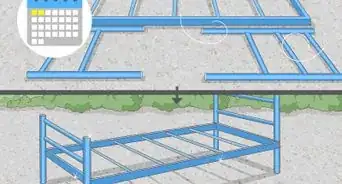
3Wait 4-8 hours for the paint to dry then lightly sand it with 800-grit sandpaper. Put a piece of sandpaper on a sanding block and sand lightly, going with the grain of the wood, all over the first coat of paint to smooth out any imperfections. Wipe the furniture down with a tack cloth after sanding it.[25]
- Most water-based paints are dry enough to sand within 4 hours, while some oil-based paints take 6-8 hours to dry.
- Refer to the paint manufacturer’s instructions for specific drying times if you aren’t sure how long to wait before you sand.
- If the piece of furniture has a bottom to paint, go ahead and flip it over and apply the first coat of paint to the underside as soon as the paint is dry to the touch. This usually takes about 1 hour for water-based paint and 4 hours for oil-based paint. Remember to clean your spray gun out again after spraying the bottom.
-
4Spray on a second coat of paint using the same techniques. Fill the paint cup up with paint about 2/3 of the way again and lock it onto the spray gun. Hold the tip of the gun 12 in (30 cm) away from 1 end of the furniture, hold the trigger down, and make 1 long, even pass over the piece. Keep making overlapping passes in the same way until you finish applying the second coat. Clean your spray gun out with water or paint thinner when you finish.[26]
- Any piece of furniture should look good after 1 coat of primer and 2 coats of paint.
- If you painted the underside of your furniture, it’s up to you whether or not to apply a second coat. If the bottom is not that visible and the first coat looks good, you may opt not to flip over the furniture again and spray on a second coat to save time.
-
5Add a coat of polyacrylic sealer if the furniture gets used heavily. Use your paint sprayer and follow the same process as applying water-based paint and primer to spray the coat of sealer on. Clean your spray gun out with water afterward.[27]
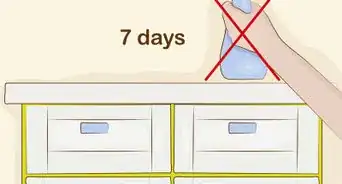
- Make sure your final coat of paint is dry before you seal it. Wait a full 24 hours before spraying on the sealer to be extra safe.
- Polycrylic sealer is water-based and easy to work with. It’s safe to apply on top of either water-based paint or oil-based paint.
- Polycrylic sealer dries to the touch in about 30 minutes and is safe to handle after 1 hour. If you want to apply 2-3 coats to heavily used furniture, wait 1 hour between each coat.
-
6Reattach all the furniture’s hardware and clean up your workspace. Screw all handles, knobs, and other hardware back into place on the piece of furniture. Gather up your drop sheets and fold them for storage or dispose of them if they’re one-time-use.[28]


Community Q&A
-
QuestionWhich paint spray gun is best for furniture painting?
 Wiliiam-jamesCommunity AnswerEarlex and Wagner HVLP sprayers are good choices for furniture painting (as per my experience).
Warnings
- Always wear protective eyewear and a respirator or facemask when you’re spraying paint.⧼thumbs_response⧽
Things You’ll Need
- Protective eyewear
- Respirator
- Spray gun
- Primer
- Paint
- Paint strainer
- Water or paint thinner
- Container
- Tack cloth
- Sanding block
- 120-, 220-, and 800-grit sandpaper
- Air compressor
- Drop cloths


References
- ↑ https://sawsonskates.com/paint-sprayer-mistakes/
- ↑ https://flawedyetfunctional.com/home/spray-paint-wood-furniture/
- ↑ https://www.toolnerds.com/wood-furniture-painting/
- ↑ Ez's Painting LLC. Painting Professionals. Expert Interview. 12 January 2022.
- ↑ https://flawedyetfunctional.com/home/spray-paint-wood-furniture/
- ↑ https://www.bobvila.com/articles/how-to-paint-metal/
- ↑ Ez's Painting LLC. Painting Professionals. Expert Interview. 12 January 2022.
- ↑ https://flawedyetfunctional.com/home/spray-paint-wood-furniture/
- ↑ Ez's Painting LLC. Painting Professionals. Expert Interview. 12 January 2022.
- ↑ https://www.bobvila.com/articles/best-paint-to-use-on-wood/
- ↑ https://www.bobvila.com/articles/best-paint-to-use-on-wood/
- ↑ https://www.bobvila.com/articles/best-paint-to-use-on-wood/
- ↑ Ez's Painting LLC. Painting Professionals. Expert Interview. 12 January 2022.
- ↑ https://www.bobvila.com/articles/best-paint-for-metal/
- ↑ https://sawsonskates.com/paint-sprayer-mistakes/
- ↑ https://www.toolnerds.com/paint-sprayer-with-air-compressor/
- ↑ https://www.toolnerds.com/paint-sprayer-with-air-compressor/
- ↑ https://www.thisoldhouse.com/painting/21017851/paint-sprayers
- ↑ https://www.thisoldhouse.com/painting/21017851/paint-sprayers
- ↑ https://www.thisoldhouse.com/painting/21017851/paint-sprayers
- ↑ https://www.thisoldhouse.com/painting/21017851/paint-sprayers
- ↑ https://flawedyetfunctional.com/home/spray-paint-wood-furniture/
- ↑ https://www.thisoldhouse.com/painting/21017851/paint-sprayers
- ↑ https://www.bobvila.com/articles/30129-dream-it-do-it-how-to-paint-cabinets-with-a-paint-sprayer/
- ↑ https://flawedyetfunctional.com/home/spray-paint-wood-furniture/
- ↑ https://www.thisoldhouse.com/painting/21017851/paint-sprayers
- ↑ https://www.apartmenttherapy.com/how-to-paint-furniture-222412
- ↑ https://www.bhg.com/kitchen/cabinets/makeovers/kitchen-cabinet-paint/
About This Article