This article was co-authored by wikiHow Staff. Our trained team of editors and researchers validate articles for accuracy and comprehensiveness. wikiHow's Content Management Team carefully monitors the work from our editorial staff to ensure that each article is backed by trusted research and meets our high quality standards.
There are 16 references cited in this article, which can be found at the bottom of the page.
The wikiHow Video Team also followed the article's instructions and verified that they work.
This article has been viewed 609,914 times.
Learn more...
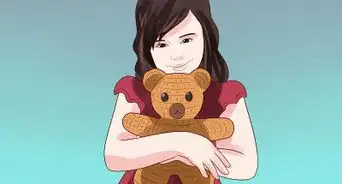
Teddy bears make cute and cuddly keepsakes and toys for kids and adults alike. If you’ve ever wanted to make a teddy bear, it’s easy to do! You can use any kind of fabric, use a sewing machine or hand sew your bear, and then personalize it however you like. Try making one for yourself or as a gift for someone special.
Steps
Fabric Cutouts
-
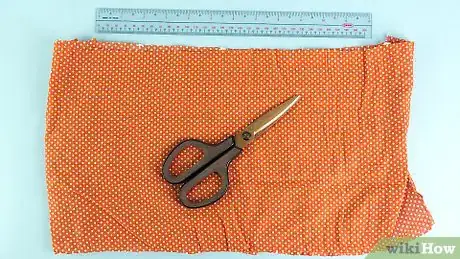
1Choose soft fabric with your preferred print or color. You can use any type of fabric you like for the bear, but make sure that you have enough to cut out 2 pieces of your pattern. For a bear that’s around 15 by 8 in (38 by 20 cm), you’ll need about 1⁄2 yd (0.46 m) of fabric.[1]
Tip: For a sentimental touch, use fabric from an old pillowcase, a favorite t-shirt, or a baby blanket to make the teddy bear. Just make sure it’s something you’re okay with cutting up first.
-
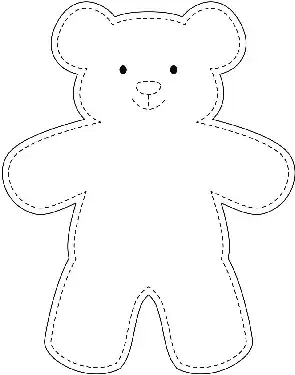
2Draw or print a teddy bear template to cut your fabric. You can find a free teddy bear-shaped template online, or draw your own on a piece of paper. Make the bear as small or as large as you want it to be.[2]
- If you’re printing a template, you can also adjust the size of the bear by enlarging or shrinking the image before you print it.[3]
Advertisement -
3Cut along the lines on the paper pattern. Use a sharp pair of scissors to cut out your template. Cut slowly and follow the lines carefully to ensure that you don’t end up with any jagged edges. Discard the excess paper after you cut out the template.[4]
- Make sure that your template includes the seam allowance. If not, cut about 1⁄2 in (1.3 cm) outside of the lines all the way around the template to provide a seam allowance.
-
4Fold a piece of fabric in half and place the pattern over it. Smooth out the fabric so there are no lumps or bumps in it. Then, pin the paper pattern to the fabric. Make sure to pin through both layers of fabric so they don’t slip while you cut. Place 1 pin every 2–3 in (5.1–7.6 cm) all the way around the edges of the pattern.[5]
-
5Cut the fabric along the edges of the paper pattern. Use a sharp pair of fabric scissors to cut along the edges of the paper pattern. Go slowly to avoid creating any jagged edges in the fabric. After you finish cutting, unpin the pattern from the fabric and set it aside.[6]
- You can keep the pattern and use it again to make more bears if desired.
Sewing Assembly
-
1Pin the 2 fabric pieces together, outer printed sides facing each other. Line up the edges of the 2 pieces so they are even. Then, insert 1 pin every 2–3 in (5.1–7.6 cm) along the outer edges of the fabric.[7] However, leave a 3 in (7.6 cm) section of the leg unpinned.[8]
- This gap in the bear’s leg will be necessary to turn the fabric right side out and to insert the stuffing into the bear’s body.[9]
-
2Sew a straight line to secure the 2 pieces. You can do this by machine or by hand. If you’re using a sewing machine, select the straight stitch setting, which is usually number 1. Then, sew along the pinned areas of the fabric to secure the 2 pieces together. If you’re sewing by hand, thread a needle with all-purpose thread in the color of your choice and hand sew in a straight line along the edges to connect the 2 pieces. Position your stitches about 1⁄2 in (1.3 cm) from the edges of the fabric.[10]
- Remember to leave the unpinned area on the leg open so you can invert the teddy bear when you are done.
- Remove the pins as you sew.
Warning: If you’re using a sewing machine, do not sew over the pins or you may damage the machine.
-
3Cut notches in the edges of the fabric going all the way around the seam. After you complete the seam, use a sharp pair of scissors to cut 1⁄4 in (0.64 cm) notches in the fabric going all the way around the edges. This will reduce the bulk along the curves in your teddy bear.[11]
- Be careful not to cut through the seams when you do this. Only cut notches in the fabric along the seams.
-
4Turn the teddy bear right side out. Use the opening you left in the leg to grasp and pull the fabric through. You may also want to use a wooden spoon to push the fabric out, especially at the ends of the bear’s arms, legs, and ears.[12]
-
5Stuff the bear through the opening in the leg. Push stuffing into the gap in the bear’s leg and all the way into the ends of the legs, arms, ears, and head. Keep stuffing the bear until it is plump. Use a wooden spoon to push the stuffing into hard to reach spots, such as the ends of its legs and arms.[13]
- You can use polyfill fiber stuffing, cotton balls, scrap fabric, or even yarn to fill the teddy bear.
-
6Pin up the gap in the bear’s leg. Once you are happy with the level of stuffing, fold over the edges of the fabric along the opening in the bear’s leg. Press the edges of the fabric together to close the gap in the leg and poke the filling back into the leg if needed. Then, insert 2 to 3 pins to secure the fabric together along the opening.[14]
-
7Sew a stitch by hand along the pinned edge to close the leg. Thread a needle with the same color thread you used to sew the seam, then tie a knot in the end of the thread. Insert the needle into the fabric about 1⁄4 in (0.64 cm) from the folded edges of the pinned area. Then, bring it back through about 1⁄4 in (0.64 cm) up on the other side. Bring it back through all the way, pull the thread taut, and then repeat. Keep sewing until the gap is closed.[15]
- Tie a knot to secure the thread at the end of the seam and cut the excess thread about 1⁄4 in (0.64 cm) from the knot.
- Make sure that you remove the pins after you finish sewing.
Embellishments
-
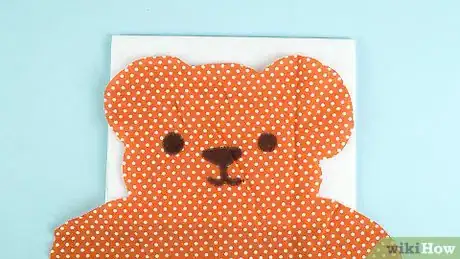
1Draw the eyes, nose, and mouth on the fabric for a quick and easy face. If you have a fabric marker that will show up on your fabric, you can use it to draw a face on your teddy bear. Draw eyes, a nose, and a mouth. Make your bear look happy, sad, grumpy, or surprised depending on what you want.[16]
- For example, you could draw 2 circles with dots in the center of them and raised eyebrows for a look of surprise, a big toothy grin for a happy bear, or a straight line for a neutral expression.
Tip: Make sure that the marker is permanent so it won’t fade or wash off the first time you launder the bear.
-
2Sew 3 buttons on for a pair of eyes and a nose. This will give your bear a cute, homemade look. Thread a needle and sew 2 buttons onto the face for the eyes. Sew 1 button on for the nose. Insert the needle in and out of the fabric and all holes in each button to secure them well. Then, cut the thread as close to the button as possible.[17]
- You may want to sew the buttons onto the fabric before you sew the 2 pieces together. This will enable you to tie knots on the back side of the fabric, which will make the buttons more secure.
- Try using 2 like-sized buttons for the eyes and a larger button for the nose.
-
3Glue on eyes, nose, and a mouth if you don’t want to draw or sew. Another way to attach your bear’s facial features is to use fabric glue or hot-glue to secure them. Choose buttons, plastic eyes, or cut out fabric facial features. Apply the glue to the fabric where you want to attach the buttons, plastic eyes, or fabric facial features and then press them into place. Let the fabric glue dry overnight, or let the hot glue dry for 30 minutes. Don’t move the teddy bear until the glue has dried completely.[18]
- If using hot glue, let the glue gun warm up for at least 10 minutes before using it. Be careful not to get any of the glue on your skin since it can burn you.
-
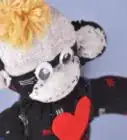
4Add extra embellishments to personalize your bear. As a special finishing touch for your bear, tie a ribbon around its neck, put a teddy bear t-shirt on it, or write its name on a small scrap of fabric and glue it onto the bear like a nametag. You can also draw on the bear, add extra buttons, or glue patches onto it if desired.[19]
- For example, you could glue 3 buttons in a vertical row on the bear’s stomach to give the appearance of shirt buttons.
- Or, get a heart-shaped patch and glue it onto the bear’s chest where its heart would be.
Sewing Guide
Community Q&A
-
QuestionCan I use something other than buttons?
 Community AnswerYes, you could use any round objects that can be sewn onto your bear, like round pieces of fabric. Buttons are easy because they have holes in them for the thread though.
 -
QuestionWere do l buy the things needed to make a teddy bear?
 Community AnswerYou could buy them from any craft or fabric store like Hobby lobby, Michael's, or Jo-Ann fabrics.
 -
QuestionWhich material would be better for using as stuffing?
 Community AnswerYou could use cotton balls or old stuffing (perhaps from other stuffed animals). Cotton batting is also a popular stuffing material.
Things You'll Need
- Teddy bear template
- Scissors
- Pins
- 1⁄2 yd (0.46 m) of fabric
- Sewing machine or needle
- Thread
- Polyfill stuffing, scrap fabric, cotton balls, or yarn
- Fabric marker (optional)
- Buttons (optional)
- Embellishments, such as patches, ribbon, scrap fabric, etc. (optional)
References
- ↑ https://www.youtube.com/watch?v=gt6lSdxmpO8&feature=youtu.be&t=30
- ↑ https://www.youtube.com/watch?v=gt6lSdxmpO8&feature=youtu.be&t=10
- ↑ https://ourpastimes.com/how-to-make-an-easy-teddy-bear-12214710.html
- ↑ https://www.youtube.com/watch?v=gt6lSdxmpO8&feature=youtu.be&t=15
- ↑ https://www.youtube.com/watch?v=gt6lSdxmpO8&feature=youtu.be&t=50
- ↑ https://www.youtube.com/watch?v=gt6lSdxmpO8&feature=youtu.be&t=60
- ↑ https://texas4-h.tamu.edu/wp-content/uploads/DudsDazzle_Resource_Simple_Seaming_Techniques_11.110._SEW-lutions_Guidelines_Your_Guide_to_Successful_Sewing.pdf
- ↑ https://www.youtube.com/watch?v=gt6lSdxmpO8&feature=youtu.be&t=80
- ↑ https://www.youtube.com/watch?v=gt6lSdxmpO8&feature=youtu.be&t=93
- ↑ https://www.youtube.com/watch?v=gt6lSdxmpO8&feature=youtu.be&t=105
- ↑ https://texas4-h.tamu.edu/wp-content/uploads/DudsDazzle_Resource_Simple_Seaming_Techniques_11.110._SEW-lutions_Guidelines_Your_Guide_to_Successful_Sewing.pdf
- ↑ https://www.youtube.com/watch?v=gt6lSdxmpO8&feature=youtu.be&t=120
- ↑ https://www.youtube.com/watch?v=gt6lSdxmpO8&feature=youtu.be&t=132
- ↑ https://www.youtube.com/watch?v=gt6lSdxmpO8&feature=youtu.be&t=150
- ↑ https://www.youtube.com/watch?v=gt6lSdxmpO8&feature=youtu.be&t=160
- ↑ https://www.youtube.com/watch?v=gt6lSdxmpO8&feature=youtu.be&t=175
- ↑ https://www.youtube.com/watch?v=gt6lSdxmpO8&feature=youtu.be&t=175
- ↑ http://blog.consumercrafts.com/craft-basics-main/how-to-hot-glue-tips/
- ↑ https://ourpastimes.com/how-to-make-an-easy-teddy-bear-12214710.html
About This Article
If you want to make a cute and cuddly teddy bear as a toy for a child or a keepsake for an adult, all you need is fabric, stuffing, and some embellishments! Pick a soft fabric with a print or color that you know they’ll like. Once you have a fabric, fold it in half and pin a template of a teddy bear to it. You can then cut out the shape and sew it together. Stuff your teddy bear with cotton balls, scrap fabric, yarn, or polyfill fiber. Also, gather some buttons, fabric, or markers to add embellishments to your teddy bear's face and body. To learn how to personalize your bear, keep reading!
