This article was co-authored by Aaron Beth. Aaron Beth is the founder of Aaron’s Refrigeration Company in New York City and a factory certified installer (FCI) for Sub-Zero products. He specializes in the service and maintenance of built-in refrigerators, wine coolers and ice machines. With over 54 years of experience, Aaron is the recipient of numerous Super-Service awards from Angie’s Lists and 2019 Best-of-the City.
This article has been viewed 325,009 times.
When your refrigerator door refuses to close, either the refrigerator has a faulty gasket (the rubber seal that forces your door to close), or your door hinges need to be tightened. Depending on the cause, you can make your refrigerator door close completely by either replacing your refrigerator gasket, or by tightening the hinges on your refrigerator door using a screwdriver or placing shims (wedges or materials used to fit or align certain objects) between your door hinges.
Steps
Replace the Gasket
-
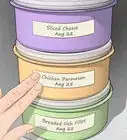
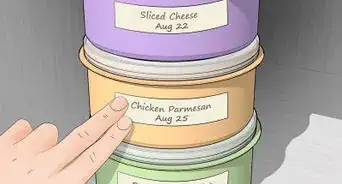
1Verify that your refrigerator's gasket needs to be replaced.[1]
- Place a thin piece of paper between your refrigerator door jamb and the gasket.
- Pull the paper out from the refrigerator door. If the paper comes out easily without resistance, the problem with your door closing lies with the faulty gasket.
-
2Determine the type of gasket needed for your refrigerator model.[2]
- Consult the manual for your refrigerator to determine its model. You can find the model type printed inside or on the cover of the manual.
- If you cannot determine the model of your refrigerator, contact the manufacturer directly by visiting their website or calling the phone number provided in the manual.
- You can also cut out a small piece of your gasket from the refrigerator door and match it to the gaskets in stock at a retail store that specializes in home repair or refrigerators. In the event your gasket needs to be special-ordered, reattach the gasket piece to the refrigerator using glue or rubber cement.
Advertisement -
3Purchase a new gasket. A new gasket can be obtained directly from the manufacturer or from a retail store that sells refrigerators, appliances, or home repair supplies. Just keep in mind, these parts are not universal. You must get a gasket designed for your specific fridge.[3]
-
4Prepare the new gasket for the refrigerator. The gasket must be of the correct temperature to seal and work properly on your refrigerator.
- Consult with the gasket instructions if they are provided with the new gasket to determine the method of preparing it for use with your refrigerator.
- If no instructions are provided, leave the gasket in the same room as your refrigerator for at least 24 hours to allow the gasket to conform to the same humidity and temperature levels of the current gasket.
- You can also try soaking your gasket in warm water until it becomes pliable enough for the seal to work.
-
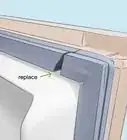
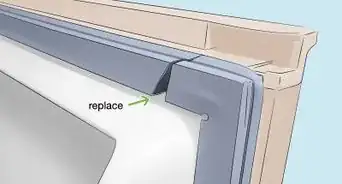
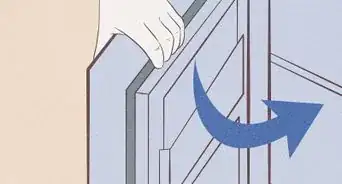
5Remove the defective gasket from the refrigerator. The removal method may differ depending on the properties or materials that hold the gasket in place on your refrigerator.[4]
- Examine the gasket on your refrigerator to determine how it is held in place. The gasket may have adhesive strips, screws, or clips that fasten it to the refrigerator door panel.
- Use the appropriate tools or methods to remove the defective gasket. For example, if the gasket is held in place by screws, use a screwdriver to remove the screws. If adhesive strips are in place, use a putty knife to pry the gasket away from the refrigerator door panel.
- Pull the gasket away from the door panel one side at a time. This will allow you to verify that all fastening components have been completely removed, preventing pieces of the gasket from breaking off and being left on the door panel otherwise.
-
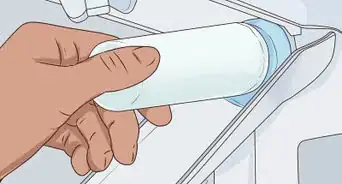
6Clean the gasket mounting area on the refrigerator. This will allow you to remove any residue that has been left behind from the old gasket; such as adhesive or dirt that may present difficulty when applying the new gasket.
- Use a sponge with liquid dishwashing detergent and warm water to clean away remaining residue. You may use a steel wool scrubbing pad in place of the sponge to clean any stubborn residue that is difficult to remove.
-
7Obtain the supplies needed to attach the new gasket. Depending on the manufacturer of the gasket and refrigerator, the tools needed to attach the gasket may vary.
- Refer to the instructions of your new gasket to determine which supplies are needed; such as screwdrivers, adhesive tape, or gasket cement.
-
8Attach the new gasket to the door panel.[5]
- Apply the gasket to the door panel one side at a time; ensuring that each side is straight and aligned properly.
- Smooth down each side to ensure it lies flat against the door panel without any bumps, or curling edges.
- Use the tools and supplies indicated by the manufacturer to secure the gasket to the door panel; such as screws, bolts, clips, adhesive, or gasket cement.
- If you use gasket cement or adhesive glue to fasten the new gasket, you may need to allow the materials to dry before you can begin opening and closing your refrigerator door again.


Tighten the Door Hinges
-
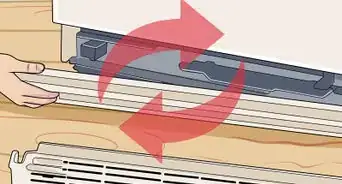
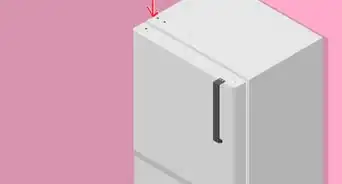
1Determine how to tighten your refrigerator door hinges. This procedure will vary depending on the make and model of your refrigerator.
- Consult your refrigerator's manual to determine how the door hinges can be tightened. If you do not have the manual, contact the manufacturer directly or visit their website to obtain contact information or a copy of the manual.
- Most hinges can be accessed by opening the refrigerator and freezer doors, and will contain hinge caps that can be removed or pried off with a screwdriver.
-
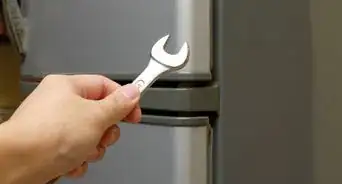
2Tighten your refrigerator door hinges.[6]
- Use a screwdriver or similar tool as required to properly tighten the door hinges.
-
3Use shims to correct additional hinge problems. You may need to place shims between your hinges and the refrigerator door if the door is still loose or refuses to close completely.
- Shims made specifically for refrigerators can be purchased from retail stores that specialize in home repair or refrigerators. You can also use pieces of cardboard in place of metal or stainless steel shims.
- In some cases, you may need to remove shims that have not been properly installed in order to correct sagging or alignment problems with the door.
- If your refrigerator door contains a magnet catch that doesn't work, remove the magnet catch and place a shim underneath to allow the door to properly seal and close.


Expert Q&A
Did you know you can get expert answers for this article?
Unlock expert answers by supporting wikiHow
-
QuestionHow do you fix the seal on a refrigerator?
 Aaron BethAaron Beth is the founder of Aaron’s Refrigeration Company in New York City and a factory certified installer (FCI) for Sub-Zero products. He specializes in the service and maintenance of built-in refrigerators, wine coolers and ice machines. With over 54 years of experience, Aaron is the recipient of numerous Super-Service awards from Angie’s Lists and 2019 Best-of-the City.
Appliance TechnicianYou can't fix the seal on a fridge. It has to be replaced. Those things are typically vinyl, so when they tear or rip, there isn't anything you can do to fix it.
Support wikiHow by unlocking this expert answer.
-
QuestionHow do I seal a refrigerator with a broken floor?
 Allan DogmaCommunity AnswerIt depends on the fridge flooring material. If it's plastic, use another plastic sheet (up to 2 mm thickness) to cover up the broken flooring with super glue. If it's metal, use a cut-out, painted, or non-corrosive metal sheet large enough to cover the broken or damaged part with an epoxy adhesive. In either situation, make sure that the insulation is still intact before patching it.
 -
QuestionOne of the plastic rollers at the bottom of my door has fractured. Where can I buy a replacement?Allan DogmaCommunity AnswerThe brand servicer always has a replacement part you can buy. If the model is already phased out, you can ask them to customize one for you.
Things You'll Need
- Thin piece of paper
- Refrigerator gasket
- Sponge
- Screwdriver
- Putty knife
- Liquid dishwashing detergent
- Steel wool scrubbing pad
- Gasket cement or adhesive
- Refrigerator shims


References
- ↑ https://www.familyhandyman.com/appliance-repair/refrigerator-repair/how-to-replace-a-refrigerator-door-gasket/
- ↑ https://www.familyhandyman.com/appliance-repair/refrigerator-repair/how-to-replace-a-refrigerator-door-gasket/
- ↑ Aaron Beth. Appliance Technician. Expert Interview. 14 July 2020.
- ↑ https://www.dummies.com/home-garden/home-improvement/kitchen-bath-remodeling/how-to-change-the-gasket-on-your-refrigerator-door/
- ↑ https://www.dummies.com/home-garden/home-improvement/kitchen-bath-remodeling/how-to-change-the-gasket-on-your-refrigerator-door/
- ↑ https://www.cnet.com/how-to/refrigerator-door-seal-stops-working/
- http://home.howstuffworks.com/how-to-repair-a-refrigerator2.htm
- http://home.howstuffworks.com/how-to-repair-a-refrigerator3.htm
About This Article