This article was co-authored by wikiHow staff writer, Travis Boylls. Travis Boylls is a Technology Writer and Editor for wikiHow. Travis has experience writing technology-related articles, providing software customer service, and in graphic design. He specializes in Windows, macOS, Android, iOS, and Linux platforms. He studied graphic design at Pikes Peak Community College.
The wikiHow Tech Team also followed the article's instructions and verified that they work.
This article has been viewed 5,877 times.
Learn more...
Do you want to recreate an X-Ray effect in Photoshop? X-rays produce a creepy, ghost-like image. If you have an image of bones or a skeleton, you can add bones to your image. You can create an X-ray effect in just a few simple steps. This wikiHow article teaches you how to create an X-Ray effect in Photoshop.
Steps
Creating an X-Ray Photo Without Bones
-
1Open a photo in Photoshop. This method will help you create an X-ray effect without bones. You only need an image of a person for this effect to work. Once you have a photo, save it to your computer and open it in Photoshop. To do so, simply right-click the photo and click Open with. Then click Photoshop.
- Alternatively, you can open Photoshop and click Open on the title screen. Then select the photo you want to apply the effect to and click Open.
- Photoshop is part of the Adobe Creative Cloud Suite. You can download and install Photoshop using the Creative Cloud desktop application or directly from Adobe's website. You can start a free trial of Photoshop at https://www.adobe.com/products/photoshop.html
- If you don't have a Photoshop subscription, you can do a lot of these same steps using GIMP instead.
-
2Duplicate the background layer. To do so, right-click the background layer in the Layers panel and click Duplicate Layer. Alternatively, you can click Layer in the menu bar at the top and then click Duplicate Layer.
- The Layers panel is generally on the right side. If you do not see it, click Window in the menu bar at the top and then click Layers to open the Layers panel.
Advertisement -
3Add an Invert adjustment. To do so, make sure you have the duplicate layer selected in the Layers panel. Then use the following steps to apply an Invert adjustment.
- Click Image in the menu bar at the top.
- Click Adjustments.
- Click Invert.
-
4Apply a Black & White adjustment. X-rays don't pick up as much blue light. When you add a Black and White adjustment, you will be given the option to adjust the color filter. Lower the blues to give the model a darker skin tone. Make sure you have the duplicate layer selected in the Layers panel and use the following steps to add a Black & White adjustment.
- Click Image in the menu bar at the top.
- Click Adjustments
- Click Black & White.
- Use the slider bar below "Blues" to lower the blue levels.
- Click Ok.
-
5Duplicate the layer again. After applying the Black & White adjustment, right-click the duplicate layer with all the adjustments applied and click Duplicate Layer.
-
6Apply a gaussian blur to the new Layer. This will need to be a pretty heavy gaussian blur that will blur nearly all the details. Select the newest layer you just duplicated and use the following steps to apply a gaussian blur:[1]
- Click Filter in the menu bar at the top.
- Click Blur
- Click Gaussian Blur.
- Click Ok if asked to rasterize the layer.
- Use the slider bar to adjust the blur level until it looks really blurry (about a 50 px radius).
- Click Ok.
-
7Change the layer with the blur to Overlay mode. This will allow the newest layer to blend with the layer below it and give it a ghost-like image. To change the layer mode, select the layer with the gaussian blur filter applied to it and click the drop-down menu at the top of the Layers panel (the one that says "Normal" by default). Select Overlay.
- If the image looks too blurry, you can lower the opacity of the blur layer to about 50%. Use the box that says Opacity at the top of the Layers panel to do so.
-
8Add a new grey Solid Color image. Use the following steps to create a new solid color layer that is about 50% grey:
- Click the icon that resembles a half-black-half-white circle at the bottom of the Layers panel.
- Click Solid Color.
- Select a grey color.
- Click Ok.
-
9Apply just a little bit of noise to the grey Solid Color layer. You'll want to add about 10% noise to the grey Solid Color layer. Make sure you have the grey Solid Color layer selected in the Layers panel and use the following steps to apply a Noise filter:
- Click Filter in the menu bar at the top.
- Click Noise.
- Click Add Noise.
- Click Ok if asked to rasterize the layer.
- Use the slider bar to adjust the blur amount to about 10%.
- Click Ok.
-
10Change the noise layer to Overlay mode. To do so, select the layer you just applied a noise filter to. Then use the drop-down menu at the top of the Layers panel (which says "Normal" by default) and select Overlay.
-
11Apply a light blue solid color layer. To do so, right-click the icon that resembles a half black and half white circle at the bottom of the Layers panel. Then click Solid Color. Select a bluish, turquoise-like color and click Ok.
-
12Set the blue solid color layer to "Hard Light" mode. To do so, click the solid color layer in your Layers panel. Then click the drop-down menu that says "Normal" at the top of the Layers panel. Then select Hard Light from the drop-down menu.
-
13Save your work. To do so, click File in the menu bar at the top. Then click Save as. Type a name for your Photoshop file next to "File Name" and click Save.
-
14Save your image as a JPEG. If you want to be able to send the image to people or post it on social media, you will need to save it as a JPEG. To do so, click File in the menu bar at the top. Then click Save as. Select JPEG in the drop-down menu next to "Format." Then click Save.[2]


Creating an X-Ray Photo With Bones
-
1Get the photos you need. For this method, you will create a simulated photo of an X-ray with bones. In order to do this, you will need a photo of a skeleton or bones. You will also need a photo of a model posing in the exact same position as the skeleton or bones. You can use this effect on a hand, skull, torso, or full-body image.[3]
- You do not need a picture of a real skeleton to do this. You can use a prop skeleton from a costume shop. You can also find images of skeletons on Google Images by searching "Skeleton", "Skeleton hand", "skull", etc. Just remember that most photos you find on Google Images are copyright and not free to use for commercial use. However, you can use them for personal use or just to experiment with.
- You may want to take several pictures of your model posing to make sure you get an image that aligns with the skeleton pose as much as possible.
- Try to get images of your model and skeleton image in front of a plain white background. This will provide an ideal background for your subject and will make it easier to remove the background of your skeleton image later on.
-
2Open the image of your model in Photoshop. To do so, you can either open Photoshop and then drag the image onto your Photoshop workspace, or you can right-click the image and select Open with and then select Photoshop.
- You can also open a new image in Photoshop at any time by clicking File in the menu bar at the top and then clicking Open. Then select the image you want to open.
-
3Place the image of your skeleton on top of your model. When you place an image in Photoshop, it adds the photo as a new layer. To place an image in photoshop, click File in the menu bar at the top and then click Place. Select the image of your skeleton and click Place.
-
4Remove the background of your skeleton image. Once your skeleton image is in place, there are a few ways you can remove the background. If the background is a plain color, you can use the Quick Select or Color Select tool to select the background. Then press Delete. You can also use the Lasso tool to trace around the skeleton and then click Select, followed by Inverse to invert the selection. Then press Delete. Alternatively, you can use the Eraser tool to carefully erase the background around the skeleton.
- Make sure you get all the gaps in between the bones while removing the background.
-
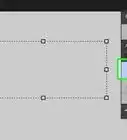
5Adjust your skeleton image so that it sits on top of the image of your model. If you do not see the transform controls around the skeleton image, make sure you select the layer with the skeleton image and click the checkbox next to "Show Transform Controls" in the panel at the top. Click and drag the edges or corners of the image to adjust the size. Click and drag just outside the corners of the image to rotate the image. Then click the checkmark in the panel at the top to set the image position.
- If you are having a hard time getting the skeleton image to align with your model, click the icon that resembles an arching arrow below an arching box to switch to warp mode. You can then click and drag the lines in the grid or the edges around the image to warp the image. Try to get the skeleton image to align with the image of your model as much as possible.
- If you don't see the Layers panel, click Window in the menu bar at the top, and then click Layers.
-
6Set the opacity of the skeleton image to about 50%. To do so, click the layer with the skeleton image in the Layers panel. Then click the Opacity box at the top of the Layers panel. Use the slider bar to lower the opacity of the skeleton image to about 50 - 60%.
-
7Apply a slight gaussian blur to the skeleton image. To do so, make sure the layer with the skeleton image is selected. Then click Filter in the menu bar at the top. Then click Blur followed by Gaussian Blur. Lower the pixel radius to about 1 pixel or more if it's a high-resolution image.
-
8Add an "Invert" adjustment to all images. To do so, click the layer you want to apply the adjustment to. Then click Image in the menu bar at the top, followed by Adjustments. Click Invert. Apply this to both your model and your skeleton image.
- If the skeleton image looks too dark after applying an Invert adjustment, press Ctrl + Z (or Command + Z on Mac) to undo the step. Instead of an invert adjustment, select your skeleton image in the Layers panel and then add an Exposure adjustment layer above the skeleton image. You can do so by clicking the Exposure icon in the Adjustment panel (if you don't see the Adjustments panel, click Window followed by Adjustments). Right-click the Exposure layer and click Create Clipping Mask to apply it to just the skeleton image. Then increase the exposure so the bones are bright white.
-
9Apply a Black & White adjustment to all images. To do so, select the layer you want to apply the adjustment to, then click Image followed by Adjustments. Click Black & White. Then lower the slider bar for the Blues down to about 20%. Then click Ok.
-
10Apply a light blue solid color layer. To do so, right-click the icon that resembles a half black and half white circle at the bottom of the Layers panel. Then click Solid Color. Select a bluish, turquoise-like color and click Ok.
-
11Set the solid color layer to "Hard Light" mode. To do so, click the solid color layer in your Layers panel. Then click the drop-down menu that says "Normal" at the top of the Layers panel. Then select Hard Light from the drop-down menu.
-
12Increase the image contrast. To do so, click Image in the menu bar at the top. Then click Brightness & Contrast. Increase the contrast so the bones look clear and well defined. Then click Ok.
-
13Add any other adjustments as needed. By now, your image should look pretty close to an X-Ray image. You can apply additional adjustments as needed. You may want to apply a soft eraser around the edges of the bones or in the eyes of the skull. You may want to apply additional blur or noise filters. You can also duplicate the layer with the skeleton image to make the bones appear more pronounced. Play around until you are satisfied with how the image looks.
-
14Save your work. To do so, click File in the menu bar at the top. Then click Save as. Type a name for your Photoshop file next to "File Name" and click Save.
-
15Save your image as a JPEG. If you want to be able to send the image to people or post it on social media, you will need to save it as a JPEG. To do so, click File in the menu bar at the top. Then click Save as. Select JPEG in the drop-down menu next to "Format." Then click Save.[4]


-Step-9-Version-2.webp)
References
About This Article