This article was co-authored by Craig Watson. Craig Watson is a Baker, Entrepreneur, and the Founder of Baked Cravings, a nut-free bakery in New York City. With eight years of experience, he specializes in creating high-quality baked goods in a nut-free facility. Baked Cravings has received The Best of Manhattan Award. Craig holds a Bachelor's Degree in Accounting from New Jersey City University and a Master of Business Administration in Marketing from Wilmington University.
There are 11 references cited in this article, which can be found at the bottom of the page.
wikiHow marks an article as reader-approved once it receives enough positive feedback. In this case, 100% of readers who voted found the article helpful, earning it our reader-approved status.
This article has been viewed 298,412 times.
A simple loaf of white bread is a great recipe to have in your baking arsenal, and you’ll love knowing how to make bread anytime you might want it. It’s a fairly straightforward process to form the dough, and you don’t need any special equipment. From beginning to end, it shouldn’t take more than 3 hours between proofing the yeast to pulling 2 freshly-baked loaves out of your oven!
Ingredients
- 1 cup (240 mL) of warm water
- 2 teaspoons (6.2 grams) of active dry yeast
- 1 cup (240 mL) of milk
- 2 tablespoons (30 mL) of melted, unsalted butter
- 2 tablespoons (25 grams) of sugar
- 1 tablespoon (17 grams) of salt
- 5 1/2 to 6 1/2 cups (660 to 780 grams) of all-purpose flour
- Neutral oil, like canola oil
- Cooking spray (optional)
Makes 2 loaves of bread
Steps
Mixing the Dough
-
1Proof the yeast in warm water for 5 minutes. Use the bowl of a stand mixer if you have one; if not, any large mixing bowl will work. Add 1 cup (240 mL) of warm water and sprinkle 2 teaspoons (6.2 grams) of active dry yeast over the surface. Set a timer for 5 minutes.[1]
- This process gives the yeast time to dissolve and activate.
- The water should be warm to the touch, but not hot. Stick your finger in it before adding the yeast—if you can’t leave your finger in there for a few seconds, the water is too hot and needs to cool down a bit more.
-
2Combine the milk, melted butter, sugar, and salt. In a separate bowl from the proofing yeast, add 1 cup (240 mL) of milk, 2 tablespoons (30 mL) of melted, unsalted butter, 2 tablespoons (25 grams) of sugar, and 1 tablespoon (17 grams) of salt. Stir them together.[2]
- For this recipe, you can use any type of milk. Keep in mind that if you use something like vanilla almond milk, your loaves will take on some of that flavor.
- It’s a great idea to use a digital scale when baking bread if you have one. It helps you measure exactly the right amount of each ingredient.[3]
Advertisement -
3Pour the milk mixture into the bowl with the activated yeast. Carefully transfer the contents of the bowl with the milk into the bowl with the water and yeast. Stir them together with a wooden spoon.[4]
- It’s okay if not all the sugar, salt, or yeast have dissolved. They’ll incorporate during the kneading process.
-
4Add 1 cup (120 grams) of flour to the liquid to form a loose dough. This step begins to bind the ingredients and makes it a lot easier to add the rest of the flour. Don’t worry if the dough doesn’t exactly look like dough at this stage.[5]
- If you don’t have a digital scale, use the spoon-and-level method. Instead of dipping the measuring cup into the flour, which can overly-compress it and add more to your recipe than you need, spoon the flour out of the bag into the measuring cup, then level it off with the back of a clean knife.[6]
-
5Stir an additional 4.5 cups (540 grams) of flour into the dough.[7] Add the flour slowly so that the dough can absorb the flour and not get overly dry. Use a wooden spoon to mix everything until the dough becomes shaggy (lumpy, but mixed well). It’s okay if all the flour isn’t yet incorporated—it will come together during the kneading process.[8]
- Don’t put your flour away just yet! Once you get to the kneading process, you may need to add a little more to get your dough to the right consistency.
- Shaggy dough is mixed well so there aren't any visible dry spots of flour, but it won’t look like a smooth, round ball yet.

Kneading and Proofing
-
1Use a dough hook, on a stand mixer if you have one. Attach the bowl to the mixer and put the dough hook in place. Set the speed to medium and let the dough knead for 8-10 minutes until it forms a smooth ball. If the dough looks super sticky, add 1 tablespoon (8.5 grams) of flour at a time until it starts pulling away from the walls of the bowl.[9]
- Test the dough by poking it. If it springs back, it’s good to go! If it doesn’t, knead it for another minute before testing it again.
- If the dough sags through your fingers when you pick it up, that’s another sign that it’s not ready yet. It should hold its shape pretty well.[10]
-
2Knead the dough by hand for 8-10 minutes if you don’t have a stand mixer. If the dough is incredibly sticky, add 1 tablespoon (8.5 grams) of flour at a time until it’s easier to handle.[11] Push down on the dough and stretch it out with the palm of your hand. Fold the top of the dough back on itself, then press and stretch it again. Repeat this process for 8-10 minutes, or until the dough makes a smooth ball.
- At the end, the dough should spring back when you poke it.[12]
- If you need to, let the dough rest for 5 minutes after adding some extra flour. This gives the flour time to absorb moisture from the dough, making it easier to handle.
-
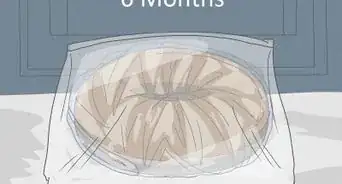
3Place the dough in a buttered bowl and let it rise until it’s twice as big. Use either butter or a neutral-tasting oil, like vegetable oil, to coat the bowl so that the flavor doesn’t impact the taste of your bread. Place the dough inside the bowl, turning it a few times, so it’s entirely coated in the grease. Cover the bowl with either plastic wrap or a clean kitchen towel and set it to the side for about 60 minutes.[13]
- If you used a stand mixer, wash and dry that same bowl and use it for your proofing process to make fewer dishes for yourself.
- When you use yeast in a recipe, the dough is going to rise and spread. The yeast essentially eats the flour and releases carbon dioxide, creating air bubbles and making your dough rise.[14]
- At the end of this process, the dough should not spring back when it’s poked. If it does, it needs more time.[15]
- Keep in mind that bread rises faster in a warm environment and slower in a cool one. If your kitchen is super cold, you could even turn your oven on low and set your dough nearby.[16]
-
4Remove the dough from the bowl and divide it into 2 equal sections. Sprinkle a little flour on a clean countertop, then gently dump the dough out of the bowl. Use your hands or a bench scraper to cut it in half. If you want to be super precise, use a food scale![17]
- A bench scraper is a baker’s tool used to cut and manipulate all different kinds of doughs.[18]
-
5Shape each section of dough into a ball and let them rest for 10 minutes. These balls can be loose—there’s no need for them to look perfect at this stage! Just gently roll them or tuck the dough so that they resemble a ball, and leave them on the counter for about 10 minutes.[19]
- When you divided the dough and formed the balls, you created a little bit of tension in the dough. Letting the dough relax releases that tension, which means it’ll be easier to do your final shaping. Easier shaping equals better bread![20]


Shaping the Loaves
-
1Grease 2 loaf pans that measure 8 by 4 in (20 by 10 cm). Take a few seconds to prep your loaf pans while your dough is resting on the counter. The next stage requires the dough to go into those pans, so it’ll be nice to have them ready. Use cooking spray if you want, or just lightly coat them with oil or butter.[21]
- You could also use 9 by 5 in (23 by 13 cm) pans.[22]
-
2Flatten the dough into a rectangle and fold the bottom 1/3 up. If the dough seems like it’s a little too sticky and isn’t coming away from the counter easily, sprinkle a little flour underneath it. Use your palms to spread the dough ball into a rectangle, then fold the bottom 1/3 up to the middle.[23]
- The folding technique here is similar to how you would fold a letter.
-
3Fold the top 1/3 of the dough down and pinch the dough closed. Bring the top of the dough down, so it covers the bottom section that you already folded up. Use your fingers to pinch the seam closed all around, including the sides.[24]
- Your loaves will look much more professional with closed seams.
-
4Create more tension by folding the dough in half a second time. Gently press down on the middle and bring the sides together. Pinch the seams together again.[25]
- This entire process creates surface tension so that the loaves rise well and keep their shape.
-
5Place the dough into the loaf pans and let them rise for 30-40 minutes. Set the dough into the pans seam-side down. The dough should start to peek over the edge of the pan once they’ve grown enough.[26]
- If you use larger pans, the dough will rise to be about level with the tops of the pans rather than peeking over the top.


Baking Your Bread
-
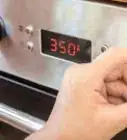
1Preheat your oven to 425 °F (218 °C). Position a rack in the center of the oven, making sure to remove any racks above it. Otherwise, there won’t be enough space for your bread to grow![27]
-
2Score the top of the dough before putting it into the oven. Use a sharp, serrated knife or a lame (pronounced “laahm”) to make a long, 1⁄2 in (1.3 cm) deep slash down the length of the dough. You could also do 3 diagonal cuts across the width of the dough if you prefer.[28]
- For an easy variation on this classic recipe, brush the top of the scored dough with beaten egg white and sprinkle sesame seeds overtop.[29]
-
3Put the loaves in the oven and reduce the heat to 375 °F (191 °C). Bake both loaves at the same time. The high heat helps the dough rise and creates a nice exterior, and the lowering temp ensures your loaves will keep cooking through without getting overly brown on the outside.[30]
- If you forget to reduce the temperature, do it as soon as you think of it.
-
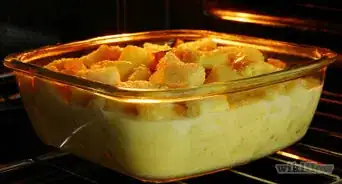
4Bake the bread for 30-35 minutes, until it’s golden-brown on top.[31] Test the bread by carefully tipping it out of the loaf pan and tapping the bottom—if it’s done, it will sound hollow. If it needs a little more time, pop it directly onto the rack instead of placing it back in the loaf pan.[32]
- You could also use an instant-read thermometer to check the internal temperature. It should read 195 °F (91 °C) when the bread is done.[33]
- Wear oven mitts when handling the hot pans and bread!
-
5Let the loaves cool on wire racks for several hours before you cut them. Cutting bread while it’s still hot is, of course, super tempting—who doesn’t love fresh, warm bread? But doing so compresses the bread and ruins all of that beautiful volume you spent so much time developing. It’s best to let it rest until it’s cool to the touch before diving in.[34]
- You’ll at least get to enjoy the smell of your bread while it’s baking and resting, even if you have to wait to eat it.


Community Q&A
-
QuestionDoes the bread machine do the whole proccess on its own and only tells you to add the ingredients?
 Community AnswerIt depends on the kind of bread you are making, but mostly yes, the bread machine does all the work for you, especially if you are just looking to make a simple, tasty loaf. Usually, the ingredients need to be added in a particular order (wet ingredients first, followed by dry, etc.), but otherwise the machine will mix, knead, rest, rise, and bake the bread for you. Just remember to use the same ingredients the recipe asks for, such as type of yeast and flour, and you will get a fairly consistent result every time.
 -
QuestionWhat ingredients can be used instead of yeast?
 Community AnswerThere isn't really anything you can use instead, but you can use self-rising flour without it. Your bread will be quite dense and might have a weird texture, but it still tastes pretty good.
 -
QuestionCan I put a container with water on the bottom rack of the oven to make the bread moist?
 ChubzwikiCommunity AnswerYes. This will be very handy when you are looking for soft, moist loaves of bread.
Things You’ll Need
- Stand mixer with a dough hook (optional)
- Large bowl
- Wooden spoon
- Digital scale (optional)
- Measuring cups and spoons
- Kitchen towel
- 2 loaf pans
- Serrated knife or lame
- Wire rack


References
- ↑ https://www.thekitchn.com/how-to-make-basic-white-sandwich-bread-cooking-lessons-from-the-kitchn-166588
- ↑ https://www.thekitchn.com/how-to-make-basic-white-sandwich-bread-cooking-lessons-from-the-kitchn-166588
- ↑ https://www.seriouseats.com/recipes/2014/08/simple-crusty-white-bread-recipe.html
- ↑ https://www.thekitchn.com/how-to-make-basic-white-sandwich-bread-cooking-lessons-from-the-kitchn-166588
- ↑ https://www.thekitchn.com/how-to-make-basic-white-sandwich-bread-cooking-lessons-from-the-kitchn-166588
- ↑ https://www.seriouseats.com/2017/03/how-to-measure-flour-dip-and-sweep-versus-spooning.html
- ↑ https://www.thekitchn.com/how-to-make-basic-white-sandwich-bread-cooking-lessons-from-the-kitchn-166588
- ↑ https://www.foodnetwork.com/recipes/ree-drummond/white-sandwich-bread-3293341
- ↑ https://www.thekitchn.com/how-to-make-basic-white-sandwich-bread-cooking-lessons-from-the-kitchn-166588
- ↑ https://www.thekitchn.com/bread-baking-tip-how-to-tell-w-156772
- ↑ https://www.thekitchn.com/how-to-make-basic-white-sandwich-bread-cooking-lessons-from-the-kitchn-166588
- ↑ https://www.thekitchn.com/how-to-make-basic-white-sandwich-bread-cooking-lessons-from-the-kitchn-166588
- ↑ https://www.foodnetwork.com/recipes/ina-garten/honey-white-bread-recipe-1925035
- ↑ https://www.seriouseats.com/2014/09/how-to-make-and-proof-bread-dough.html
- ↑ https://www.foodnetwork.com/recipes/tyler-florence/wonderful-white-bread-recipe-1910367
- ↑ https://www.seriouseats.com/2014/09/how-to-make-and-proof-bread-dough.html
- ↑ https://www.thekitchn.com/how-to-make-basic-white-sandwich-bread-cooking-lessons-from-the-kitchn-166588
- ↑ https://www.thekitchn.com/handy-kitchen-tool-the-bench-s-45469
- ↑ https://www.thekitchn.com/how-to-make-basic-white-sandwich-bread-cooking-lessons-from-the-kitchn-166588
- ↑ https://www.seriouseats.com/2014/09/how-to-make-and-proof-bread-dough.html
- ↑ https://www.thekitchn.com/how-to-make-basic-white-sandwich-bread-cooking-lessons-from-the-kitchn-166588
- ↑ https://www.foodnetwork.com/recipes/ina-garten/honey-white-bread-recipe-1925035
- ↑ https://www.thekitchn.com/basic-techniques-how-to-shape-97063
- ↑ https://www.thekitchn.com/basic-techniques-how-to-shape-97063
- ↑ https://www.thekitchn.com/how-to-make-basic-white-sandwich-bread-cooking-lessons-from-the-kitchn-166588
- ↑ https://www.thekitchn.com/how-to-make-basic-white-sandwich-bread-cooking-lessons-from-the-kitchn-166588
- ↑ https://www.thekitchn.com/how-to-make-basic-white-sandwich-bread-cooking-lessons-from-the-kitchn-166588
- ↑ https://www.epicurious.com/recipes/member/views/basic-white-bread-james-beard-51498401
- ↑ https://www.foodnetwork.com/recipes/tyler-florence/wonderful-white-bread-recipe-1910367
- ↑ https://www.thekitchn.com/how-to-make-basic-white-sandwich-bread-cooking-lessons-from-the-kitchn-166588
- ↑ https://www.thekitchn.com/how-to-make-basic-white-sandwich-bread-cooking-lessons-from-the-kitchn-166588
- ↑ https://www.epicurious.com/recipes/member/views/basic-white-bread-james-beard-51498401
- ↑ https://www.foodnetwork.com/recipes/tyler-florence/wonderful-white-bread-recipe-1910367
- ↑ https://www.epicurious.com/recipes/member/views/basic-white-bread-james-beard-51498401
- ↑ https://www.thekitchn.com/how-to-make-basic-white-sandwich-bread-cooking-lessons-from-the-kitchn-166588
- ↑ https://www.epicurious.com/recipes/member/views/basic-white-bread-james-beard-51498401
About This Article

To make a loaf of white bread, start by mixing 1 packet of active dry yeast and some warm water in a bowl. Then, let the mixture sit for 10 minutes or until it starts to bubble. Next, add melted butter, sugar, and flour to the mixture, whisking everything together until a dough forms. Once you're finished making the dough, knead it for 10 minutes, shape it into a ball, and let it rise for 1 hour. After 1 hour, roll out the dough, shape it into a loaf, and let it rise for 1 more hour. Finally, bake the dough in a loaf pan for 30 minutes at 400 degrees Fahrenheit. To learn how to make white bread using bulk yeast, keep reading!