This article was co-authored by wikiHow Staff. Our trained team of editors and researchers validate articles for accuracy and comprehensiveness. wikiHow's Content Management Team carefully monitors the work from our editorial staff to ensure that each article is backed by trusted research and meets our high quality standards.
There are 17 references cited in this article, which can be found at the bottom of the page.
The wikiHow Culinary Team also followed the article's instructions and verified that they work.
This article has been viewed 30,828 times.
Learn more...
Fluffy bread is the product of CO2 and steam getting caught in pockets of gluten, which causes the dough to expand. This expansion is what makes the bread so soft and light. To make your dough, first you’ll need to combine ingredients with yeast. This mixture will be thickened with flour as you work it with a mixer and knead it with your hands. Shape the dough as it rises, and then it's ready to bake.
Ingredients
- 5 to 6 cups (1.2 to 1.4 L) flour
- ½ cup (118 ml) milk
- 3 tbsp (44.4 ml) sugar
- 2 tsp (9.9 ml) salt
- 3 tbsp (44.4 ml) butter
- 2 packets of yeast (dry)
- 1½ cups (355 ml) water
Steps
Creating the Yeast Mixture
-
1Warm up milk in your microwave. Pour ½ cup (118 ml) milk into a microwave safe mixing bowl. Heat it a minute at a time until it is warm to the touch. Once warmed, remove the milk from the microwave.
-
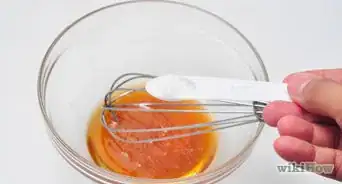
2Combine the sugar, salt, and butter with warmed milk. Mix in 3 tbsp (44.4 ml) sugar, 2 tsp (9.9 ml) salt, 3 tbsp (44.4 ml) butter. If the milk isn’t warm enough to melt the butter, heat the mixture in the microwave again at minute intervals until it melts.
- The warm milk should absorb ingredients easily. If you notice undissolved ingredients, whisk the mixture until it is consistent throughout.
- You can also heat milk in a sauce pan on your stovetop. However, the milk should never be hotter than warm to the touch.[1]
Advertisement -
3Heat up 1½ cups (355 ml) of water and add it to the mixer’s bowl. Set the milk mixture off to the side to cool. Microwave the water until it is about 110 °F (43 °C). The warmed water can be poured into the bowl of your mixer.
- The ideal water temperature range for activating yeast is between 105 and 110 °F (41 and 43 °C). Use a thermometer to ensure your water's the right temperature.[2]
- If your tap water is hot enough, feel free to use it straight from the faucet. When the water is so hot it stings, it's generally hot enough to activate yeast.
-
4Add the yeast and 1 cup (236.6 ml) of flour and mix for 2 - 3 minutes. After you add the yeast and flour, turn on your mixer. Allow the mixer to work the water, yeast, and flour for 2 or 3 minutes.
Thickening the Mixture into Dough
-
1Stop the mixer and add in flour and the milk mixture. When the mixer is stopped, pour in 1 cup (236.6 ml) of flour and the cooled milk mixture. Turn on your mixer for another 2 minutes, then get ready to add some more flour.[3]
- The milk mixture should be cool to the touch and its ingredients should be fully dissolved before it is added to the mixing bowl.
-
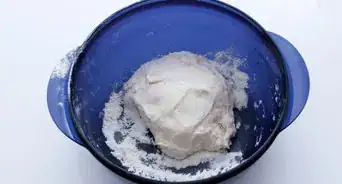
2Run the mixer at intervals as you add flour 1 cup (236.6 ml) at a time. Stop the mixer after 2 minutes and pour a cup of flour into the mixing bowl. Resume mixing until the mixture is smooth, then add another cup of flour. Continue mixing in the flour until 5 cups (1.2 L) have been added.[4]
-
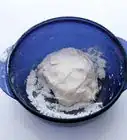
3Add a little extra flour as necessary. Depending on your yeast, you may only need to add a very little bit of flour, though you may need as much as a full cup. Mix for about 6 minutes after adding the fifth cup of flour.
- Mix flour into the dough until it forms a puffy ball around the hook.[5]
-
4Sprinkle your countertop or a cutting board with flour. This will prevent your dough from sticking to your counters or cutting board as you knead it. A thin dusting should be enough. If the dough begins sticking while kneading, lightly sprinkle more flour.[6]
-
5Knead the dough. The dough ball should come off the dough hook and out of the mixing bowl easily. Roll the doughball onto the flour. To knead the dough with your clean hands:[7]
- Flatten the dough by pushing into its middle with the heel of your hand.
- Fold the flattened dough over on itself.
- Gather the dough back together into a ball.
- Repeat this process until the dough is a smooth, glutinous consistency.[8]

Rising the Dough
-
1Spray the mixer’s bowl and doughball with cooking spray. Hold the mixer’s bowl over your sink and coat its inside completely with cooking spray. Transfer the kneaded dough into the mixing bowl, then spray the doughball until it is also coated in cooking spray.[9]
-
2Place a dish towel over the bowl and allow it to rise for 35 minutes. Drape a clean dish towel over the mouth of the mixer’s bowl to cover the dough. When the dough has roughly doubled in size, it’s to be kneaded again.[10]
- Dough that is warm generally rises faster than dough that is cold or cool. Slightly warmer than room temperature is ideal.
- Rising dough in a location that is too hot could rush the fermentation process of the yeast, negatively impacting the quality of the bread when finished.[11]
-
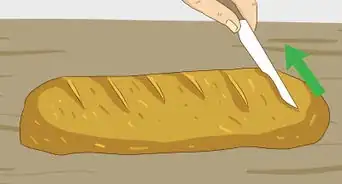
3Punch down the dough. The dough should be poofy and of smooth consistency. Punch directly into the middle of the doughball from above with your fist until you reach the bottom of the mixing bowl. Working outward from the center, punch down the dough until you reach the edge of the bowl.[12]
-
4Cut the dough ball in half and knead it again. Knead the dough in the same fashion you did earlier until it is malleable and smooth. Use a piece of wire or knife to cut the dough in half. Shape each half to roughly the size of a single loaf bread pan.
-
5Grease your bread pans with cooking spray. Take your bread pans over to the sink and coat their insides completely in cooking spray. Make sure the insides of each pan are completely coated in a thin layer of spray.
-
6Insert each half into a greased bread pans. Insert each half of the dough into its own bread pan, then spray the dough with cooking spray. The dough will need about 55 minutes to rise again.[15]
- Moisten the dough as it rises in the bread pans. If it looks dry, give it a spritz of cooking spray or a fine misting of water.
- Cover the dough with a towel as it rises. However, the dough will eventually expand farther than the top of the pan. When this happens, remove the towel.[16]
Baking the Bread
-
1Preheat your oven to 400 °F (204 °C). Most ovens take about 15 minutes to preheat. If your oven does not have a preheat feature, set your oven to 400 °F (204 °C) and check it with an oven thermometer. Adjust the temperature until the thermometer reads a steady 400 °F (204 °C).[17]
-
2Insert the bread into the oven and lower the heat after 15 minutes. Allow the bread to bake for 15 minutes at 400 °F (204 °C). After that, drop the oven temperature to 350 °F (177 °C).
-
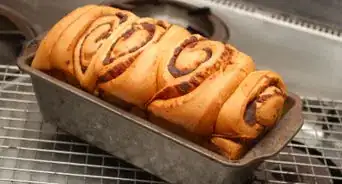
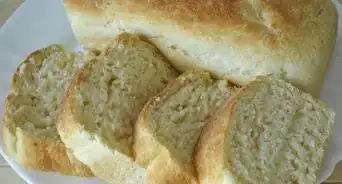
3Continue baking at 350 °F (177 °C) for about 35 minutes. Keep an eye on your bread as it bakes. Depending on your oven, your dough might bake in more or less time. After 35 minutes, or when it's golden brown, it can be removed.[18]
-
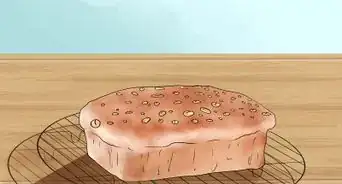
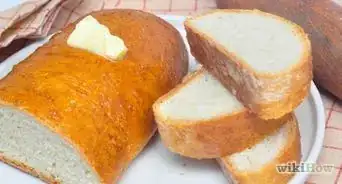
4Remove the bread, allow it to cool, and it’s ready to eat. The bread and pans will be hot, so use an oven mitt or potholder to remove them from the oven. Tilt the bread pans on an angle to remove the baked loaves. Cut the bread into slices when cooled and enjoy.[19]
-
5Finished.


Warnings
- Always handle oven heated implements with caution. Improperly handled, these can cause burns, deform kitchen surfaces, and more.⧼thumbs_response⧽
- Some mixers may not be suited for making dough. If you smell burning or melted plastic odor, stop using the mixer immediately.⧼thumbs_response⧽
Things You’ll Need
- Microwave safe bowl
- Microwave (or stove)
- Pot (optional)
- Stirring utensil (like a fork or whisk)
- Mixer with dough hook
- Cooking spray
- Clean dish towel
- Spray bottle (filled with clean water; optional)
- Oven
- Oven mitt (or potholder)

References
- ↑ https://www.youtube.com/watch?v=ixfjYqRa1a4&feature=youtu.be&t=52s
- ↑ http://www.cookistry.com/2011/01/technique-water-temperature-for-yeast.html
- ↑ https://www.youtube.com/watch?v=ixfjYqRa1a4&feature=youtu.be&t=3m28s
- ↑ https://www.youtube.com/watch?v=ixfjYqRa1a4&feature=youtu.be&t=3m52s
- ↑ https://www.youtube.com/watch?v=ixfjYqRa1a4&feature=youtu.be&t=6m9s
- ↑ http://www.thekitchn.com/home-hacks-108771
- ↑ http://www.thekitchn.com/home-hacks-108771
- ↑ https://www.youtube.com/watch?v=ixfjYqRa1a4&feature=youtu.be&t=6m52s
- ↑ https://www.youtube.com/watch?v=ixfjYqRa1a4&feature=youtu.be&t=7m35s
- ↑ https://www.youtube.com/watch?v=ixfjYqRa1a4&feature=youtu.be&t=8m1s
- ↑ http://www.thekitchn.com/home-hacks-108771
- ↑ https://www.youtube.com/watch?v=ixfjYqRa1a4&feature=youtu.be&t=8m30s
- ↑ http://www.joyofbaking.com/PanSizes.html
- ↑ https://www.youtube.com/watch?v=_4CsRTlqNDU&feature=youtu.be&t=44s
- ↑ https://www.youtube.com/watch?v=_4CsRTlqNDU&feature=youtu.be&t=1m31s
- ↑ https://www.youtube.com/watch?v=_4CsRTlqNDU&feature=youtu.be&t=3m18s
- ↑ https://www.youtube.com/watch?v=_4CsRTlqNDU&feature=youtu.be&t=4m11s
- ↑ https://www.youtube.com/watch?v=_4CsRTlqNDU&feature=youtu.be&t=4m32s
- ↑ https://www.youtube.com/watch?v=_4CsRTlqNDU&feature=youtu.be&t=5m14s
About This Article

To make bread that’s soft and light, start by mixing your yeast mixture for 2 to 3 minutes. Then, add the other ingredients and mix until the dough forms into a puffy ball. Next, place your dough on a counter that’s been lightly sprinkled with flour, and knead the dough until it has a smooth, glutinous consistency. Finally, spray the inside of a bowl with cooking spray, then cover the bowl after placing your dough inside. Let the dough rise for 35 minutes, until it’s roughly doubled in size. To learn why punching down your dough after it’s finished rising helps your bread be as soft as possible, read on.