X
This article was co-authored by wikiHow Staff. Our trained team of editors and researchers validate articles for accuracy and comprehensiveness. wikiHow's Content Management Team carefully monitors the work from our editorial staff to ensure that each article is backed by trusted research and meets our high quality standards.
This article has been viewed 123,625 times.
Learn more...
Kids and adults alike enjoy playing with bows and arrows. Instead of purchasing a bow and arrows from a store, spend an afternoon crafting your own from household materials. These toy weapons should be made and created under adult supervision.
Steps
Method 1
Method 1 of 3:
Crafting a Bow out of a Branch
-
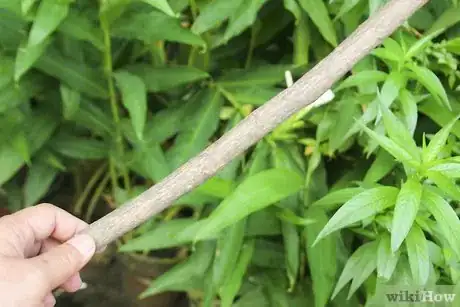
1Locate and cut your bow stick. Take a walk outdoors with your hand saw and pruning scissors to find wood for your bow. Search for a live sapling or tree limb that is ½ inch in diameter. Cut down the sapling or limb with your hand saw. Remove any branches or small limbs with your pruning scissors. Cut the limb or stick so that it falls just below your belly button when one end is placed on the ground.[1]
-
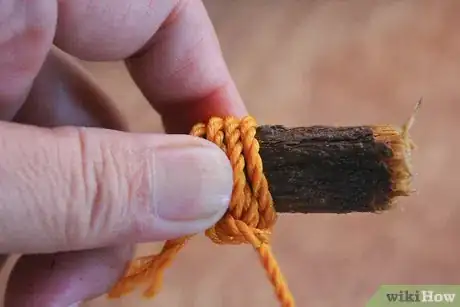
2Wrap the string around the top of the bow. Place your bow on the ground. Wrap your thin, strong string tightly around the top end of your bow. Tie the a knot in the string.
- Consider using a braided nylon string.[2]
Advertisement -
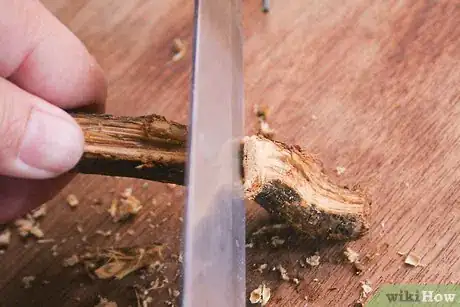
3Cut and bend the bow. Flip the bow over, placing the top of the bow on the ground. Use an exact-o knife to create a notch across the bottom end of the bow. Place pressure on the end of the bow to bend it.[3]
- The notch should be thick enough for your string to sit in.
-
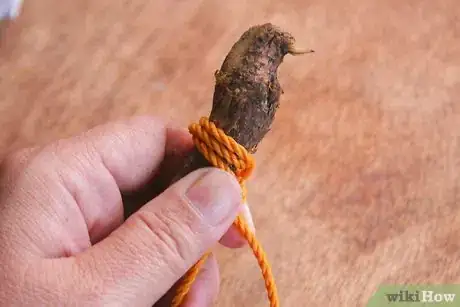
4String the bow. Pull the string tightly up the length of the bow and over the end, letting the string sit in the notch you created. Wrap the string around the bow 6 to 8 times and then tie a knot in the string.[4]
-
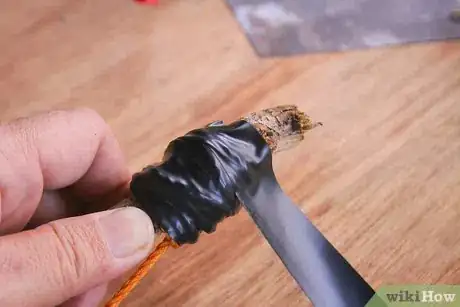
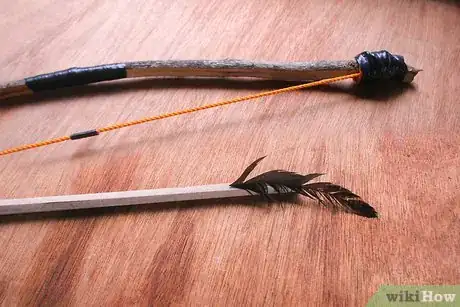
5Place electrical tape on the bow and string. Wrap the string with electrical tape to secure the ends. Wrap the center of the bow with electrical tape to create a hand grip. Place a small piece of electrical tape around the center of the string to mark where the arrow will rest.[5]
-
6Create arrows. To create arrows, you will need wooden dowels, electrical tape, and feathers.
- Cut the ¼ inch or 5/16 inch wooden dowels 18 to 24 inches long.
- Place a piece of electrical tape around the top and bottom of the dowel.
- Use an exact-o knife to slit the end of the arrow.
- Cut a feather in half with an exact-o knife.
- Glue one half of the feather to each side of the arrow near the end.[6]
Advertisement
Method 2
Method 2 of 3:
Crafting a Bow out of a Popsicle Stick
-
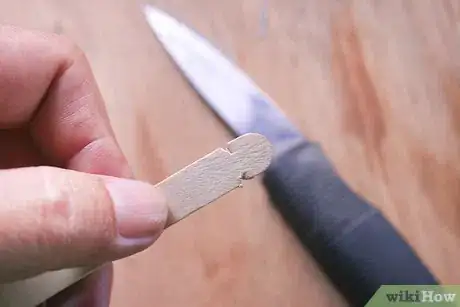
1Create notches in the popsicle stick. Retrieve your popsicle stick and a sharp knife. Use the knife to create 2 small parallel notches (one on each side) on each end of the popsicle stick. Each notch should be approximately 2 mm long. Place the notches ½ inch from the end.
- Ask a parent to help you cut the notches in the popsicle stick.
-
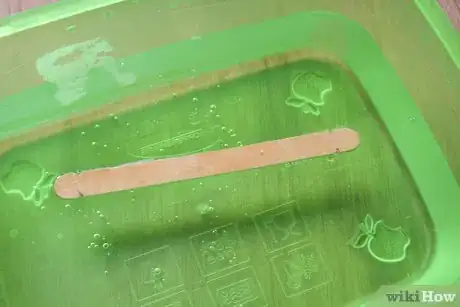
2Soak the popsicle stick. In order to bend the popsicle stick without breaking it, you must soften the wood. Fill a bowl with water. Place the popsicle stick in the bowl of water. Allow the popsicle stick to soak for 1 to 2 hours.[7]
- It is better to over soak the popsicle stick than to under soak it.
-
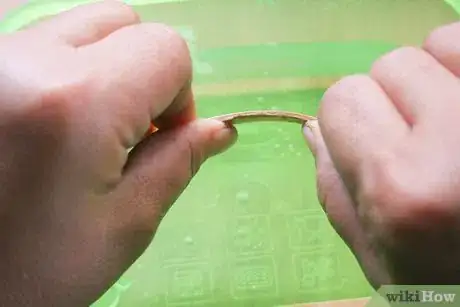
3Shape the popsicle stick into a bow. Remove the popsicle stick from the bowl of water. Starting at the center of the popsicle stick, gently bend the bow into a “C” with your fingers. Continue to curve the popsicle stick until it resembles a bow.[8]
-
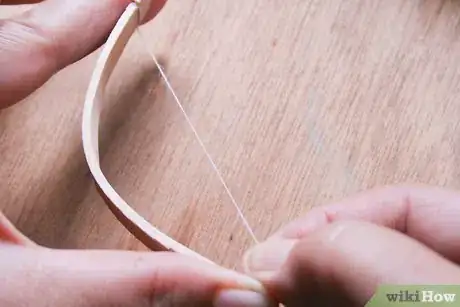
4String the bow. Wrap the dental floss several times around the notches on the top of the popsicle stick. Bring the dental floss down the length of the bow on its left side to the bottom. Wrap the dental floss several times around bottom notches. Bring the dental floss up the length of the bow on its right side to the top notches. Wrap the dental floss several times around the top notches. Tie the dental floss in a knot.
- You may place a dab of hot glue on the knot to prevent it from untying.[9]
-
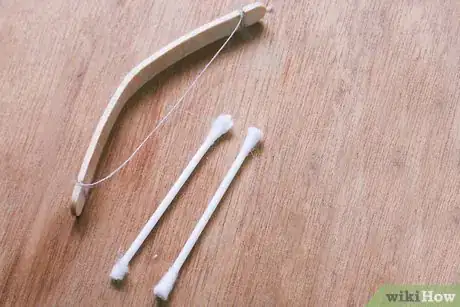
5Make Q-tip arrows. Retrieve several q-tips, a nail clipper, and a sharp knife. Use the nail clippers to cut off one end of the Q-tip just about the cotton swab. Cut a small slit in the bottom of the arrow with a sharp knife.[10]
Advertisement
Method 3
Method 3 of 3:
Crafting a Bow out of a PVC Pipe
-
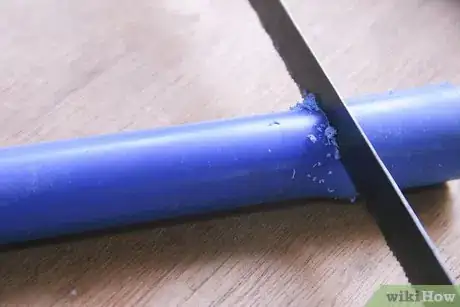
1Cut the PVC Pipe. The ½ inch PVC pipe is sold in 10 foot sections. Use a measuring tape and permanent marker to divide the pipe into three 40 inch sections. Cut the pipe into three equal sections with a hacksaw or fine tooth jigsaw.[11]
-
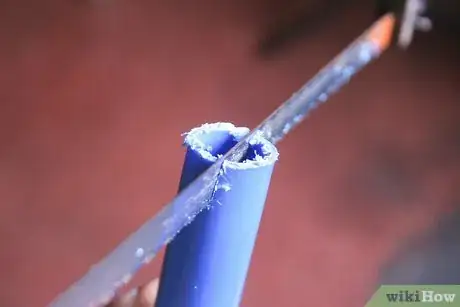
2Cut two notches into the PVC Pipe. Use your saw to cut a notch 1 inch in length into the top of the pipe. Flip the PVC pipe over. Cut a second 1 inch long notch on the opposite end of the PVC Pipe in alignment with the first notch.[12]
-
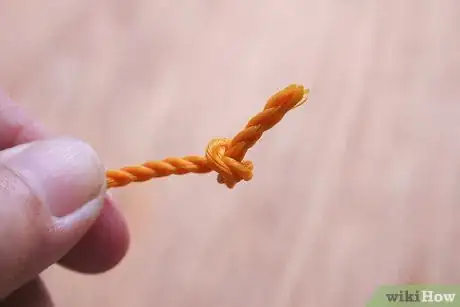
3Prepare the nylon rope. Tie a knot in one end the nylon rope. The knot should be thick enough so that it will not slip through the notch you created. Burn the end of the knot with a lighter to prevent the rope from fraying.[13]
-
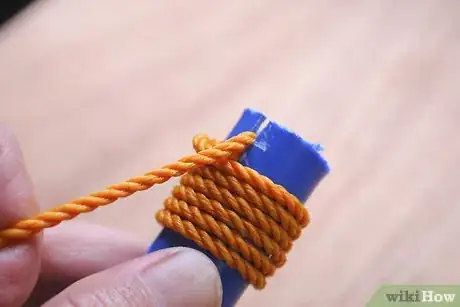
4String the bow. The process of stringing the bow requires a bit of patience and some muscle.
- Insert the rope into the top notch so that the knot is situated inside the pipe.
- Pull the string tightly down the length of the bow.
- Cut the rope 5 inches beyond the bottom of the pipe.
- Tie a knot in the rope approximately 4 ½ inches from the end and burn the ends. Like the first knot, the second knot should be thick enough so that it does not slip through the notch.
- Bend the pipe and slide the rope into the bottom notch so that the knot is situated inside the pipe.
- Wrap a piece of duct tape around each end of the bow to prevent the string from moving.[14]
-
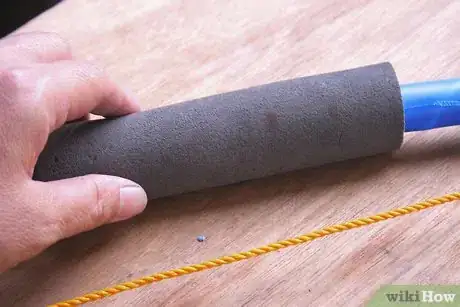
5Create a hand grip. Place the 6 inch piece of pipe foam around the PVC pipe at its center. Bring together the two edges of the pipe foam. Place a zip tie over each end of the pipe foam to secure it in place. Cut the ends off of the zip tie with a pair of scissors.[15]
-
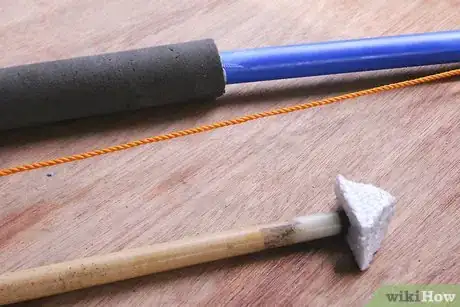
6Create arrows. To create arrows, you will need dowels, 2 inch thick home insulation foam, a hot glue gun, and a knife.
- Use a sharp knife to create 3 inch x 3 inch triangles out of the 2 inch home insulation foam.
- Insert the dowel into the center of one of the triangle’s three sides.
- Remove the dowel, coat the end with hot glue, and reinsert the dowel into the foam arrow head.
- Slit the end of the dowel with a sharp knife. The slit makes it easier to string the arrow.[16]
Advertisement
Warnings
- Don't aim at or shoot at people.⧼thumbs_response⧽
- Use your best judgement.⧼thumbs_response⧽
Advertisement
Things You'll Need
Crafting a Bow out of a Branch
- Live ½ inch thick tree limb or sapling
- Strong, thin string
- Feathers
- ¼ inch or 5/16 inch wooden dowel
- Hand Saw
- Pruning Scissors
- Electrical Tape
- Exact-o Knife
- Super Glue
Crafting a Bow out of a Popsicle Stick
- Popsicle Sticks
- Dental Floss
- Bowl
- Water
- Sharp Knife
- Nail Clippers
Crafting a Bow out of a PVC Pipe
- 40 inches of ½ inch thick PVC Pipe
- 6 inches of ¾ inch thick pipe cover
- Thick Nylon String
- 3 16 inch x ⅜ inch wooden dowels
- 2 inch thick foam home insulation
- Duct Tape
- Zip Ties
- Lighter
- Scissors
- Hacksaw or fine tooth jig saw
- Hot Glue Gun and Glue
- Permanent Marker
- Tape Measurer
References
- ↑ http://www.4tunate.net/2012/10/simple-outdoor-adventures-for-boys-day-14-make-a-bow-and-arrow/
- ↑ http://frugalfun4boys.com/2014/10/01/pvc-pipe-bow-arrows/
- ↑ http://www.4tunate.net/2012/10/simple-outdoor-adventures-for-boys-day-14-make-a-bow-and-arrow/
- ↑ http://www.4tunate.net/2012/10/simple-outdoor-adventures-for-boys-day-14-make-a-bow-and-arrow/
- ↑ http://www.4tunate.net/2012/10/simple-outdoor-adventures-for-boys-day-14-make-a-bow-and-arrow/
- ↑ http://www.4tunate.net/2012/10/simple-outdoor-adventures-for-boys-day-14-make-a-bow-and-arrow/
- ↑ http://allfortheboys.com/home/2012/1/3/diy-bow-and-arrow-janel-from-hating-martha.html
- ↑ http://allfortheboys.com/home/2012/1/3/diy-bow-and-arrow-janel-from-hating-martha.html
- ↑ http://allfortheboys.com/home/2012/1/3/diy-bow-and-arrow-janel-from-hating-martha.html
- ↑ http://allfortheboys.com/home/2012/1/3/diy-bow-and-arrow-janel-from-hating-martha.html
- ↑ http://www.skiptomylou.org/diy-pvc-bow-and-arrow/
- ↑ http://www.skiptomylou.org/diy-pvc-bow-and-arrow/
- ↑ http://www.skiptomylou.org/diy-pvc-bow-and-arrow/
- ↑ http://www.skiptomylou.org/diy-pvc-bow-and-arrow/
- ↑ http://www.skiptomylou.org/diy-pvc-bow-and-arrow/
- ↑ http://www.skiptomylou.org/diy-pvc-bow-and-arrow/
About This Article
Advertisement
