This article was co-authored by wikiHow Staff. Our trained team of editors and researchers validate articles for accuracy and comprehensiveness. wikiHow's Content Management Team carefully monitors the work from our editorial staff to ensure that each article is backed by trusted research and meets our high quality standards.
The wikiHow Video Team also followed the article's instructions and verified that they work.
This article has been viewed 456,193 times.
Learn more...
Rubber band weaponry has proven its worth on many school and household battlefields. In particular, the rubber band shooter, also called the rubber band gun, has distinguished itself as a versatile tool. For example, a talented rubber band trick shooter might knock down a paper target or he might stun a stationary fly. And so could you. All it takes to make your own is some creativity, a few household items, and some rubber bands. Before you know it, a trusty rubber band shooter will be as good as yours.
Steps
Making a Pencil Peashooter
-
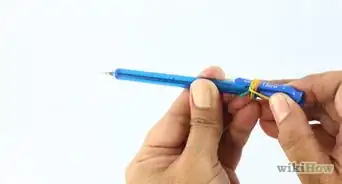
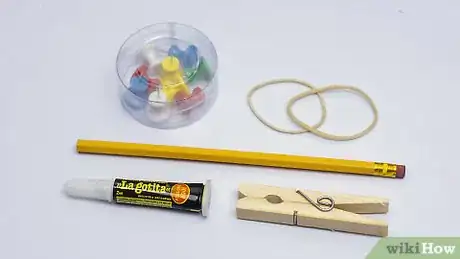
1Grab your pencil peashooter components. This rubber band shooter gets its name from the pencil that forms its stock. The bits and pieces you'll need to make your peashooter are mostly common household items, and include:
- Pencil
- Thumbtack
- Hot glue gun or superglue
- Clothespin
- Rubber band
-
2Attach your clothespin catch to your pencil. Using your hot glue or superglue, attach your clothespin so it is lined up with the writing end of your pencil, with the alligator clip side facing the eraser. Allow enough time for the glue to fully dry before continuing.Advertisement
-
3Create a hand grip with your thumbtack. Take your thumbtack and push it into your pencil on the side opposite your clothespin. The nub of the thumbtack should give you just enough to wrap a finger around to help you grip your pencil peashooter.
-
4Test fire your pencil peashooter. Take your rubber band and pull it so that one end catches on the eraser end of your pencil and pull the opposite between the clip end of your clothespin. Aim your weapon and open your clothespin to release and fire your rubber band.
Fashioning a Rubber Band Rifle
-
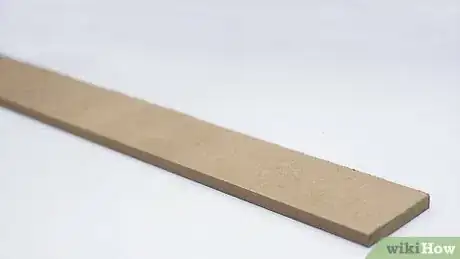
1Find a suitable piece of wood for the stock and barrel. The stock and barrel of your rubber band rifle should be made of a material soft enough that you can cut a groove into it. Wood is likely the cheapest and most readily available option, though bamboo and similar materials can also make an effective stock.
- Your stock should be about two feet (60 cm) in length.
- You can find suitable wood for your stock from a sturdy tree branch, a hardware store, or a lumber yard.
- Spare handles for tools, frequently sold at hardware stores, are an excellent option to consider.
-
2Collect the rest of your rubber band rifle parts. In addition to your stock and barrel, you'll need a release along with something to attach your rubber band release to your gun. All in all, you'll need:
- Clothespin (for release)
- Pencil
- Glue (wood glue, superglue, etc.)
- Knife
- Rubber band
-
3Attach a clothespin to your stock to act as your release.[1] The best placement for your clothespin depends on the kind of rifle you intend on making. A high powered rubber band rifle can be made by attaching your clothespin farther back on the stock. Normal rifles should have the clothespin attached ⅔ of the way from the front toward the back of your stock. To attach your clothespin:
- Mark your stock with a pencil or knife at the location you plan on attaching your clothespin.
- Use a glue, like wood glue, superglue, or hot glue, to attach your clothespin to your stock.
- Allow sufficient time for your glue to fully dry.
- Note: the farther back you put your clothespin, the more pressure your rubber band will exert on the pin. If you place your pin too far back, your clothespin might not be strong enough to hold your rubber band in place.
-
4Notch your stock at the front of the barrel.[2] Use a knife or a cutting tool, like a small woodworking saw, to cut a notch in the front of your stock where your barrel comes to an end. This will be where you load your rubber band.
-
5Arm your rubber band rifle with ammunition. Take a rubber band and put one end of it into the notched part of your stock at the tip of the barrel. Then pull your rubber band back, stretching it all the way to the clothespin. Open your clothespin and:
- Hold your rubber band so that it is behind the teeth of your clothespin.
- Close your clothespin to trap the rubber band on the inside of the clothespin.
-
6Test tension and sturdiness. Using your finger, push and pull lightly on your armed rubber band to make sure the notch you have cut is deep enough. Then, inspect your clothespin to ensure it is sturdy enough to withstand the tension of your rubber band.
- If the band slips free easily, you may want to use your cutting tool to cut your notch a little deeper.
- If your clothespin does not seem sturdy enough, you may want to apply some more glue or an additional fastener, like duct tape.
-
7Test fire your new rubber band rifle. Aim your rifle by looking down stock, using the clothespin and end of the barrel to sight your target. When, looking down the barrel of your rubber band rifle, you see your target right above both your clothespin and the tip of your barrel, down on the clothespin to release the rubber band.
- At maximum tension, the rubber band should fire about 15 to 20 yards (13.7 to 18.3 m).
Crafting a Realistic Rubber Band Rifle
-
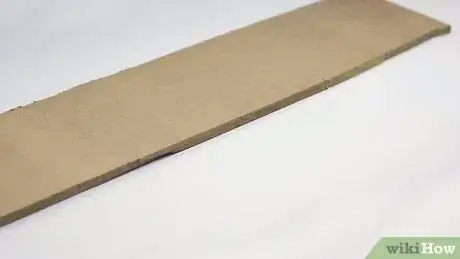
1Find a suitable piece of wood. To make yourself a more realistic rifle, you'll need a board about three feet (90 cm) long and six inches (15 cm) wide. You should be able to purchase a board for this purpose from your local hardware store or lumber yard.
-
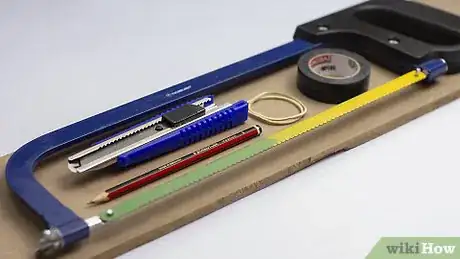
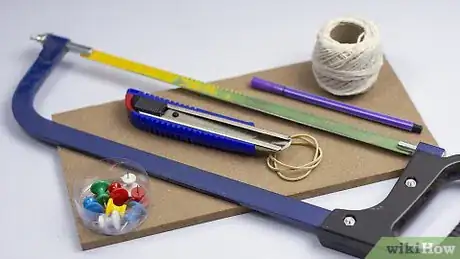
2Get your other rifle making supplies. In addition to the wood that you will form into the main body of your rubber band rifle, you will also need ammunition and supplies to help you cut your wood into the shape of your gun. For this project you should have:
- Pencil/felt tip marker
- Woodworking saw (or a common saw)
- Jig saw (optional)
- Duct tape (or thin leather strip)
- Knife
- Rubber bands
-
3Draw the outline of your rifle on your board. Using a pencil or felt tip marker, draw a general outline of a rifle. Feel free to do this freehand, though you may want to use an image from online to model your outline. Generally, your rifle should have:
- A long, thin barrel
- A rectangular sight atop the beginning of the barrel.
- A stock.
- A trigger.
-
4Cut out the outline of your rifle. Use a woodworking saw for greater precision, or a common saw if that is unavailable, and cut along the outside of the outline you drew on your board. Do this until the outline is completely cut free.
-
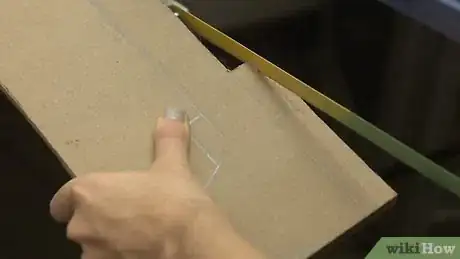
5Notch the front of your barrel.[3] Take a jig saw and make a triangular notch in the front of your wooden gun cutout. The notch should form a wedge pointing inward on the barrel and should be thick enough to accommodate a rubber band.
- In the event you don't have a jig saw, a normal saw or knife should be able to sufficiently notch the front of your barrel.
-
6Attach your trigger. Take a piece of duct tape or a thin strip of leather folded in half and nail or staple it onto the center of the top of where the stock meets the barrel. You will use this strip like a "trigger," where by pulling the strip free you can fire your rubber band.
-
7Notch the top of your barrel beneath where your strip covers. Using a saw or knife, cut a notch into the top of your barrel beneath where you have attached your trigger strip. Your notch should be deep and thick enough to serve as a catch for your rubber band.
-
8Arm your weapon. Tuck your duct tape or leather strip into the notch you have made on the top of your barrel. Now your gun is ready to be armed with a rubber band. Place one end of your rubber band in the notch you have made at the end of your barrel and the other end over your strip and into the notch atop your barrel.
-
9Pull your strip free to release your rubber band. Pull backwards on your strip of duct to release your rubber band, causing it to fire down the length of your barrel. Take aim by:
- Look down the barrel of your gun with your dominant (most likely your right) eye.
- Align the top of your barrel where the notch is with the tip of your barrel as closely as you are able.
- Adjust your gun until you see your target directly above both your notch and tip of the barrel.
- Release your rubber band.
Designing a Rubber Band Pistol
-
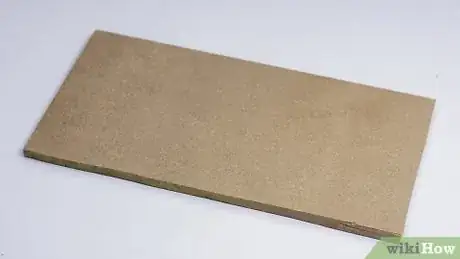
1Find a flat, relatively thin piece of wood. A regular board, one foot (30 cm) long and six inches (15 cm) wide, should work well for your pistol. Wood in these dimensions can be purchased at most hardware stores or lumber yards.
-
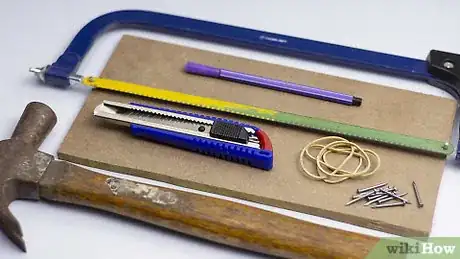
2Pull together your pistol production parts. There are some tools you should have on had so that you can fashion the piece of would you found into a really cool rubber band pistol. To make your pistol, you'll need:
- Pencil (or felt tipped marker)
- Saw
- Knife
- Rubber bands
- Nails (thin kind)
- Hammer
-
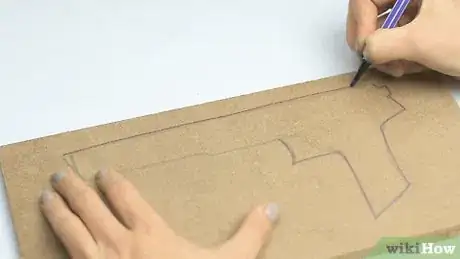
3Draw your pistol on the wood as a guide. With a pencil or felt tipped marker, draw the desired outline of your pistol on your piece of wood. You may want to refer to an online picture of a pistol to serve as a model for your drawing.
-
4Cut your pistol outline free from the board. Using a normal saw, follow the pistol outline you drew on your board to guide your cutting. Once you cut your pistol free, take some sandpaper and smooth any jagged edges.
-
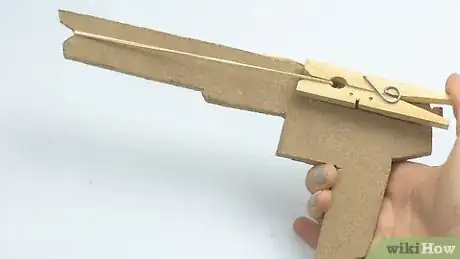
5Create a rubber band catch on top of your barrel with a clothespin.[4] Do this by using a hammer to pound a small nail through the part of your clothespin that will lie flat against the barrel of your gun. A second nail can be added to improve the stability of your clothespin.
-
6Cut a notch in the front of the barrel. Use a regular saw or knife to cut a V-shaped notch into the front end of the barrel of your pistol. The resulting notch you make should be deep and wide enough to serve as a catch for your rubber band.
-
7Load your pistol with a rubber band. Do this by catching one end of your rubber in the notch you made at the front of the barrel and pulling it into the jaws of the clothespin. While the clothespin is closed, the pistol will be loaded with a rubber band. To fire, open the clothespin and shoot the rubber band.
Smithing the Legendary Rubber Band Machine Gun
-
1Find or purchase a piece of wood. You'll need a board that is at least one foot (30 cm) long, six inches long (15 cm), and of decent thickness. Thicker wood will result in a sturdier gun. Wood can be bought at most local hardware stores or lumber yards.
-
2Accumulate the necessary parts for machine gun making. The wooden board that you now have will eventually turn into the stock and barrel of your rubber band machine gun. But to transform that wood into your legendary rapid-shooter, you'll need:
- Pencil (or felt tipped marker)
- Saw
- Knife
- Rubber bands
- String
- Thumbtack
-
3Draw the outline of your machine gun on the board. Use a pencil or felt tip marker and sketch the outline of your machine gun. You may want to look up some images on line to serve as an example for your outline.
-
4Cut your outline free and sand all rough edges. Using a normal wood saw, cut along the outline you have drawn on your wood until your machine gun is free from the board. Once it is free, you can take sand paper and rub it against the edges of your wooden gun until it is smooth to the touch.
-
5Notch the barrel of your gun, tip to tip. Cut a notch with your knife that runs down the barrel of your wooden gun, starting where your barrel meets the stock and running along the top side. This will be the track for your pull-release string.
-
6Cut side to side notches in the top of your barrel.[5] Starting where the stock of your gun meets the barrel, cut as many horizontal notches with your knife as you desire. Leave about one inch (2.5 cm) between your horizontal notches, and make sure your tip to tip notch running along the top of your barrel crosses all of your horizontal notches.
-
7Attach your pull-release string. Use a tack to pin your string to the very front of the barrel of your wooden gun. Lay your pull-release string atop the barrel of your gun, guiding it with your fingers so that it lays in the tip to tip track.
-
8Arm your machine gun with rubber bands. Each of the horizontal notches you cut into your barrel will be a catch on which you can string your rubber band. Take one end of your rubber band and catch it on the front of your wooden gun, and pull it back until you can hook it in place onto a horizontal notch.
-
9Pull the string to release your rubber bands. By pulling on the release string quickly, you'll knock the rubber bands free one after another, creating a rapid fire, machine-gun effect. You might also think of pulling the string slowly to create a more sustained effect.
Creating a Rubber Band Sniper Rifle
-
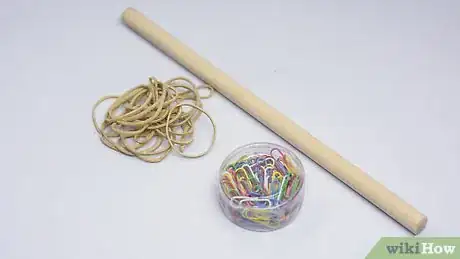
1Gather your supplies. Your rubber band special ops sniper rifle is made with only the strongest yardstick or meter stick. A flimsy meter stick might not be able to withstand the tension of your rubber band rounds. You'll need:
- Yardstick/meter stick
- Rubber bands
- Paperclips
-
2Make rounds. Do this by taking two rubber bands and tying both together. To complete your round, you'll need to string a paperclip onto one of the conjoined rubber bands. Repeat this process until you have around 10 rounds of ammunition.
-
3Arm your weapon. Hold your rubber band round by the paper clip and catch the opposite end on the tip of your meter stick. Then stretch the rubber band along the entire length of your meter stick, holding the meter stick by supporting the underside of it.
-
4Release your paper clip to fire the round. Now that your rubber band round is strung tensely along the entire length of your meter stick, letting go of your paper clip will launch the rubber bands. Due to the extreme tension and the attached paper clip, this round should not be aimed at living creatures, as it could do harm.
Community Q&A
-
QuestionCan I shoot at bugs?
 Community AnswerYes, you can.
 -
QuestionAre there more ways to make a rubber band gun?
 Community AnswerYes. There are many more ways to make one. A quick way is to carve a gun shape out of wood, then put a stick through, top to bottom, for the trigger, and a nock on the front of the barrel, to hold the band in place.
 -
QuestionCan I make a rubber band gun that use household items and not wood?
 Community AnswerYou can replace the wood with cardboard. The "trigger" thumbtack is optional, you can tape/glue cardboard on instead.
Warnings
- Don't aim at living things, you could do harm or cause injury. Shoot at targets only.⧼thumbs_response⧽
- Doing this may get you into trouble at school. Do not attempt to fire a rubber band gun at school.⧼thumbs_response⧽
Things You'll Need
Fashioning a Rubber Band Rifle
- Wood (two feet long (60 cm))
- Clothespin (for release)
- Pencil
- Glue (wood glue, superglue, etc.)
- Knife
- Rubber band
Crafting a Realistic Rubber Band Rifle
- Wood (three feet (90 cm) by six inches (15 cm))
- Pencil/felt tip marker
- Woodworking saw (or a common saw)
- Jig saw (optional)
- Duct tape (or thin leather strip)
- Knife
- Rubber bands
Making a Pencil Peashooter
- Pencil
- Thumbtack
- Hot glue gun or superglue
- Clothespin
- Rubber band
Rubber Band Pistol
- Wood (one foot (30 cm) by six inches (15 cm))
- Pencil (or felt tipped marker)
- Saw
- Knife
- Rubber bands
- Nails (thin kind)
- Hammer
Smithing the Legendary Rubber Band Machine Gun
- Wood (one foot (30 cm) by six inches (15 cm))
- Pencil (or felt tipped marker)
- Saw
- Knife
- Rubber bands
- String
- Thumbtack
Creating a Rubber Band Sniper Rifle
- Yardstick/meter stick
- Rubber bands
- Paperclips
References
- ↑ http://builtbykids.com/make-a-rubber-band-gun/
- ↑ http://www.motherearthnews.com/diy/rubber-band-rifle-zmaz82jfzkin.aspx
- ↑ http://www.motherearthnews.com/diy/rubber-band-rifle-zmaz82jfzkin.aspx
- ↑ http://builtbykids.com/make-a-rubber-band-gun/
- ↑ http://www.motherearthnews.com/diy/rubber-band-rifle-zmaz82jfzkin.aspx
About This Article
To fashion a basic rubber band rifle, first choose a piece of soft wood or bamboo that’s about 2 feet long to make the stock and barrel. When you’re ready to make the release, glue a clothespin near the back end of the stock, with the gripping end facing forward. After the glue has dried, use a knife or small saw to cut a notch into the front end of the stock. Finish up by stretching a sturdy rubber band from the notch to the clothespin, then pinch the rubber band firmly in place at the other end with the clothespin. Squeeze the clothespin to release and fire your rubber band. Keep reading to learn how to make other types of rubber band guns, like a pencil pea shooter or rubber band pistol!

.webp)
