This article was co-authored by wikiHow Staff. Our trained team of editors and researchers validate articles for accuracy and comprehensiveness. wikiHow's Content Management Team carefully monitors the work from our editorial staff to ensure that each article is backed by trusted research and meets our high quality standards.
wikiHow marks an article as reader-approved once it receives enough positive feedback. In this case, 83% of readers who voted found the article helpful, earning it our reader-approved status.
This article has been viewed 370,519 times.
Learn more...
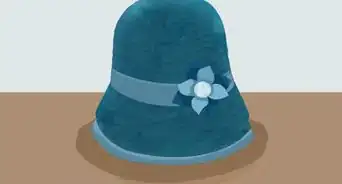
Bucket hats are a trendy accessory that can complete just about any outfit. They are also pretty handy at protecting your hair from the sun. Instead of running off to the store and buying one, why not make you own? They are fast and easy to make. Once you know what to do, you can make a new hat for every occasion!
Steps
Cutting the Pieces
-
1Choose your fabric. You will need two different colors, one of the outside of the hat and one for the inside. Consider using cotton for one side and canvas or denim for the other.
-
2Cut two 8-inch (20.32-centimeter) circles. You will need to cut one circle out of each fabric. This will be the top of the hat.[1] You will be using ½-inch (1.27-centimeter) seam allowances. If you have a very small head, you might want to cut a smaller circle. If you have a bigger head, you'll need to cut a bigger circle.Advertisement
-
3Cut the body pieces. You will need two 12 by 3-inch (30.48 by 7.62-centimeter) rectangles for each fabric. You should have four rectangles total.[2]
- If you want a taller hat, make the rectangles 4 inches (10.16 centimeters) wide instead.
- If you cut a bigger/smaller circle, then cut each rectangle so that it measures half of the circumference.
-
4Cut the brim pieces. You will need four identical pieces total, two from each fabric. The pieces need to be 3½ inches (8.89 centimeters) wide. They need to be 12 inches (30.48 centimeters) long along the inner curve and 18 inches (45.72 centimeters) long around the outer curve.[3]
- If you want a wider brim, cut the arches 4½ inches (11.43 centimeters) wide instead.
- If you cut a bigger/smaller circle, match the inner curve of the brim to the length of your adjusted rectangle.
-
5Consider cutting some fusible interfacing. If your fabric is thin, you might want to add interfacing. Cut the interfacing ½ inch (1.27 centimeters) smaller than your pieces, then iron them to the wrong side of the fabric. You only need to do this for the inner or the outer fabric pieces, not both.


Sewing the Hat
-
1Pin and sew the rectangles together. Pin the two outer rectangles together, right sides touching. Sew up both of the narrow ends using a ½-inch (1.27-centimeter) seam allowance.[4]
- Repeat this step for the two inner fabric pieces.
-
2Pin and sew the brim pieces together. Pin the two outer brim pieces together, right sides facing in. Sew along just the narrow, straight ends. Use a ½-inch (1.27-centimeter) seam allowance.[5]
- Repeat this step for the two inner fabric pieces.
-
3Press the seams open on the body and brim pieces. Place one of the body pieces on the ironing board with the seam facing you. Use your iron to spread apart the seam. Press the seam open and flat. Repeat this step for all of the seams on all of the body and brim pieces.
-
4Pin and sew the body pieces to the circles. Pin the top edge of the outer body piece to the outer edge of the matching circle. Make sure that the wrong sides are facing out. Sew around the edge using a ½-inch (1.27-centimeter) seam allowance.[6]
- Repeat this step for the two inner fabric pieces.
-
5Pin and sew the brim to the body. Pin the inner edge of the matching brim all around the bottom edge of the body piece. Make sue that the wrong sides are facing out, then sew using a ½-inch (1.27-centimeter) seam allowance.[7]
- Repeat this step for the two inner fabric pieces.


Assembling the Hat
-
1Tuck one hat into the other. Turn one hat right side out; leave the other one as it is. Tuck the first hat into the second one so that the right sides are pressed together and the wrong sides are facing out.
-
2Pin and sew around the outer edge of the brim. Sew using a ½-inch (1.27-centimeter) seam allowance. Leave a 4-inch (10.16-centimeter) wide gap for turning. Remove the pins as you sew.
-
3Cut notches into the seams to reduce bulk. Cut a notch every ¾ inch (1.91 centimeter) to the seam around the top of the hat. Cut a notch every inch (2.54 centimeters) to the seam around the outer edge of the brim. The notches need to be just under ½ inch (1.27 centimeters) so that they don't cut into the stitching.
- You don't need to cut notches into the seam between the body and brim pieces.
-
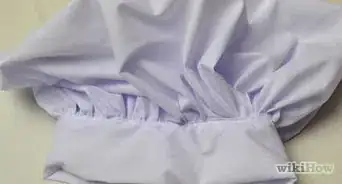
4Turn the hat inside out through the gap. Shape the hat so that one piece is tucked into the other. If you need to, use a skewer or knitting needle to help push out the seams along the brim.


Finishing the Hat
-
1Tuck and press the gap shut. Tuck the edges of the gap in by ½ inch (1.27 centimeters) so that they match up with the rest of the brim. Press the brim flat with an iron when you are done.
-
2Topstitch around the outer edge of the brim. Sew ¼ to ½ inch (0.64 to 1.27 centimeters) away from the outer edge of the brim.
-
3Add more rows of topstitching to the brim. You don't have to do this, but it will make your hat look more professional. Simply topstitching around the brim for 4 to 5 more rows. Leave a ¼ to ½ inch (0.64 to 1.27 centimeters) gap between each row.[8]
-
4Topstitch the top and body of the hat, if desired. Again, if you don't have to do this, but it'll give you hair a nice touch. Topstitch around the top edge of the body part, ¼ inch (0.64 centimeter) away from the seam. Next, topstitch around the bottom edge of the body part, also ¼ inch (0.64 centimeter) away from the seam.[9]


Community Q&A
-
QuestionWhere can I find the cord and attachments for the strap?
 T. ChinsenTop AnswererCord and attachments can be purchased at any fabric store, in the notions department. Some cord comes packaged or you can purchase by measured length.
 -
QuestionCan I make the hat reversible?
 LilyloversTop AnswererSure! This would be a great way to make your hat unique and adaptable for different outfits.
 -
QuestionWhat type of material do you need to make this?
 Athena21Community AnswerAny sort of medium to heavy duty fabric should work - it needs to be stiff enough to hold the shape of the hat. So something like cotton, canvas or denim might be a good choice. If you choose a thinner fabric, you'll need to use fusible interfacing, as explained in the article.
Things You'll Need
- Two different colors of fabric
- Fusible interfacing (optional)
- Thread
- Sewing machine
- Sewing pins
- Fabric scissors


References
- ↑ https://www.youtube.com/watch?v=gYldGOFBKSw
- ↑ https://www.youtube.com/watch?v=gYldGOFBKSw
- ↑ https://www.youtube.com/watch?v=gYldGOFBKSw
- ↑ https://www.youtube.com/watch?v=gYldGOFBKSw
- ↑ https://www.youtube.com/watch?v=gYldGOFBKSw
- ↑ https://www.youtube.com/watch?v=gYldGOFBKSw
- ↑ https://www.youtube.com/watch?v=gYldGOFBKSw
- ↑ https://www.youtube.com/watch?v=gYldGOFBKSw
- ↑ http://www.applegreencottage.com/2014/08/tutorial-cute-bucket-hat.html
About This Article

Bucket hats can complement nearly every outfit, and they’re fast and easy to make at home. Start by picking 2 different colors of fabric since you'll be making an inner lining and outer lining that you'll sew together in the end. Pick different fabrics, like cotton for 1 side and canvas or denim for the other. Once you have your fabric, you’ll need to cut 2 circles for the head-piece, 4 rectangles for the body pieces, and 4 brim pieces. After you cut your fabric, pin and sew the rectangles, brim pieces, and body pieces together. Finally, pin and sew the inner and outer linings together to get your original and fashionable bucket hat. To learn how to cut notches into the seams of your bucket hat to reduce bulk, keep reading!