wikiHow is a “wiki,” similar to Wikipedia, which means that many of our articles are co-written by multiple authors. To create this article, 184 people, some anonymous, worked to edit and improve it over time.
This article has been viewed 1,311,858 times.
Learn more...
A gimp, also called a gymp or boondoggle, is a lacing stitch used to make bracelets, keychains, pulleys, and even bookmarks. It's a wonderful stitch to know, and useful for a variety of applications, and is the cornerstone of all "boondoggle" stitches. [1] Later on you can choose to progress to the spiral stitch.
Steps
How to Use the Double Loop Method
-
1Obtain two colors of gimp lacing from a craft store. You can do this with two strands of one color, but it's easiest to keep track of what you're doing with two colors, especially if you're just starting. Choose any colors you like.
-
2Cut two pieces of gimp from two different colors. Place one on top of the other to make a cross. Make sure the pieces lay flat. [2]
- When cutting the material, cut an equal length. The lacing isn't very expensive, and it's much easier to trim a bit at the end than to add more later.
- Make sure you use a flat surface to start, after you started it, don't use a flat surface- pick up the strands to work with them.
Advertisement -
3Make a twist. Hold one of the strands. Twist it around the other strand twice, making two loops over the straight piece.
-
4Weave the second piece. Take the other piece and weave it above the first one. Do the same to the other side of the strand. Move to the second color. Weave the second color over and under the two loops. Go straight across. Weave the other strand, repeating the stitch with the second color.
- If using a flat material, avoid twisting the strands as you loop them over and pull them through.
-
5Pull tight. Make a gentle, slow pull to avoid twisting. [3] Try to pull each stitch to a consistent tightness so that they will come out even. An easy way is to hold the center of the stitch and pull one strand at a time. Leave some extra length. You'll want to have about three inches at the end for attaching as a bracelet or to tie to an object.
-
6Repeat. Use this stitch to make additional stitches, adding to the length of your bracelet or lanyard. Make two loops of one color, straight across the stitch you just made. Leave some extra length. You'll want to have about three inches at the end for attaching as a bracelet or to tie to an object.
-
7Finish when desired. A box styled gimp can be as long or as short as you wish. No knotting or tying off is necessary on the ends; simply be sure the last stitch is tight, and it should hold the whole length of stitches in. [4]


How to Use the Single Loop Method
-
1Start off as normal. Begin in the same way as in the Double Loop method. Use the Double Loop method for the first stitch, then begin using the Single Loop method. This technique is more advanced; it is trickier, but quicker once you're used to it. The red arrow shows what you will do in the current step. Your result should match the next image at the beginning of this step.The four parts of the cross are now Strands A, B, C, and D.
-
2Fold Strand A over. Leave a loop. Hold it with one finger while you prepare to make the next fold. Take your time making the folds and loops, and make sure they’re nice and even.
-
3Repeat with Strand B. Fold Strand B (the one on the same side as Strand A) over Strand A. Hold it down with one finger.
-
4Fold Strand C over the top of Strand B. Repeat the first step with the second strand. You can hold this fold down with the same finger you used for the second fold.
-
5Fold Strand D. Put Strand D over the top of Strand C, but underneath Strand A. Pull each strand tight. As with the Double Loop method, be sure to pull slowly and evenly to avoid twisting the strands, and to ensure an even, flat stitch.
-
6Rename the strands. Strand A is now Strand C and Strand C is now Strand A. Repeat. You will be back at the beginning, only the pattern will be flipped.


How to Make Stuff with your Box Styled Gimp
-
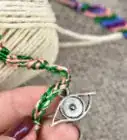
1Make a bracelet. One of the most common uses is for friendship bracelets. From young kids to teenagers to adults, friendship bracelets are worn around the world, and they are commonly made form the simple box gimp stitch.
- Make the gimp as long as it needs to be (use a measuring tape on your wrist and add an inch). Super glue or melt the ends together and then slip it around your wrist. You could also use metal clasps.
- If you don't have super glue you can tie the ends together, or you can also use a match to melt the ends together.
-
2Make a keychain. Add a keyring to one end of your gimp and you've got a keychain! Having a nicely stitched gimp as your keychain holder is a nice look, and since gimp lacing and the stitch itself are highly durable, it’s ideal for applications such as keeping your keys in place.
- Add the key ring first, as you begin the stitch if your intent is to make a keychain.
- You can make a keychain out of a gimp you’ve already woven- simply use a match to melt the ends of the two strands together around your keyring for a permanent connection. [5]
-
3Make a lanyard. A box gimp is ideal for making a long, sturdy lanyard. The gimp lacing can withstand being pummeled about on a lifeguard’s neck as he or she jumps in and out of the water.
- You'll need two extra long strands of gimp.
- Attach the two pieces by tying, using superglue, or melting together to form the attachment to hang around your neck.
- Attach whistle or other item in a similar fashion as a keyring to the other two ends.


Community Q&A
-
QuestionHow do I do it with jelly string?
 Community AnswerYou do it the same way. At my summer camp we used jelly string instead to make the bracelets, and they turned out amazing. Just follow the steps given.
 -
QuestionIs there a difference in the final pattern if I start with one method rather than the other?
 Community AnswerNo. You can start with whichever method you think is the easiest.
Warnings
- Don't put one too tightly around your wrist, neck, ankle or finger as it may cut off circulation.⧼thumbs_response⧽
Things You'll Need
- Two strands of gimp lacing, any color
- Scissors
- Large and stable surface

References
About This Article
To make a box styled gimp, start by taking 2 equal lengths of gimp from 2 different colors and placing 1 on top of the other to make a cross. Hold 1 of the strands and twist it around the other strand twice, making 2 loops over the straight piece. Take the other piece and weave it above the first one. Then, do the same thing to the other side of the strand. Weave the second color over and under the 2 loops, go straight across, and gently pull each stitch so they’re even. Use this stitch to make additional stitches down the length of gimp, and leave some extra length at the end so you can attach it to a bracelet or object. For tips about how to use the single loop method to make a box styled gimp, read on!