This article was co-authored by Amy Guerrero. Amy Guerrero is an Arts and Crafts Specialist and the Owner of Sunshine Craft Co., a crafting studio based in Phoenix, Arizona. Amy specializes in macrame, DIY crafting, and teaching fiber arts. She offers monthly in-person and online workshops along with having developed a range of DIY craft kits for at-home projects. Amy holds a BS in Industrial Design from Philadelphia University. She worked as a graphic designer before starting her own business. Sunshine Craft Co. is a creative hub that offers a wide range of workshops, tools, and resources for any craft project to inspire creativity and community engagement.
There are 7 references cited in this article, which can be found at the bottom of the page.
This article has been viewed 5,641,121 times.
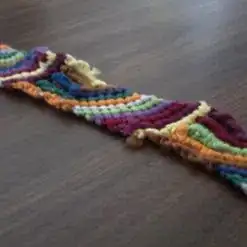
Friendship bracelets are fun, easy things to make! You can give them to a friend, or keep them to spice up your own jewelry collection. If your friendship bracelet-making skills are especially refined, you can even sell a few! Start by learning the basic technique, then get fancy by adding simple braids, charms, and beads.
Steps
Getting the Bracelet Started
-
1Choose several strands of embroidery thread in a variety of colors. You’re the artist here. Choose as many strands of thread as you like, as long as you're using three or more. Go for color combinations that you think would make a pretty pattern. Get creative! If you only use one color of thread, you won't be able to create a pattern.[1]
Four to six strands will make a narrow bracelet, and 6-10 strands will make a thicker one. The more strands you chose, the wider the bracelet will be.
-
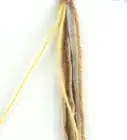
2Measure and cut your first strand. Measure a length of thread slightly longer than the distance from your fingertip to your shoulder and then cut it. That way, you’ll have enough thread for the bracelet to stretch around your wrist to create a pattern. It’s better that your string is too long than too short, so cut a longer string when in doubt.Advertisement
-
3Use the first strand to measure the remaining strands. You want a nice, even bracelet. Hold the cut strand up to the remaining strands and cut them to be the same length as this strand. Spread out the threads so that the colors are in the order you'd like the striped patterns to be. To make the knotted end of your bracelet less bulky, try not to cross the threads over one another too much.
-
4Pass the first strand over the second strand to tie a knot. You will need to make the "half-hitch" knot to do this correctly.[2]
- First, move the first thread over the top of the 2nd thread. Make sure to leave some of the first strand on the other side so that there is a loop.
- Bring the first thread behind the second thread and then pull it through the loop.
- Hold the second thread firmly while you pull on the first thread. As you do this, a knot will move up to the top of the second thread. Now, you’re done with your first knot. Not so bad, right?
-
5Repeat the same knot using the same strands. After you make the second knot with the first and second strand, you will need to use the first strand to make two knots in the third strand, and then the fourth, and so on. Keep going until there are two knots on every strand.[3]
- Make sure that you pull on the thread just until you feel resistance. Be careful not to pull too tight! If some knots are tighter than others, the bracelet will look lumpy and uneven instead of neat and sleek.[4]
- Continue knotting the first strand around each successive thread, moving from left to right, until you've knotted all of the strands and the first strand is in the far right position.[5]


Continuing the Knot Pattern
-
1Start the process again with the far left thread. Congrats, you’ve made it through the first round of knots! Let’s keep going. The far left thread will be the new first thread. Every thread will end up on the right when you're done, and you'll start with a new color of thread every time. Repeat the double knot technique with the far left strand, moving from left to right until the strand is in the far right position.[6]
-
2Continue until the bracelet is long enough for your wrist. You’ve made an awesome bracelet, so you should make sure it fits! Wrap it around your wrist. There should be enough extra room that you (or the person who will wear the bracelet) can fit about two fingers in next to your wrist.
-
3Tie the second end of the bracelet into a knot. Make sure that the knot doesn’t take up any of the length you need to wear the bracelet.
-
4Trim away the additional string. If you still have a lot of string left over, you can snip it off with a pair of scissors.
-
5Tie the bracelet together. Now that you've knotted both ends of the bracelet, just tie the strands of the bracelet together and you’re ready to rock it! If you want your bracelet super snug, have a friend knot the bracelet after you put it on.

Adding a Simple Braid and Beads
-
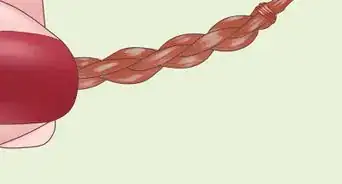
1Add a simple braid. If you want a little extra flair, try a simple braid. The braid will be on either end of the bracelet, so you should start your braid before knotting the main design. Gather neighboring individual strings into groups of two or three so that you have three main threads to braid with (left, center, right).
-
2Cross the right strand over the center strand. Take whichever thread is currently in the right position and cross it over the top of the center thread. That thread now becomes the center thread. Next, take whichever thread is currently in the left position and cross it over the top of the center thread so that thread now becomes the center thread.[7]
- Now, just repeat! Continue this pattern -- right over center, left over center -- until you've reached the desired length of braid, which should be about an inch (2.54cm) or less.
-
3Tie a knot before you begin the main braid. Once you've reached the desired amount of the simple braid, about an inch (2.54cm) or less, tie a knot before you begin braiding the striped pattern.
-
4Braid the other end of the bracelet. After you have a good length of the striped pattern, finish off your bracelet with a short length of simple braid.
-
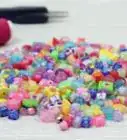
5Add charms or beads to the end of the bracelet. If you feel like your bracelet needs a little something extra, thread some fun charms or beads onto the strands as you braid. Tie them in a knot to secure them.[8]
- All done! Give it to a good friend, try your hand at selling it, or keep it if it's too beautiful to part with.

Community Q&A
-
QuestionWhat is embroidery thread?
 Community AnswerIt's a 6-strand thread that has a looser twist, which allows for a higher sheen.
 -
QuestionWhat other materials can I use to make a bracelet?
 Community AnswerYou can use yarn, string, twine, ribbon, wool, etc. as long as you make sure whatever you choose is not too thick or heavy.
 -
QuestionCan I make this type of bracelet with yarn?
 Community AnswerYes. You can also make it with other types of thread too. Keep in mind that the finished bracelet will also be thicker.
Warnings
- Embroidery thread is very thin. Be careful that you do not tie knots in the wrong place. If you do, it's not the end of the world; you can always pick the knots apart with a pair of tweezers or a safety pin, but it's tedious and once in a while causes a thread to unravel or break. It is very hard to untie knots in embroidery thread.⧼thumbs_response⧽
- Do not tie bracelets too tightly onto your wrist, make sure you still have some circulation!⧼thumbs_response⧽
- Try not to get your fingers stuck in the knots or tangle the thread.⧼thumbs_response⧽
Things You'll Need
- Embroidery thread
- Scissors
- Safety pin(s),clipboard or tape
- Beads and/or charms (optional)


References
- ↑ https://www.mybluprint.com/article/the-best-threads-for-hand-embroidery
- ↑ http://www.animatedknots.com/halfhitch/#ScrollPoint
- ↑ http://www.instructables.com/id/how-to-make-a-friendship-bracelet-1/step5/start-the-knotting/
- ↑ http://www.instructables.com/id/how-to-make-a-friendship-bracelet-1/
- ↑ http://friendship-bracelets.net/tutorial.php?id=12
- ↑ http://www.instructables.com/id/how-to-make-a-friendship-bracelet-1/
- ↑ https://www.youtube.com/watch?v=qxJY4lna5q0
- ↑ https://www.youtube.com/watch?v=tM3-Mt_afNY
About This Article