wikiHow is a “wiki,” similar to Wikipedia, which means that many of our articles are co-written by multiple authors. To create this article, 10 people, some anonymous, worked to edit and improve it over time.
The wikiHow Video Team also followed the article's instructions and verified that they work.
This article has been viewed 124,556 times.
Learn more...
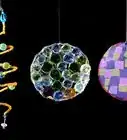
Perler beads are a surprisingly versatile craft material. They were originally marketed to children, but have been used to create cute geeky hair clips or "sprites" of video game characters, among other things. Perler bead keychains can be a great way to accessorize a purse, backpack, or lanyard in a unique and inexpensive way.
Steps
Making the Perler Design
-
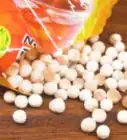
1Gather your materials. While Perler beads, jump rings, and Perler accessories can usually be found in craft stores, you might have to order the key chains online. You can also just use string to attach your creation to the item you're accessorizing.[1]
-
2Prepare the work area. Pull out a pegboard, if you're using one, or use a hard, iron-safe work surface like a wooden table.Advertisement
-
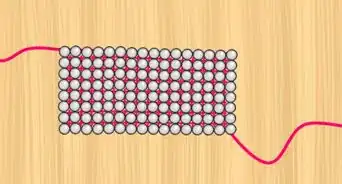
3Make your pattern. Arrange the Perler beads on the pegboard or surface in whatever pattern you want, such as a heart or Pokeball. Use a picture for reference if you need to.[2]
-
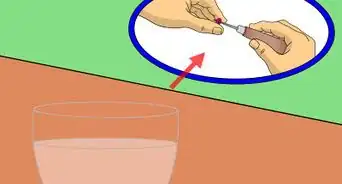
4Prepare to iron. If using a pegboard, carefully transfer it to an ironing board and turn on the iron. If not using a pegboard, leave the beads on the surface and turn on the iron. Place a sheet of parchment paper or Perler ironing paper over your design.[3]
- Make sure the iron is on a "dry" setting, not a steam one.
-
5Press the hot side of the iron over the beads. Carefully move it in a circular motion, making sure that all of the beads are fused. Pressing too hard or moving too roughly can knock beads out of place! Completely fused beads shouldn't have visible holes in the center.[4]
-
6Set the iron aside. Put a heavy flat object on top of your creation and let the beads cool.
-
7Remove the heavy object. Lift the fused beads and flip them over, then iron the back for a smooth, finished look.


Turning Your Craft into a Keychain
-
1Carefully poke a hole through one of the perimeter beads. If you have jump rings, spread one open with your fingers or jewelry pliers. Push it through the hole in your creation. If using string, thread it through the hole.[5]
-
2Secure the jump ring around the key chain's end, joining it through the key chain's last link. If using string, simply loop the string through the key chain's last link (you can loop it through more than once for extra strength), tie it off in a knot, and trim the ends.[6]
-
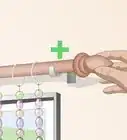
3Attach the key chain to a buckle, zipper tag, or decorative metal loops on the purse/backpack/etc. Alternatively, tie the Perler bead creation directly to the purse/backpack/etc. using string.

Community Q&A
-
QuestionCan I add to the perler bead creation after it's already ironed?
 Community AnswerYes. When you take the beads off the pegs, you can add more by putting the fused beads back onto the board, add new beads, then just iron it again.
 -
QuestionHow can I prevent my beads from cracking?
 Community AnswerYou can prevent your beads from cracking by ironing them a bit more after they start have cracks appear on them. If your perler bead creation breaks, put the pieces together on an ironing table and iron them out with parchment paper. Same goes for the other side.
 -
QuestionAny idea how I can make it stronger and glossy? What can I use to coat it?Community AnswerYou can iron both sides to make it stronger. To make it glossier, you can put clear fingernail polish on it.
Warnings
- Be careful when using the iron! Have an adult do it for you if you're not experienced with them.⧼thumbs_response⧽
- Using a pegboard is recommended, because otherwise, it's very easy for the design to be skewed or knocked out of place.⧼thumbs_response⧽
Things You'll Need
- A pack of assorted Perler® beads
- "Pegboards" to make them easier to shape (optional)
- An iron
- Parchment paper or Perler ironing paper
- Key chains with rings
- Open jump rings or thread
- An image of the design you want to make (optional)


References
- ↑ https://www.craftymarie.com/2019/01/make-perler-bead-keychain.html
- ↑ https://www.youtube.com/watch?v=-R3YGLUsjRY
- ↑ https://craftulate.com/perler-bead-key-chains/
- ↑ http://krysanthe.com/how-to-make-perler-bead-keychains/
- ↑ https://myfrugaladventures.com/2016/03/rainbow-perler-bead-keychain/
- ↑ https://myfrugaladventures.com/2016/03/rainbow-perler-bead-keychain/
About This Article
To create a Perler bead keychain, you'll need beads, parchment or ironing paper, a key ring, and an iron. On top of your paper, lay out your Perler beads in your desired design. Once this is done, place parchment paper on top of the beads and gently iron in a circular motion until your design is melted. Then, place a heavy object, like a book, on top of your beads so they can cool down and stay flat. Once they are cool, poke a hole at the top of your design and add a key ring. For more tips on laying out and ironing your Perler beads, scroll down!