X
This article was co-authored by wikiHow Staff. Our trained team of editors and researchers validate articles for accuracy and comprehensiveness. wikiHow's Content Management Team carefully monitors the work from our editorial staff to ensure that each article is backed by trusted research and meets our high quality standards.
This article has been viewed 120,740 times.
Learn more...
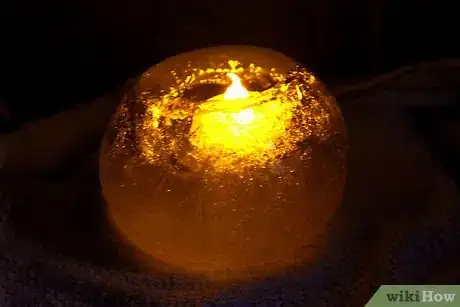
Luminaries are anything that you put a candle into to light up the night. Paper bag luminaries are the most popular, but you can make them from all sorts of materials, including clay! If you live in an area where the temperatures fall below freezing, you can make ice luminaries instead for a magical effect!
Steps
Method 1
Method 1 of 3:
Crafting Paper Bag Luminaries
-
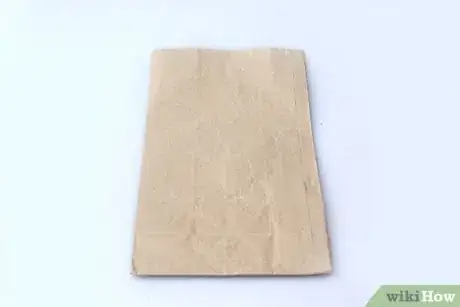
1Get a small, plain, paper bag. A brown paper lunch bag will work great for this, but you can use a colored paper bag instead. You can find these bags in the gift wrap section of a craft store. They are sold in packs, and are often labeled as "goody bags."
- If your bag came with handles, cut them off with a pair of scissors.
- Do not use bags that are made from thick, shiny paper. The light will not pass through them and create that magical glow.
-
2Turn the bag so that the front is facing you. Flatten the bag first, then turn it so that the smooth side is facing you. The side with the bottom of the bag folded against it is the back. If you can see the folded bottom of the bag, flip the bag over.Advertisement
-
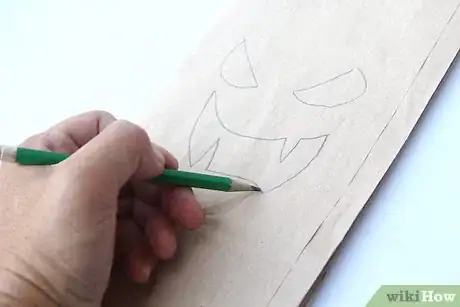
3Trace your desired shape onto the front of the bag with a pencil. Use a pencil to lightly trace the shape onto the front of your bag. If you don't want to freehand the design, use stencil, cookie cutter, or fall leaf instead.[1]
- Your design can be as simple as a Jack-o-Lantern face or as intricate as a doily or snowflake.
- The design needs to be 2 1⁄2 to 3 inches (6.4 to 7.6 cm) from the bottom of the bag.
- Skip this step if you want to use a shaped craft puncher to make your design.[2]
-
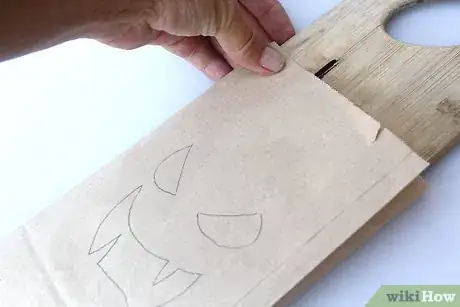
4Slide a small cutting mat into the bag. You can find these self-healing mats in the scrapbooking or scissors section of a craft store. If you can't find a cutting mat that's small enough for the bag, use a piece of wood or thick cardboard instead.
- If you are using a craft hole puncher, slide the bottom half of the puncher into the bag, and place the upper half over the front of the bag.
-
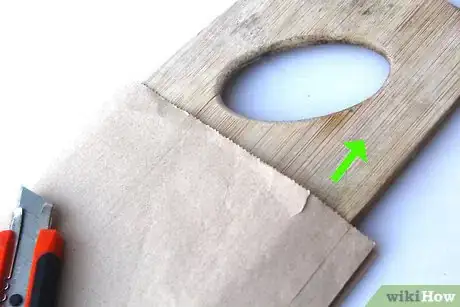
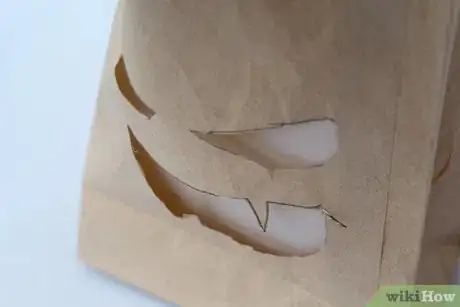
5Cut your design out with a craft blade. If you are doing an intricate design, start with the smaller, inside shapes, then move onto the bigger shapes. Make sure to cut away from yourself and to replace the blade when it becomes dull.[3]
- If you are using a craft hole puncher, press down on the handle to cut out your shape.
- For a more delicate design, use a hammer and an eyelet setting tool to punch holes around your drawing instead. Space the holes 1⁄4 to 1⁄2 inch (0.64 to 1.27 cm) apart.[4]
-
6Remove the cutting mat and clean up your lines. Take the cutting mat out of the bag. If there are pieces of paper still stuck inside the bag, carefully pull them out, or cut them with a pair of small, pointed scissors.
-
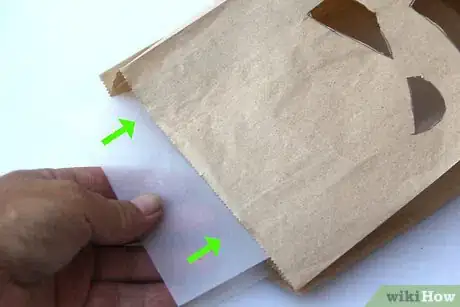
7Secure tissue paper inside the bag, if desired. Cut a sheet of tissue paper, tracing paper, or thin printer paper to the size of your bag. Tuck it inside your bag behind the design, and secure it with glue or pieces of tape. This will give your luminary a softer glow.
- Use colored tissue paper to change the color of the glow.
- A glue stick will work the best for this. You can use regular white glue, but you will need to wait for it to dry.
-
8Set the luminary on a heat-safe surface and fill it with sand. Find a place to display your luminary, such as a concrete doorstep or a driveway. Set the luminary down and make sure that it won't get accidentally knocked over.[5] Fill the bag with 2 inches (5.1 cm) of sand. This will help weigh the luminary down so that it does not fall over.[6]
- If you can't get any sand, use clean kitty litter or small pebbles.[7]
- Craft or aquarium sand will work the best. You can purchase bags of this sand in craft stores and pet stores.
-
9Place a tea light or votive candle into the luminary and light it. If you are worried about the bag catching on fire, place a glass jar or votive holder into the bag first, then place the candle into the jar or votive.[8] Another option is to use a LED or battery-operated tea light instead.
- Never leave burning luminaries unattended. Have a bucket of water nearby in case a luminary tips over.
Advertisement
Method 2
Method 2 of 3:
Making Ice Luminaries
-
1Ensure that it is below freezing outside. You don't need snow, but you need below-freezing temperatures. If the temperature is above freezing, the ice luminaries will melt too fast.
- Choose a day with lots of snow on the ground. The luminaries will look more magical!
-
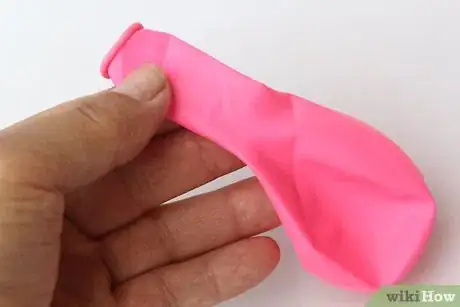
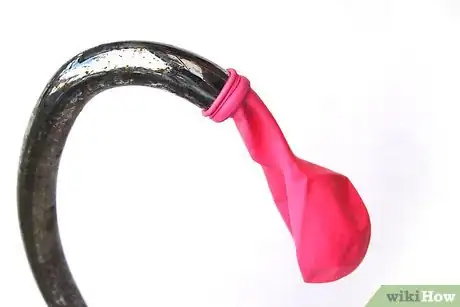
2Choose your balloon and fit the opening over a faucet. Stretch the opening of your balloon over the spout on your faucet. Use a regular balloon if you want a large luminary, and a water balloon if you want a small luminary.
-
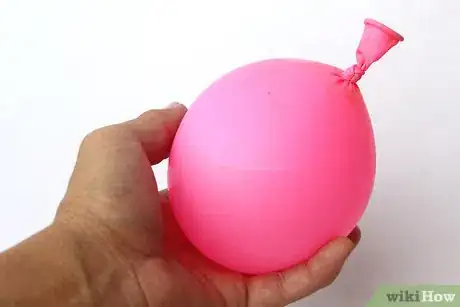
3Fill the balloon with water until it becomes round. Hold the balloon to the faucet with 1 hand, and the bottom of the balloon with the other. Turn the water on and let the balloon fill until it stretches and becomes shaped like a ball. How much you fill the balloon is up to you. The more you fill it, the bigger your luminary will become.[9]
- Do not overfill the balloon; the water needs room to expand as it freezes.
-
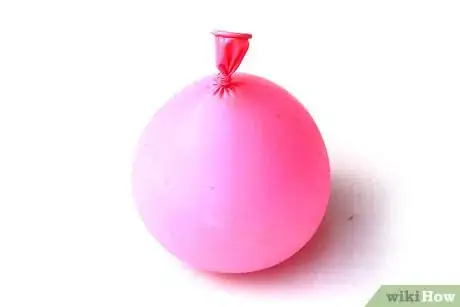
4Remove the balloon and knot the tail. Turn the water off first, if you have not already. Holding the balloon in your palm, use your other hand to tug the tail off of the faucet. Set the balloon down in the sink, with the tail pointing up. Wrap the tail around your finger to make a loop, then pull the end of the tail through the loop.
- If you want a colored luminary, add 1 drop of food coloring to the balloon before you tie it. Shake the balloon after you tie it to mix the color.
-
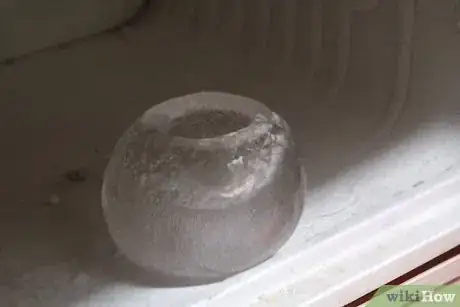
5Freeze the balloon until it turns solid. Place the balloon into the freezer, and leave it there overnight. If you live in a cold climate where temperatures fall below freezing, you can freeze the balloon outside.[10]
- How long the balloon takes to freeze depends on how big it is. Expect this to take anywhere from 6 to 12 hours.
-
6Cut the balloon away from the frozen ball. Use a pair of scissors to cut the tail of below the knot. Cut the balloon apart down the sides, then peel it away from the ice. Discard the balloon when you are done.
- Be careful when removing the balloon. The ball may not be completely frozen inside.
-
7Freeze the ball longer if needed or desired. Depending on the size of your balloon, you may still have water inside it. If you want a solid ice luminary, you will need to freeze your balloon longer. If you want a hollow luminary, poke a hole in the ice, then drain the excess water out.[11]
- Solid ice luminaries have a softer glow than hollow luminaries.
-
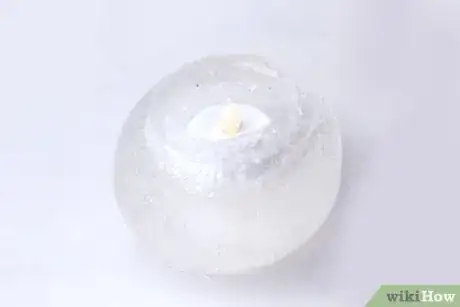
8Make a well in the snow, then set an LED tea light into it. Use your fingers or a small spice jar to make a shallow well in the snow. Turn on a battery-operated, LED tea light, and set it into the well. Make sure that the plastic flame is below the top of the well. If the flame is sticking out, it will get in the way of the ice ball. In this case, you should make the hole deeper.[12]
- If you make a hollow luminary, set the tea light right on top of the snow instead.
- If there is no snow outside, dig a hole in the soil instead.
- You can also use outdoor Christmas lights instead. The ones with the bigger bulbs will work better than the ones with the smaller bulbs.
-
9Place the luminary over the tea light. Because the tea light is inside the snow, the luminary should sit comfortably on top of it. There is no need to carve a hole in the luminary. If you made a hollow luminary, then make sure that you place the opening right over the tea light—you may have to break the ice around the opening to make it larger.[13]
- Be aware that colored luminaries may stain your pavement as they melt.
Advertisement
Method 3
Method 3 of 3:
Creating Clay Luminaries
-
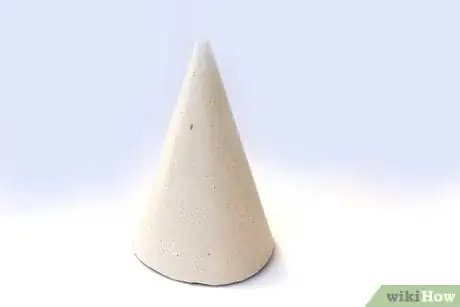
1Create a cone-shaped template out of cardstock. Roll a piece of paper into a cone. Tape or staple it together, then cut the bottom until it is the height you want it to be. Cut the cone along the side edge, then spread it flat. You'll have a shape similar to a semi-circle.[14]
- Make the cone 8 inches (20 cm) tall for a large luminary, 6 inches (15 cm) for a medium one, and 4 inches (10 cm) for a small luminary.
- Alternatively, you can find a template online for a cone, print it, then cut it out with a pair of scissors or a craft blade.
-
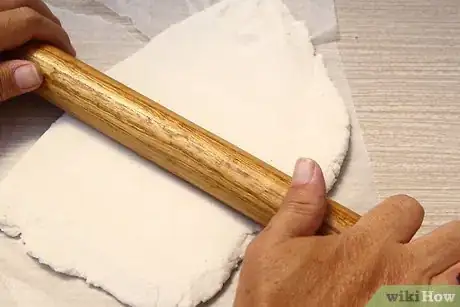
2Roll the clay into an 1⁄8 in (0.32 cm) thick sheet on parchment paper. Place a wad of clay on top of the parchment paper. Roll it into a thin sheet with a rolling pin, about 1⁄8 inch (0.32 cm) thick. Make the sheet a little bigger than your template.[15]
- Air-drying porcelain clay will work the best, but ceramic clay or paper clay will also work. You can find both in the clay aisle of a craft store.
- Avoid using wax paper. It may sound like a good idea, but it will stick to the clay.
- Keep a set of 1⁄8 in (0.32 cm) thick dowels to either side of the clay as you roll it. This will prevent you from rolling the clay too thin.
-
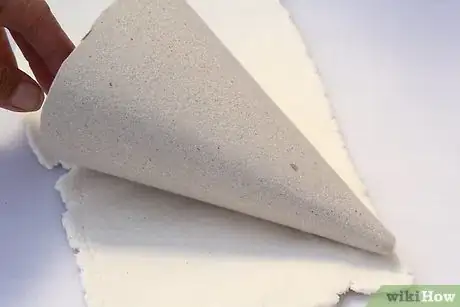
3Transfer your template onto the clay. Place your cardstock template on top of the clay sheet. Trace around the template with a craft blade, making sure to cut all the way through the clay.[16]
- Leave an 1⁄8 to 1⁄4 in (0.32 to 0.64 cm) seam along one of the straight edges of your clay cone. This will make it easier to put it together.
-
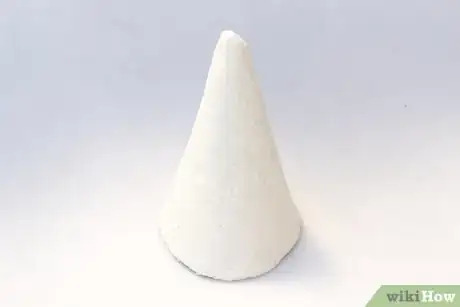
4Wrap the template back into a cone shape. If you made your own template, wrap it so that the side edges touch, then secure them with a long strip of tape. If you printed out a template, there may be a flap for the overlap; assemble the cone according to the instructions.[17]
-
5Create a series of crosshatches along 1 of the straight side edges. Your clay piece should have 2 straight edges and 1 curved edge. Choose 1 of the straight edges, then make a series of Xs along it. This is known as crosshatching, and it should be no wider than the 1⁄8 to 1⁄4 in (0.32 to 0.64 cm) seam you added earlier.
-
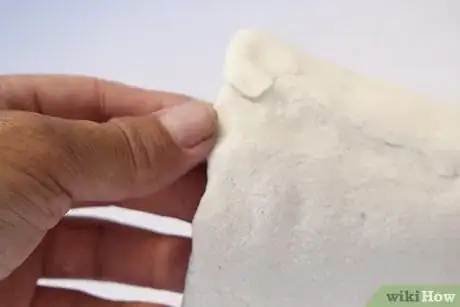
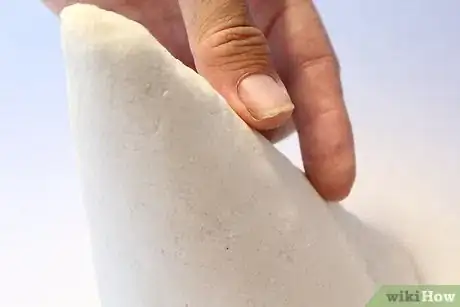
6Wrap the clay around the cone, then dampen and overlap the edges. Pick the clay piece up an wrap it around the cone, with the scored edge on the outside. Dampen the scored edge using a wet finger or sponge, then press the other edge down on top of it.[18]
- For an even stronger hold, score the other straight edge just before you press it down.
- Leave the paper inside the cone. You won't be taking it out until the clay dries.
-
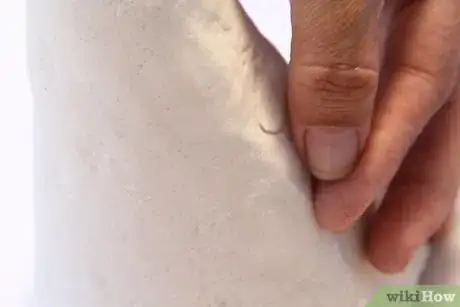
7Smooth down the seam. Support the cone from the inside with 1 hand while you use your other hand to smooth the seam down. Run a wet paper towel or a wet finger back and forth across the seam until it disappears.[19]
-
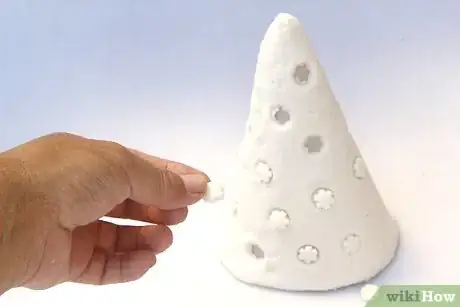
8Cut designs into the cone using mini cutters. Find a set of mini cookie cutters or clay cutters that are between the size of your pinkie nail and thumbnail. Support the cone from the inside as you press the cutters into the clay. Give the cutter a small wiggle before pulling it out of the clay.[20]
- Don't worry about the paper template covering the hole.
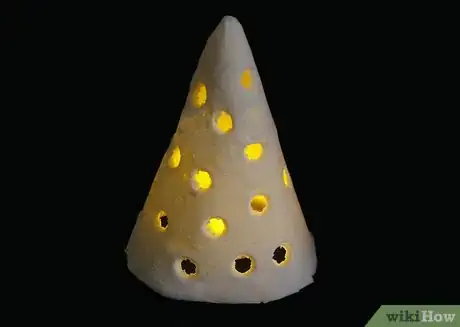
- Cut as many holes into the clay as you want to. The more you cut, the more light will shine through!
-
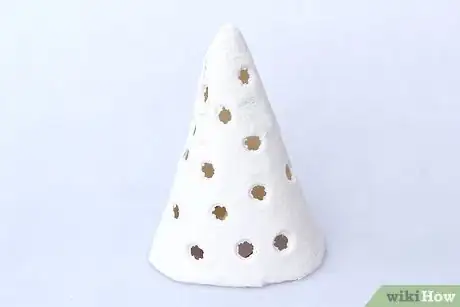
9Wait 6 hours, remove the template, then let the clay finish drying. Set the cone down upright in a cool, dry area. Let it dry for 6 hours, then carefully pull the paper template out of the clay cone. Allow the cone to finish drying. This can take anywhere from 12 to 24 hours, depending on the type of clay that you used.[21]
- If you are worried about the luminary collapsing as it dries, place a small jar inside of it. The jar needs to be tall enough to reach the top of the cone without distorting it.
- The clay will turn lighter in color as it dries. For example, if you used paper clay, it will go from gray to white.
-
10Use the clay luminary with LED or battery-operated tea lights. Do not use real tea lights inside these. While porcelain and ceramic clay do not burn, the heat generated by the tea lights can cause the clay to crack. The lack of air circulation could also cause real flames to extinguish after a few minutes.[22]
- Paint your luminaries or glaze them for a nicer finish.
Advertisement
Community Q&A
-
QuestionDo you need a brown bag to make luminaries?
 Community AnswerThere are a ton of options available. The brown bag way is one way, but you can use vases, tin cans or even a small, hollowed-out log.
 -
QuestionWhat can I use instead of sand?
 Community AnswerYou can use pebbles or even raw beans. If you are using a battery-operated light, you could even use camping stakes through the bottom of the luminaries to secure them to the ground.
 -
QuestionHow do I make the luminaries float?
 Community AnswerIf you want to have the luminaries float in water, you can try using packing bubble wrap. Cut it to be just short of the bottom of your luminaries, and attach using gorilla or double-sided tape. Seal the bottom with plastic wrap and packing tape, making sure your luminaries aren't too heavy that they sink.
Advertisement
Warnings
- Do not leave burning luminaries unattended.⧼thumbs_response⧽
Advertisement
Things You'll Need
Crafting Paper Bag Luminaries
- Paper bag
- Small cutting mat
- Craft blade
- Sand
- Tea lights
- Glass jar or candle votive (optional)
Making Ice Luminaries
- Balloon
- Water
- Freezer or freezing temperatures
- LED, battery-operated tea light
Creating Clay Luminaries
- Cardstock
- Scissors
- Craft blade
- Tape
- Parchment paper
- Air-drying clay (ceramic, paper, or porcelain)
- Rolling pin
- Mini clay or cookie cutters
- LED, battery-operated tea light
- 2 1⁄8 in (0.32 cm) thick dowels (optional)
References
- ↑ http://www.southernliving.com/home-garden/decorating/how-to-make-paper-luminaries
- ↑ http://www.northpole.com/craftcottage/easy-paper-bag-luminaries
- ↑ http://www.southernliving.com/home-garden/decorating/how-to-make-paper-luminaries
- ↑ http://porch.com/gigglesgalore/diy-paper-bag-luminaries/
- ↑ http://www.northpole.com/craftcottage/easy-paper-bag-luminaries
- ↑ http://www.southernliving.com/home-garden/decorating/how-to-make-paper-luminaries
- ↑ http://www.northpole.com/craftcottage/easy-paper-bag-luminaries
- ↑ http://www.northpole.com/craftcottage/easy-paper-bag-luminaries
- ↑ http://onelittleproject.com/ice-luminaries/
- ↑ http://onelittleproject.com/ice-luminaries/
- ↑ http://onelittleproject.com/ice-luminaries/
- ↑ http://onelittleproject.com/ice-luminaries/
- ↑ http://onelittleproject.com/ice-luminaries/
- ↑ https://abeautifulmess.com/2013/12/diy-porcelain-holiday-tree-lights.html
- ↑ https://abeautifulmess.com/2013/12/diy-porcelain-holiday-tree-lights.html
- ↑ https://abeautifulmess.com/2013/12/diy-porcelain-holiday-tree-lights.html
- ↑ https://abeautifulmess.com/2013/12/diy-porcelain-holiday-tree-lights.html
- ↑ https://abeautifulmess.com/2013/12/diy-porcelain-holiday-tree-lights.html
- ↑ https://abeautifulmess.com/2013/12/diy-porcelain-holiday-tree-lights.html
- ↑ https://abeautifulmess.com/2013/12/diy-porcelain-holiday-tree-lights.html
- ↑ https://abeautifulmess.com/2013/12/diy-porcelain-holiday-tree-lights.html
- ↑ https://abeautifulmess.com/2013/12/diy-porcelain-holiday-tree-lights.html
About This Article
Advertisement
