X
wikiHow is a “wiki,” similar to Wikipedia, which means that many of our articles are co-written by multiple authors. To create this article, 9 people, some anonymous, worked to edit and improve it over time.
This article has been viewed 28,748 times.
Learn more...
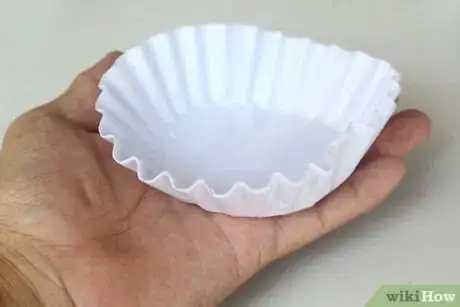
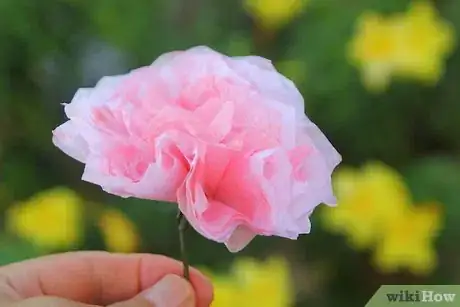
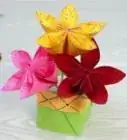
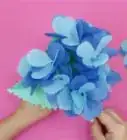
There are many ways to craft beautiful flowers out of paper, but not all of them are as easy and inexpensive as this. If you want to make a simple but effective bunch of "flowers" for a decoration, a centerpiece, or even a bouquet, all you need is a handful of regular coffee filters and a few other crafting materials. Even if you're a crafting novice, you'll be able to make an effective coffee filter flower (or several!).
Part 1
Part 1 of 3:
Dyeing Your Filters
-
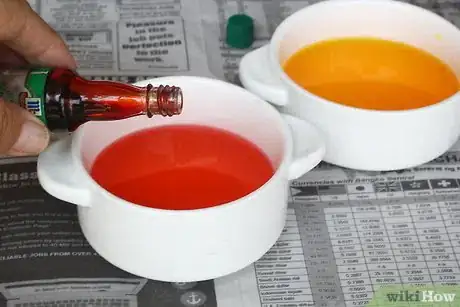
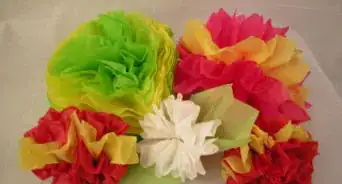
1Pick a type of dye. If you want plain old white flowers, skip this section. You can choose how to dye them, depending on how you want them to look; it's worth experimenting with different kinds of dye, colors, and strengths of your mix. Paint (watercolor or watered-down acrylic paints), food coloring, and even tea can work well, and each of them will give you a different effect.
-
2Protect your surfaces. You're going to be working with a dye of some kind, so put down some newspaper or use an area that you don't mind getting messy. Food coloring in particular can stain your hands and clothes, so be prepared to get a little dirty!
- You'll need a small actual work area (enough room for a bowl), but more importantly, you'll need enough room to let your filters air dry. If you're planning on making a lot of flowers, lay out some newspaper or wax paper, or a set of trays or cutting boards, enough to accommodate several stacks of coffee filters, side by side.
-
3Drop a little of the paint or food coloring in a medium-sized bowl of water. How much you use will depend on the kind of dye. For food coloring, you probably only need 5-10 drops, but with paint, you want a good dollop. Aim for somewhere between the quantity of toothpaste you'd put on a toothbrush and the amount of cream cheese you'd put on a bagel.
- There's no real science to it; just add a little at a time, stirring and mixing as you go, until your color is evenly distributed in the water.
- To get an idea of how dark or vibrant the color will actually be on the filter, you just have to try it out. Then you can add more water or more color to change the outcome, as desired.
-
4Dip your filters in the dye and water. You can dye several filters at a time without any negative effect, so grab somewhere between five and ten in a stack, fold the whole stack in quarters (just for ease of handling), and stick the outer edge in the water. There's no need to immerse them completely, because the filters are very absorbent; they'll suck up the color.
- Try experimenting with how much dye you apply to each one. You might want some of the filters to just have dyed edges or be half colored, and others to be fully colored. Similarly, you might want to do some with a mixture that has a lot of color in it, and others with a more watered-down variation.
- Dye filters in various shades. Flowers with slightly darker centers or outer edges can look pretty neat!
-
5Let them dry. The coffee filters are, obviously, covered in paint or food coloring and wet, so you need to leave them to dry. This might take longer than you think; ideally, leave them overnight. Make sure they're on some newspaper, wax paper, or another surface you don't mind getting stained.
- If you really want to accelerate the process, you can try using a hair dryer to dry them out; it does work, but it can also cause the paper to curl up and change a little in texture, so keep an eye out for any unintended consequences if you try this.
Advertisement
Part 2
Part 2 of 3:
Cutting the "Petals"
-
1Start with three coffee filters - the flower's outside layers. Stack them and fold the whole stack into quarters (fold them in half, and then in half again).
-
2Cut out a ruffled or scalloped edge. This will help the final craft look more like a flower. The edge you're cutting shouldn't be too far from the filter's original edge (assuming you want a flower that's about the size of the original filters). In other words, don't cut too much off; just enough to create a neat edge.
- There's lots of room for experimentation here; try some filters with deeper or shallower curves, some with more or fewer petals, etc. If you're not sure where to begin, start with three to four curves on each quarter side of filter, about half an inch in height.
-
3Grab three more coffee filters for your flower's center. Stack them and again, fold the whole stack into quarters.
-
4Cut a slightly lower scalloped edge. You want the center three filters to be a bit smaller than the outer ones, so cut a little closer to the center angle of the folded stack (maybe 0.25 - 0.5 inch away from the outer edge).
- Try to keep your "petal" size and shape - that is, your scalloped edge - fairly similar to what you cut the first time, for consistency. You want this stack of filters to be a little smaller than the first one, but generally similar in design.
Advertisement
Part 3
Part 3 of 3:
Assembling Your Flowers
-
1Open up and stack all six filters. You don't need them folded anymore; open them up and smooth them out, before stacking them. The smaller set go on top, the larger underneath.
- You might want to separate and rotate the individual filters a little, so that the petals don't perfectly align.
-
2Pinch the filters at the center point, and work your stack into a cone or flower shape. This part can be tricky the first time, but you'll get used to it. Don't worry about getting the "petals" looking perfect at this stage; you just need to secure the center of the flowers. Once you have the center of all six filters held tight, secure the pinched bottom with a stapler.
- Don't worry about manhandling the filters. Even if they get folded or crushed, the outcome will still look good; in fact, you're going to end up purposefully fluffing and crushing them, later.
- Optional alternative: An alternative approach here can result in a more secure flower. This won't work well with pipe cleaners, but if you have a fairly thin wire (like 18-gauge floral wire) for your stems, you can actually poke each filter through it, at the center. Hold the wire firmly and start with the big ones, pushing the wire through each one's center, one by one; then do the small ones. Once all the filters are skewered, use pliers to create a little twist in the wire at the top, like the flower bud's "core". Push the filters up against this core, and work them into a cone shape around it.
-
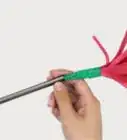
3Attach the stem, if desired. Sure, you can just make a flower bud without a stem, but if you have some pipe cleaners or floral wire (and haven't added it already, with the alternative method above) and want to make a "complete" flower, then now is the time to add it.
- Lay the stem against the pinched bottom of the flower and staple it to the filters. This can get a little finicky if you don't have a good stapler, but it is doable. Practice your angles until you can reliably secure the wire to the filters.
-
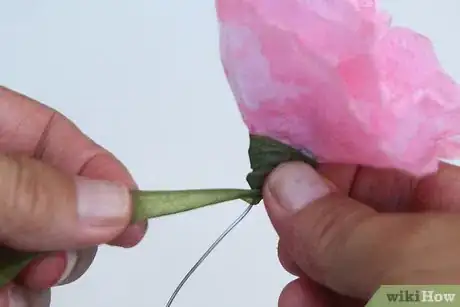
4Tape the flower's base. The staple or wire method are important, but alone they might not hold your flower tightly enough. Get some masking tape, washi tape, or even floral tape (although this variety isn't always very sticky), and wrap it around the base of the flower and stem (if you used one).
- If your tape is green, it can actually help your final product look even more like a flower; the tape doesn't end up very visible in the bunch of flowers, so don't be afraid to use enough to secure the flower to the stem.
-
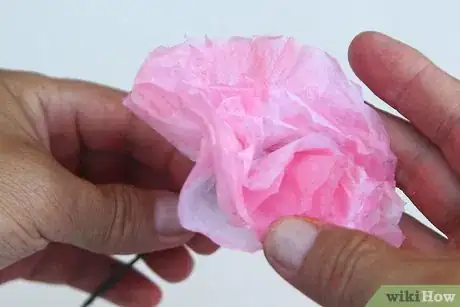
5Fluff out the petals. How much you "crush" and "fluff" is up to you, but it looks good even with a fair amount of "abuse". Do each petal layer one by one, starting in the center. Separate it from the others and pull it towards the center, crushing it a little in your palm to fluff it up. Then do the next one, and so forth. Don't be afraid to rough them up for a more "flowery" look!
- To make the flower look a bit more realistic, hold the stem with one hand, and with your other hand gather the top filter and squeeze it together. Now do this with the second filter, and so forth. Once you've done all six layers, fluff them out a bit.
-
6Make some more, and arrange them in a bunch. With six or seven flowers, you can form a nice little bouquet or vase-full, or you can skip adding the stems and use your flowers to decorate a wreath or other household ornament. Get creative!
-
7Finished.
Advertisement
Community Q&A
-
QuestionCan I alter it to make it easy for kids?
 Community AnswerOf course! You can allow the kids to decorate the coffee filters with markers, glitter glue, crayons, stickers, or whatever they want. Then, pick a colored pipe cleaner, and stick it straight through the middle.
Advertisement
Things You'll Need
- Flat-based coffee filters
- Dye, if desired (food coloring, acrylic paint, watercolor paint, etc)
- A bowl of water
- Newspaper, wax paper, or something similar to protect your surfaces
- Scissors
- A stapler
- 18 gauge green floral wire, green pipe-cleaners, or a similar "stem", if desired
- Tape (ideally green - masking tape, washi tape, or floral tape)
References
- http://www.doodlecraftblog.com/2014/02/coffee-filter-flower-tutorial.html
- twoshadesofpink.blogspot.com/2012/04/coffee-filter-flowers-and-video.html
About This Article
Advertisement
