This article was co-authored by wikiHow Staff. Our trained team of editors and researchers validate articles for accuracy and comprehensiveness. wikiHow's Content Management Team carefully monitors the work from our editorial staff to ensure that each article is backed by trusted research and meets our high quality standards.
The wikiHow Video Team also followed the article's instructions and verified that they work.
This article has been viewed 144,171 times.
Learn more...
Without an ice cube tray, trying to cool down your drink on a hot day can seem impossible. There’s no need to worry though, because there are a number of ways to make ice cubes when you don’t have a tray. You can use silicon molds, improvise with an egg carton, or make crushed ice in a plastic bag. So long as you have access to a freezer, these household goods will allow you to make ice cubes that will work just as well as the kind you make in a tray.
Steps
Using a Silicone Mold
-
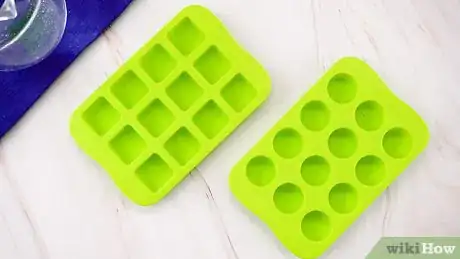
1Choose a mold that will hold water easily without spilling. If you have a baking mold made of silicone that is rigid and deep enough that water will stay in as you move it around, it will work just like an ice cube tray. The best molds are ones with solid shapes like squares or circles, but ones with a design on them will also work.
- Since silicon molds are often used to make shaped cookies and candies, each “cube” will take on the shape of whatever the mold is.
-
2Fill the shapes with water. Run your tap over the mold until each shape fills with water. Don’t let the water spill into other shapes or sit above the depressions, as this can cause a thin sheet of ice to form on top of the ice “cubes.” Try to hold the mold with your hands on the bottom so that it doesn’t sag or begin to leak.
- You can leave a little air at the top of each depression if you want to avoid the risk of a thin layer altogether.
Advertisement -
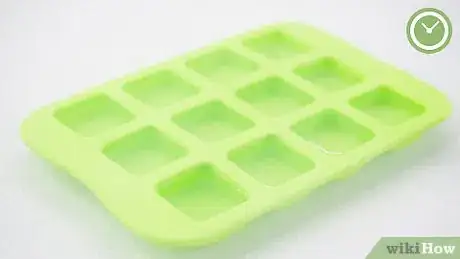
3Freeze the molds for at least 4-8 hours. In order to freeze all the way through, the ice cubes need to stay in the freezer for several hours at a minimum. If you want to make sure the cubes won’t break or melt as quickly, be sure to freeze them for at least 8 hours. Doing this overnight is a good way to make sure you have solid ice by morning.
-
4Pop the ice out by twisting the mold, just like an ice tray. The soft silicone should bend a bit, allowing the ice to break off and be pulled out. You can also try to pat the tray from the underside to release loosened ice cubes. If you are too rough with the mold, it could break or get damaged.
- Use the flat end of a fork or spoon handle to get between the ice and the mold if you are struggling to break the ice loose.
Making Ice Cubes in a Plastic Bag
-
1Fill a plastic zipper bag 1/4 full with water. Run your tap into a plastic bag until it looks like it’s about a quarter of the way full. You can use any size of bag, with larger bags producing more ice because they can hold more water. No matter the size, the water shouldn’t go past the 1/4 mark, and you should never fill the bag to the brim.[1]
- You can use both freezer bags and thinner sandwich bags to make ice.
-
2Zip the bag shut to keep the water inside. Once you’ve filled the bag up 3/4 of the way, zip the bag at the top by securely pressing the two sides together or by pulling the zipper across to secure the bag. Leaving this open at all will lead to spillage in your freezer, so make sure you close it tightly.[2]
- Leave some air in the bag so that it’s easier to get the ice cubes out after breaking them apart. You only need just enough air that the top of the bag isn’t pressed tightly against the water.
-
3Lay the bag on its side in the freezer. In order to get a layer of ice that is easy to break apart or crush, you’ll need the water to freeze horizontally in the bag. Lay the lay the bag flat on the flattest available surface in the freezer.[3]
- The flattest surface is probably the freezer’s floor, as the grates used to create shelves will let the bag droop and form an uneven block.
- If you’re worried about spillage, you can put the bag on top of a tray, or inside of another bag.
-
4Freeze the water in the bag for 4-12 hours, depending on the amount of water. A small bag may freeze in 4 hours, but larger bags could take 8-12 hours to freeze hard enough that you can break the ice up without it melting too quickly. The more water in the bag, the longer it will take to freeze.[4]
- The longer amount of time is due to the fact that the water has to freeze as a single block, rather than separate, individual pieces.
-
5Break up the ice after removing it. You can use your hands to break up the ice into small, thin chunks that resemble cubes, or you can simply take a rolling pin and crush up the ice. If you filled the bag over 1/4 of the way full, you’ll almost definitely need to crush up the ice, as there won’t be a thin, snappable layer.[5]
- You should do this while the ice is still in the bag to keep it from spilling out.
Improvising with an Egg Carton
-
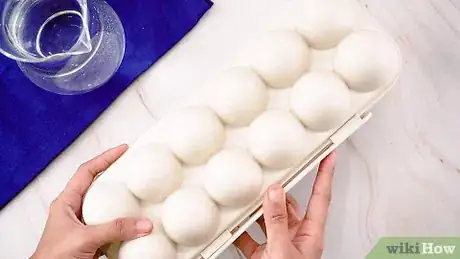
1Choose a styrofoam egg carton for a simple, waterproof ice tray. If your eggs come in a styrofoam carton, you already have a perfect ice tray alternative. The styrofoam will be almost entirely waterproof, and the water will freeze without binding to the styrofoam like it would with a paper carton.
- Be sure to wash the carton thoroughly beforehand to get rid of any possible food borne illnesses like salmonella.
-
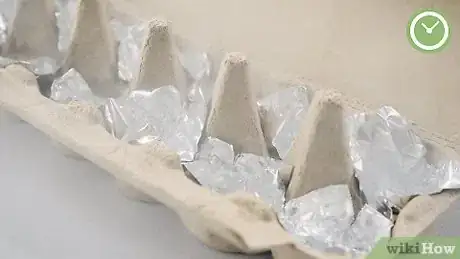
2Line a paper carton with foil if you don’t have a styrofoam one. If you get your eggs in the more common paper carton, you can still use it to make ice cubes. Take a sheet of aluminum foil and break off squares to press into the dimples. So long as no holes form as you do this, the foil will create a waterproof barrier between the water and the paper.[6]
- Make sure there aren’t any gaps by using a square piece and pressing it down into the middle of the dimple to create a seamless lining.
- It’s a good idea to let the foil stick up a bit above the carton so it’s easier to pull the ice out.
-
3Fill the dimples with water. Whether you are using a lined paper carton or a styrofoam one, you can fill the dimples up with tap water to a point just below the top of the dimple. If you fill the dimples too far, they might spillover into one another. Your ice will form little dome shapes in the carton.
- Do this especially carefully if you are using a paper carton, as spray from the water could dissolve the paper.
-
4Freeze the carton for at least 4-8 hours with the lid off. As you put the carton in the freezer, make sure the lid doesn’t cover the dimples, as this could keep the water from freezing as quickly. The ice will need at least 4 hours to become solid and at least 8 hours, or an overnight freeze, to minimize melting and breaking.
- You can also remove the lid entirely before filling the carton up.
-
5Remove the ice from the carton by pressing up on the bottom. A push on the underside of each dimple will apply pressure to the ice and help you get it out of the carton. If you used a paper carton, you might be able to simply pull up on the foil, depending on how much condensation formed between the paper and the foil.
Community Q&A
-
QuestionHow can I make ice cubes without water?
 Community AnswerYou could use these methods with another drink, like soda or juice. These are then frozen fruit juice cubes or frozen soda cubes and can be added to drinks in the same way as ice cubes. You'll just have to be sure the flavors match.
 -
QuestionHow long does it take for it to get solid?
 Tabletaccount112Community AnswerIt takes about 5 to 7 hours for a the water to harden.
Things You’ll Need
Silicone Mold Ice Cubes
- Silicone mold
- Water
- A freezer
Plastic Zipper Bag Ice Cubes
- Zipping plastic bag
- Water
- A freezer
- Rolling pin (optional)
Egg Carton Ice Cubes
- Styrofoam or paper egg carton
- Water
- A freezer
- Aluminum foil (for a paper carton)
References
- ↑ https://icemakershub.com/how-to-make-ice-cubes-without-using-a-tray/
- ↑ https://icemakershub.com/how-to-make-ice-cubes-without-using-a-tray/
- ↑ https://icemakershub.com/how-to-make-ice-cubes-without-using-a-tray/
- ↑ https://icemakershub.com/how-to-make-ice-cubes-without-using-a-tray/
- ↑ https://icemakershub.com/how-to-make-ice-cubes-without-using-a-tray/
- ↑ https://icemakershub.com/how-to-make-ice-cubes-without-using-a-tray/
About This Article
If you don’t have an ice cube tray at home, you can improvise one with an egg carton. Choose a Styrofoam egg carton if possible, since these are watertight. Wash the carton out with soap and water, then fill the cups with clean water. If your egg carton is paper instead of Styrofoam, line the cups with aluminum foil before adding water so the water won’t soak through. Leave it in the freezer with the lid open for 4 to 8 hours so the ice has time to freeze completely, then pop your ice cubes out of the cups when you’re ready to use them. Keep reading to learn how to make ice in a silicone mold or zip top bag!
