This article was co-authored by wikiHow Staff. Our trained team of editors and researchers validate articles for accuracy and comprehensiveness. wikiHow's Content Management Team carefully monitors the work from our editorial staff to ensure that each article is backed by trusted research and meets our high quality standards.
The wikiHow Video Team also followed the article's instructions and verified that they work.
This article has been viewed 621,258 times.
Learn more...
Sure, you can go out and buy a greeting card, but nothing says love like the time and care it takes to make something homemade. Give your greeting cards a truly personal touch by making them yourself! Friends and family will be delighted to receive your unique designs in the mail, and it will take you less time than you think
Steps
Designing the Card
-
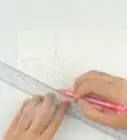
1Add fun embellishments with stickers, tape, or beads. In addition to textured layering paper, you can glue on pressed flowers, put a couple of cute stickers down, or use washi tape to create interesting patterns on the card. Lay down a ruler on the edges to draw straight smooth borders with colorful sharpies or glue on beads for interesting texture.
- Find add ons at craft stores or get creative with items you find in your home and outside, like flowers, old buttons, or ribbons
- If you want, you can use a hot glue gun to glue down bigger items. This might be more effective, but be careful not to burn yourself, and don't use it around kids. Lay out a sheet of paper to catch extra hot glue, and always unplug the gun once you are finished.
-
2Fold the piece of paper in half hamburger style. Lay your sheet of paper out and fold it in half from one short side to the other short side. Line up the sides and press down on the crease.
You can also cut the paper to make it smaller if you want a cuter, smaller card. In this case, just trim off an inch or two from each side, and then fold it again.
Advertisement -
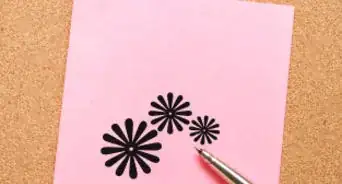
3Draw a simple design in pen or permanent marker for an easy option. If you want a minimalist, eye-catching card, you can use white cardstock and draw an illustration in black pen or marker on the front of the card. Use a fountain or ballpoint pen to draw something simple, maybe a cupcake, a christmas tree, or a menorah. This can give a very elegant, professional effect to your greeting card.
- For a historic, romantic feel, try drawing a silhouette like the one above.
-
4Paint a design on the front of the card for a pretty touch. Get out a set of watercolor or acrylic paints, a cup of water, and a brush. Use watercolor for a soft, toned-down look or try out acrylic paint for bolder, brighter colors and thicker textures. Make sure your base paper is a light white or beige color for best results.
Paint a flower, a pattern, a christmas tree, or anything your heart desires on the front of the card.
-
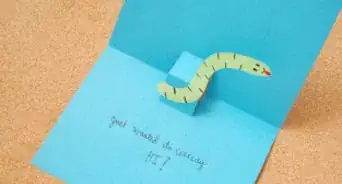
5Add a pop-up element for some 3-dimensional magic. Build a heart, a sun, or a christmas tree that pops right out of the page! Creating a pop up card will show your loved one that you went the extra mile. Kids especially love this trick.
- Try creating a pop-up cake for someone's birthday or get personal with a pop-up of something the person really enjoys, like a basketball or a cup of coffee.
- For an anniversary or wedding card, make a pop up heart.
-
6Use ink stamps to create an old fashioned feel. You can buy ink stamps with alphabet letters or different designs to press onto the front of your card. Open up the ink pad and press the stamps on one by one to coat them with ink. Then, press the stamps onto the front of the card, either for decoration or to write out a message in ink letters.
- Ink pads and stamps can be found at most craft stores.
-
7Glue on extra layering paper if you want to add dimension to your card. Here, you can use scraps of wrapping paper, tissue paper, textured craft paper, or simply different colored cardstock. Cut out a square or rectangle piece of this paper and glue this second layer down onto the front of your greeting card.[1]
- Play around with the location and shape of this texture piece. Try making a border or laying it down in a diamond shape.
- For example, cut thin lines of different colored paper and lay these out as a border.


Adding Your Message
-
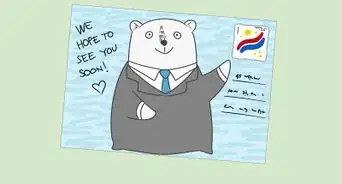
1Write the main message on the front of the card. Using pen or sharpie, write out the key message the greeting card is intended to display. If you want to, write out a classic greeting for the specific occasion, like “Happy Father's Day,” or “Happy Hanukkah.” Or, if it's not a holiday, consider something like, “Sending Hugs,” or “Miss You.”
- You don't have to stick to the cookie cutter greetings. The more personal you are, the better. If your friend loves Harry Potter, make a Harry Potter themed birthday card with a line about enjoying butter beer on their big day.
- For an extra pretty message, write in bubble letters, use a bright sharpie for a pop of color, or even get super fancy with calligraphy.
-
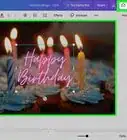
2Cut out letters from magazines to glue your message in collage format. Different textures and fonts can add a cool element to your card. Simply brainstorm what you want to say, in this case “Happy Birthday,” and cut out the needed letters from a magazine. Look for letters that are big enough to read easily and that come in colors you like. Then, glue them onto the card using a glue stick.
-
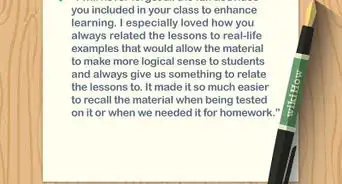
3Write a longer message on the inside of the card. Use the inside space to elaborate on the message on the front of the greeting card. For example, if your greeting card is for Father's Day, say something to your dad about how grateful you are for him. Write in pen for a more detailed message and smaller lettering, or use a permanent marker for a short message.
- Depending on the occasion, these messages will look slightly different. Your tone will vary depending on what the card is for (for example, excited for a happy birthday card or kind and subdued for a get well soon card).
-
4Add personal stories and details to make the card more intimate. Depending on the occasion, it can be a great time to get a little sentimental. If it's a friends birthday, write out reasons you love having them as a friend. If it's Mother's Day, try writing out reasons you're grateful for your mom.
- If you haven't seen this person in a while, let them know you're thinking of them in your everyday life or tell a story that relates to them.
- While the front typically contains some kind of generic greeting, the inside of the card is the perfect place to say something meaningful to your friend!


Making Homemade Envelopes
-
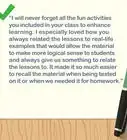
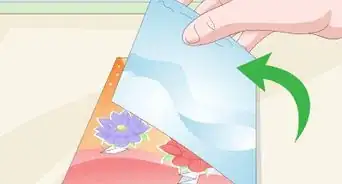
1Find a square piece of paper large enough for your greeting card. To test whether your card will fit inside this piece of paper, turn the square so that it looks like a diamond. Fold the left and right corners in towards each other. Place your card horizontally on top of these two folded corners--if it fits within the border of the square, the piece of paper is the right size.[2]
- If you don't have any square paper, use a ruler to measure out a square on a larger piece of paper. Alternatively, you can purchase patterned square paper at a craft store.
-
2Place the square in a diamond position and draw an 'X' from the corners. Line a ruler up from one corner to its opposite corner, and draw a line along the ruler with a pencil. Turn the paper 90 degrees, line up the ruler again from corner to opposite corner, and draw a line along the ruler with a pencil.[3]
- Use a pencil so that your finished envelope will not have pen marks inside of it.
-
3Fold the left and right triangles (Triangle A and B) until their corners touch. The edges of both Triangle A and B should match the lines of the 'X'. Run your finger along the the outside edges of the two folded sections so that they stay folded.
- When running your finger along the edges, press down hard to crease the paper fully.
-
4Fold the bottom triangle (Triangle C) up so its tip is above the center. Place your finger one finger tip length above the center, and mark this point with a pencil. This is about where Triangle C's corner should land.
- Run your finger along the bottom edge so that the paper creases thoroughly.[4]
-
5Place double sided tape on the inside edges of Triangle A and B. The tape should run from the point in the middle down along the bottom edge of Triangles A and B. Use double sided tape if available, or fold a piece of tape so it's sticky on both sides.
- If you do not have tape, you can use glue. Put a thin line of glue along the bottom edges of Triangles A and B.
-
6Press Triangle C against Triangles A and B. Try to set Triangle C down smoothly, pressing from the bottom upwards to prevent any creasing or air bubbles. The double sided tape or glue will hold the triangles together.[5]
- If Triangle D is not sticking for some reason, re-apply the glue or tape and try to fold it again.
-
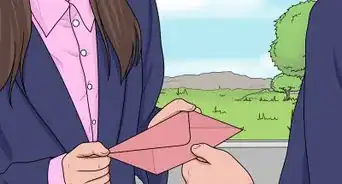
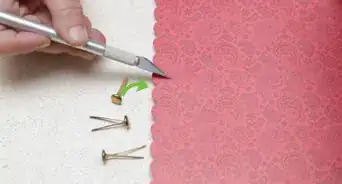
7Place your card inside the envelope and seal it with tape or a sticker. Once your card is firmly in the envelope, fold down Triangle D and close it off with a sticker. Alternatively, place double sided tape along the inside edges of Triangle D (where the adhesive goes on regular envelopes) and close the top of the envelope, pressing down to seal it against the bottom of the envelope.[6]
- You can also place tape over Triangle D on the outside edges to hold it down. For a more aesthetically pleasing look with this option, purchase tape with pretty patterns at your local craft store.
Community Q&A
-
QuestionDo I have to write on the greeting card?
 Shriya PadhiCommunity AnswerYou don't have to. You can also write your messages on another piece of paper and put it inside the card, or cut messages in the form of shapes and stick them on your actual card. You can give it a pop-up effect too.
 -
QuestionWhere can I find some examples of handmade cards?
 Community AnswerSearch online for handmade greeting cards. You should be able to find lots of them this way.
 -
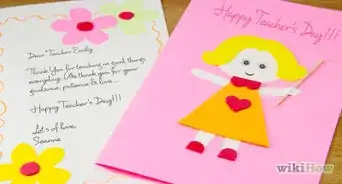
QuestionHow do I make a greeting card that a teacher will appreciate?
 Community AnswerTry putting pictures of your classmates along with the teacher on the card. The more you give it a DIY look, the more it will be appreciated by your teacher.
Things You'll Need
- Cardstock (A4 or A5)
- Colored Paper or other decorations (optional)
- Scissors
- Pencil
- Glue or double sided tape
- Ribbon and hot glue gun (optional)
- A square piece of paper
- Glitter (optional)
- Stickers (optional)
- Beads (optional)
- Flowers (optional)
- Pretty craft tape (optional)
-Step-17.webp)
References
- ↑ https://www.happinessishomemade.net/1-2-3-simple-steps-to-beautiful/
- ↑ https://www.thesprucecrafts.com/easy-folded-paper-envelope-2905553
- ↑ https://www.thesprucecrafts.com/easy-folded-paper-envelope-2905553
- ↑ https://www.thesprucecrafts.com/easy-folded-paper-envelope-2905553
- ↑ https://www.thesprucecrafts.com/easy-folded-paper-envelope-2905553
- ↑ https://www.thesprucecrafts.com/easy-folded-paper-envelope-2905553
About This Article

If you want to make a handmade greeting card, fold a sturdy piece of cardstock in half. Decorate the front of the card with a drawing, words cut out of colorful paper, decorations made from pipe cleaners, or anything else you can think of. For instance, if you’re making a birthday card, you can put a drawing with a drawing of a cone-shaped hat with the words “Happy Birthday” on top. On the inside of the card, write a heartfelt message and sign your name. Read on to learn how to make a homemade envelope!