This article was written by Marta Nagorska and by wikiHow staff writer, Megaera Lorenz, PhD. Marta Nagorska is a Nail Technician and Nail Art Blogger based in London, UK. She runs the blog, Furious Filer, where she gives tutorials on nail care and advanced nail art. She has been practicing nail art for over 5 years and graduated from Northampton College with distinction with a Nail Technician and Manicurist degree in 2017. She has been awarded the top spot in the OPI Nail Art Competition.
There are 34 references cited in this article, which can be found at the bottom of the page.
This article has been viewed 17,551 times.
So, you’ve decided to make your own fake nails at home to save yourself a trip to the salon. But what do you do if you don’t have nail glue on hand? Luckily, you can make and attach your own fake nails just using common household materials. And since most of these alternative methods are gentler and less drying than salon nails, both your wallet and your nails will thank you.
This article is based on an interview with our professional nail artist, Marta Nagorska. Check out the full interview here.
Steps
Flour and Paper Nails
-
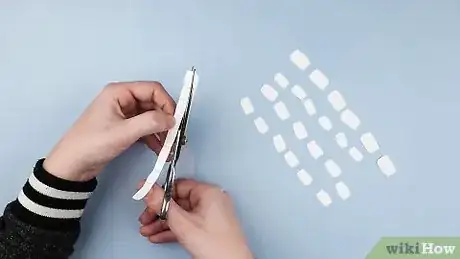
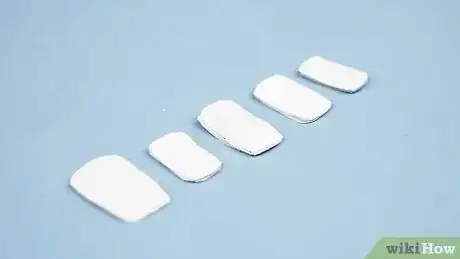
1Cut each nail shape out of 6-10 layers of paper. You can use newspaper, magazine pages, construction paper, printer paper, or even tissue. However, you’ll get the strongest nails if you use something pretty thick. Cut out a piece of paper in the right shape and size for each of your nails. Then, use each nail you just cut as a guide to snip out several more layers of the same size and shape.[1] Stack the layers of paper together and put the guide on top, then cut around it to make the duplicate shapes.
- The more layers you use, the sturdier and thicker your nails will be.
- If you’re having trouble keeping all the layers of paper together after you cut them, try gently taping the stacks together or holding them together with paperclips until you’re ready to use them.
-
2Make a paste with a spoonful of flour and a little water. Sprinkle a spoonful of flour in a small bowl and mix it with enough water to create a thick, glue-like paste.[2] This paste will harden as it dries, making your nails strong and sturdy.
- Alternatively, mix equal amounts of cornstarch and cold water in a small bowl until all the lumps are gone. Make about 1⁄3 cup (79 mL) of this mixture. Slowly stir the paste into 1 cup (240 mL) of boiling water, then let it cool and thicken.[3]
- Lay down a sheet of plastic to protect your workspace as you’re making and working with your paste. This can get messy!
Advertisement -
3Glue the layers of the paper nails together with the paste. Use a small paintbrush to brush a thin layer of your flour or cornstarch mixture onto each nail-shaped piece of paper. Once you’ve coated one piece, press one of the same-sized pieces of paper on top of it. Keep doing this until you’ve glued together all the layers of one nail, then move on to the next one.[4]
- When you’ve finished each nail, paint the front and back of it with the paste to seal it.
- If you’ve ever made papier-mâché crafts, this process might seem pretty familiar. That’s because it’s the same thing—you’re just using it to make nails![5]
-
4Let the nails dry overnight. Now that you’ve made your nails, you’ll need to sit back and be patient for a bit. Set them in a dry spot overnight so they can harden completely.[6]
- A few hours into the drying process, use your fingers to gently curve the nails. You want them to be a bit arched in the middle so that they’ll fit the curve of your natural nails.
-
5
-
6Attach the nails with nail tabs. Use adhesive nail tabs or a skin-safe double-sided tape (such as wig tape) to stick the nails on.[9] Make sure your natural nails are clean and dry so that the adhesive sticks well.
- You can also gently buff your nails first to help the tabs adhere better.
- You can buy wig tape, double-sided tape, or nail tabs online or at a beauty supply store.
-
7Paint the nails however you like. Add a couple of layers of clear basecoat. After it dries, paint on the polish of your choice. Unless you really like how the paper nails look on their own, choose an opaque polish so you can’t see the pattern underneath.[10]
- Paint the edges of the nails as well as the top to help seal them and hide the layers of paper.
- Feel free to get creative and do some fancy nail art! Add gems, decals, or some pretty painted designs to complete the look of your nails.
- These nails are not likely to last as long as standard acrylics, gel nails, or plastic press-ons. However, they can be a good option if you want fancy nails for a day or two.
- While a few layers of nail polish will help make your fake nails more water-resistant, it probably won’t make them completely waterproof. Water will still damage the paper if it leaks in. Wear gloves if you want to shower with the nails on, and be careful when you’re cleaning your hands.
Plastic Straw Nails
-
1Cut a plastic straw into 10 short sections. Snip through the straw to make a series of mini-straws. Make each section as long as you want your new nails to be. These straw nails are pretty sturdy, so feel free to make the sections as long as you like! The straw nail will cover your entire fingernail from cuticle to tip, so cut each section long enough to go over each nail plus a bit of extra length for the tips.[11]
- If you want really long nails, you’ll probably need to use more than one straw.
- Any plastic drinking straw will work for these nails. However, if you’re using bendy straws, you’ll want to cut your sections out of the straight part of the straw and not the bendy part.
-
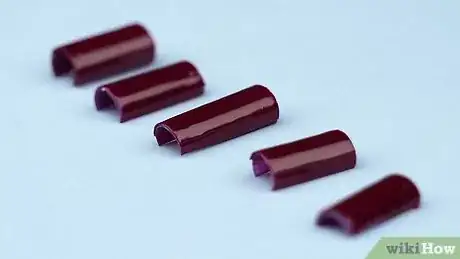
2Snip the sections of the straw into nail shapes. Use a sharp pair of scissors to cut each straw section open lengthwise. This will create a curved piece of plastic that you can fit to your natural fingernail. Trim the pieces of straw to the right size and shape to fit nicely over each nail.[12]
- You can also trim the tip of each straw nail into any shape you like. For instance, you can make them pointy, blunt, or rounded.
-
3Add a second layer of straw to each nail with double-sided tape. If your new nails seem a little too bendy, don’t worry. You can reinforce them with some of the scrap pieces of straw that you trimmed off. Put a strip of double-sided tape on the underside of each nail, then layer on a second piece of straw that’s the same length as the nail.[13]
- If any of the second piece of straw is sticking out from under the first one after you tape it in place, trim it to fit with a pair of scissors or nail clippers.
-
4Decorate your nails before attaching them if you like. If you used patterned or colorful straws, you might not want to cover them with nail polish. But even if you like the base color of the straws, you can still glam them up a bit! One option is to decorate the straw nails with acrylic paint or nail polish details before attaching them. Flatten the nails and attach them to a piece of paper with double-sided tape, then add your designs using a fine-detail brush or a nail art tool.[14]
- If you paint the nails, let them dry completely before you put them on your fingers so you don’t smudge your art.
- You can also use craft glue to attach nail gems, or stick on some pretty decals.
-
5Attach the nails with double-sided tape. Before you put on your new straw nails, clean and gently buff your real nails to help the adhesive stick better.[15] Use adhesive nail tabs or a skin-safe double-sided tape, such as wig tape, to attach your new nails. Attach an adhesive tab or piece of tape to each nail, then peel off the backing to expose the sticky surface on top. Then, firmly press your new nails in place.[16]
- With tape or nail tabs, your straw nails should last around 5 days before they come unstuck.
-
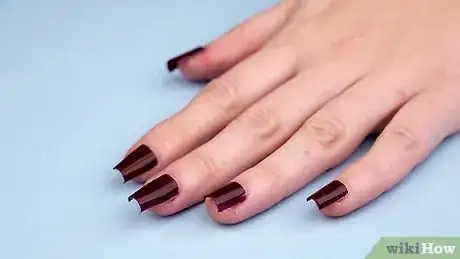
6Paint the nails however you want. If you didn’t already decorate your straw nails, now’s the time to do it. Paint on a few layers of your favorite nail polish, and your new nails will be good to go.[17]
- These nails are plastic, so you can get them wet without worry. However, be careful about soaking your hands in soapy water to avoid soaking off your adhesive nail tabs.
- If your straw nails are still in good shape after you take them off, you can always use them again!
Tissue and Craft Glue Nail Tips
-
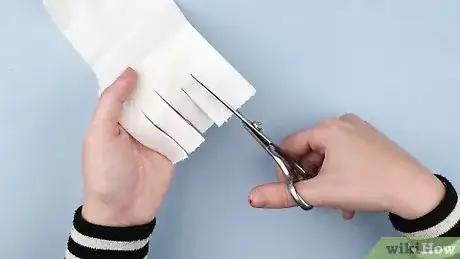
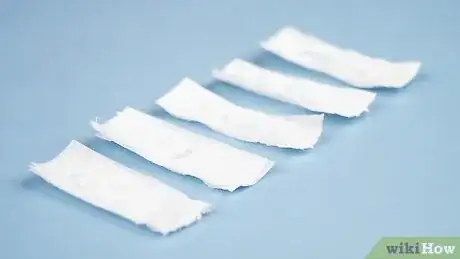
1Cut out 10 strips of multi-ply tissue to the length you want for your nail tips. You can use toilet tissue or craft tissue, like the type you’d put in a gift bag. Use a multi-ply paper so that each nail tip has at least 4 layers of paper in it, since this will create a stronger nail. Cut your paper into strips of the length you want for your tips, with enough extra length to cover about a third of your natural nail.[18]
- If you’re using craft tissue or single-ply tissue, you can also cut the tissue into long strips and then fold each strip up, accordion style, to create multiple layers.[19]
- You only need to cut out tip shapes and not a full nail. With this technique you’ll be using paper to extend the tips of your nails, then covering the rest of your nail with polish.
-
2Paint a few drops of white glue between each layer of paper. Use a white PVA glue that dries clear, like Elmer’s Glue-All, Gorilla Wood Glue, or Fevicol. Use a small paintbrush to coat each layer of the tissue, then press the layers together to create a stronger nail tip.[20]
-
3Roll the barrel of a pen or paintbrush gently over the nail tips. This will help squish the layers together. It will also create a slight curve to help the tips fit the natural shape of your nail a bit better.[21]
- Don’t wrap the tissue tightly around the brush or pen. Just hold the tissue in your hand and lightly roll the brush or pen barrel over it lengthwise, like a rolling pin.
-
4Allow the tips to dry. Set them somewhere warm and dry so that the glue can harden. Since the tips are small, this shouldn’t take very long.[22]
- Depending on how much you use, PVA glue usually takes about 30 minutes to dry. It takes up to 24 hours to completely cure and become hard and waterproof.[23]
-
5Mix equal amounts of nail polish and white glue. You’ll use this mixture to attach the tips to your nails, as well as to harden the tips and give them a nail-like texture. Combine a few drops of the glue with the same amount of a clear nail polish or lacquer.[24]
- You can also make a similar glue by mixing clear school glue and cornstarch to form a thick paste.[25] This mixture may dry a little harder than just glue and nail polish.
- Depending on how warm and dry it is in your work area, you may need to work fast before the glue starts to dry out. However, it usually takes about half an hour for craft glue to fully set, so you should have some time.
-
6Paint the DIY nail glue onto your nail tips. Use a small paintbrush or nail brush to paint the glue and nail polish mixture onto each nail. You only need to put the glue on about the front 1/3 to 1/2 of your nail, from the middle of your nail to the tip. This is the part of your nail that will be covered by the tissue tips. You’ll be filling in the rest of your nail, from about the middle of the nail to your cuticle, with nail polish.[26]
-
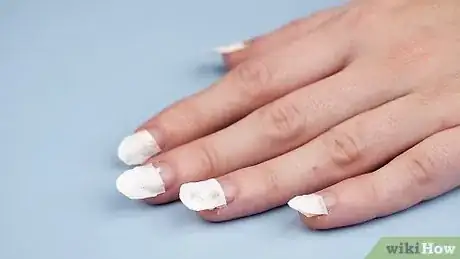
7Attach the nail tips to your nails. Grab your tissue nail tips and press them into place on each of your nails.[27] They might still be a little delicate, so be careful not to tear or bend them.
- Make sure your natural fingernails are clean and dry before you stick the tips on. The glue will stick better if your nails aren’t dirty, oily, or wet. You can even use a little rubbing alcohol to get them extra clean and dry.
-
8Trim the tips to the shape you want. Once the glue has had a chance to dry a little, grab a pair of scissors and shape the tips. Feel free to cut them into any shape you like.[28]
- Shorter and blunter shapes will be less likely to break or tear than long, narrow ones.
-
9Paint the tips with the glue and nail polish mixture. Using a small paint brush or nail polish brush, brush a coat of your glue mixture onto each tissue nail tip. To seal the tips completely, brush both the top and the underside of each tip.[29]
-
10Apply a coat of clear nail polish on top of each nail. This will further harden the nails and smooth out the surface of the tissue. Coat both the tips and the exposed part of your natural nail with the clear polish. Paint the edges and the underside of the nail tips as well.[30]
- To make your nails even stronger and more waterproof, apply 2-3 layers of the transparent polish or base coat.[31]
- When you’re done, allow the layer of clear polish to dry before you add any more polish to your nails.
-
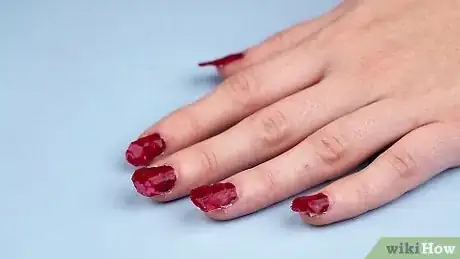
11Paint over your nail with your favorite polish. Go for an opaque polish that will hide the tissue nail tip. Enjoy your new DIY nails![32]
- Keep in mind that these nails will probably be a lot less durable than something like acrylic, plastic, or gel nails. Your tissue manicure may last a couple days if you’re careful.
- Even with a few layers of nail polish to seal them, these nails probably won’t hold up well to getting wet. Avoid soaking them in water, and use gloves if you want to take a shower or bath.
Nail Glue Alternatives
-
1Attach fake nails with nail tabs. These double-sided adhesive tabs are cut to fit your fingernails, and they make a good substitute for nail glue. Just stick the tab on your natural nail and press the fake nail on top.[33] Check the label for instructions on how to remove the tabs. Depending on the type of adhesive in the tabs, you may be able to soak them off in soapy water or loosen them with a bit of coconut or olive oil.
- Nail tabs might not last as long as nail glue, but many brands claim they can keep your fake nails on for up to 5 days with proper care.
- Make sure you get adhesive nail tabs instead of nail guards, which are only adhesive on one side.
- With any adhesive product, it helps to start with clean nails. Use a little acetone or rubbing alcohol to get rid of any oils that might prevent the tabs from sticking.
-
2Use small sections of wig tape. Wig tape is double-sided and safe to use on your nails and skin. To use it as a substitute for nail glue, just snip out several pieces in the right size and shape to fit your nails. Stick the tape on your nails and then press your preferred fake nails on top.[34] When you’re done with the nails, peel off the nails and then the tape.
- If there’s any sticky residue left behind, wipe it with a cotton swab dipped in rubbing alcohol or nail polish remover to loosen the goo.
- Just like adhesive nail tabs, wig tape probably won’t last as long as regular nail glue. However, it’s a great short-term option if you just want a few days of wear.
-
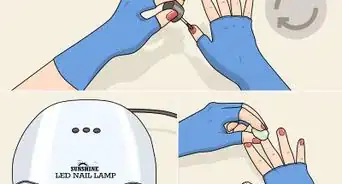
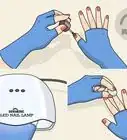
3Stick your nails on with a gel base coat. Use a little nail polish remover to take off any polish or other products that might be clinging to your nails. Then, gently buff your nails with a nail file to rough up the surface slightly and help the gel stick. Apply a coat of clear gel base coat, press on your fake nails, and put your hand under a UV lamp for about 30 seconds to cure the gel.[35]
- Just like nail glue, nail gel can be a bit harsh on your nails. Using a UV curing light too often can also damage your skin and put you at risk of developing skin cancer.[36] However, you can use this method in a pinch if you don’t have any other way to stick your nails on.
- Soak off nail gels with a bit of acetone-based nail polish remover. Since acetone can dry out your skin and nails, rub some petroleum jelly or cuticle oil on your nails and cuticles when you’re done to moisturize them.[37]
-
4Apply nail guards to protect your nails from glue. If you want the extra holding power of nail glue but you’re worried that it might damage your nails, nail guards are a good option. Just like adhesive tabs, nail guards are designed to stick directly to your fingernails, but they provide a protective barrier between the nail and whatever you are putting on top of it. Once the guards are in place, simply apply your glue, press-on, gel, or other product of your choice on top of the guard.[38]
- If you plan to use the nail guards with press-on nails, check the label first. Some of these guards are designed to work under gels and acrylics, but not under press-ons.
- Always clean your nails first with nail polish remover or rubbing alcohol to remove any dirt, oils, or lingering nail polish. This will help the guards stick better.
- Check the packaging for instructions on how to remove your nail guards. Some brands come with special tools to help you peel the guards off when you’re done using them.
References
- ↑ https://youtu.be/FMkT1dwRlhw?t=19
- ↑ https://youtu.be/FMkT1dwRlhw?t=134
- ↑ https://new.artsmia.org/virtual-open-studios/papier-mache-paste
- ↑ https://youtu.be/FMkT1dwRlhw?t=166
- ↑ https://www.bbcgoodfood.com/howto/guide/how-make-paper-mache
- ↑ https://youtu.be/FMkT1dwRlhw?t=357
- ↑ https://youtu.be/FMkT1dwRlhw?t=395
- ↑ https://youtu.be/FMkT1dwRlhw?t=486
- ↑ Marta Nagorska. Nail Artist. Expert Interview. 26 May 2021.
- ↑ https://youtu.be/FMkT1dwRlhw?t=519
- ↑ https://youtu.be/OmPQgIFAOCE?t=21
- ↑ https://youtu.be/vfIKZWQRb9k?t=31
- ↑ https://youtu.be/vfIKZWQRb9k?t=89
- ↑ https://youtu.be/0K_KLsIMoWM?t=107
- ↑ https://youtu.be/vfIKZWQRb9k?t=230
- ↑ Marta Nagorska. Nail Artist. Expert Interview. 26 May 2021.
- ↑ https://youtu.be/OmPQgIFAOCE?t=93
- ↑ https://youtu.be/e8g9t4hGcJ4?t=26
- ↑ https://youtu.be/niV9sH77EFc?t=87
- ↑ https://youtu.be/e8g9t4hGcJ4?t=44
- ↑ https://youtu.be/e8g9t4hGcJ4?t=75
- ↑ https://youtu.be/e8g9t4hGcJ4?t=82
- ↑ https://www.bobvila.com/articles/how-long-does-wood-glue-take-to-dry/
- ↑ https://youtu.be/kQI96fec1b8?t=41
- ↑ https://youtu.be/niV9sH77EFc?t=172
- ↑ https://youtu.be/kQI96fec1b8?t=66
- ↑ https://youtu.be/kQI96fec1b8?t=72
- ↑ https://youtu.be/e8g9t4hGcJ4?t=115
- ↑ https://youtu.be/kQI96fec1b8?t=83
- ↑ https://youtu.be/e8g9t4hGcJ4?t=131
- ↑ https://youtu.be/niV9sH77EFc?t=473
- ↑ https://youtu.be/e8g9t4hGcJ4?t=160
- ↑ Marta Nagorska. Nail Artist. Expert Interview. 26 May 2021.
- ↑ Marta Nagorska. Nail Artist. Expert Interview. 26 May 2021.
- ↑ https://youtu.be/JeWyK7ijNyQ?t=58
- ↑ https://www.aad.org/public/everyday-care/nail-care-secrets/basics/pedicures/gel-manicures
- ↑ https://www.aad.org/public/everyday-care/nail-care-secrets/basics/pedicures/removing-gel-polish
- ↑ Marta Nagorska. Nail Artist. Expert Interview. 26 May 2021.
