This article was co-authored by Marta Nagorska and by wikiHow staff writer, Amy Bobinger. Marta Nagorska is a Nail Technician and Nail Art Blogger based in London, UK. She runs the blog, Furious Filer, where she gives tutorials on nail care and advanced nail art. She has been practicing nail art for over 5 years and graduated from Northampton College with distinction with a Nail Technician and Manicurist degree in 2017. She has been awarded the top spot in the OPI Nail Art Competition.
There are 12 references cited in this article, which can be found at the bottom of the page.
This article has been viewed 532,639 times.
If you want to apply fake nails but you’d like to avoid using nail glue (or if you just don’t have any on hand), you’re in luck! There are several options you can use to keep fake nails in place. While these techniques might not last as long as glue would, they’re perfect if you like to change up your look a lot or if you want to wear fake nails for a special occasion, but you don’t want to commit to wearing them for a week or more.
Steps
Applying Fake Nails with Double-Sided Tape
-
1Use nail tabs if you want a more durable hold. Some brands of fake nails come with adhesive tabs instead of glue.[1] These sticky, double-sided tabs are already cut to fit fingernails, and they will often hold for several days.[2]
- You can also buy nail tabs yourself, either at a beauty supply shop or online.
- Adhesive nail tabs are like sticky, double-sided tape.[3]
Tip: If you’re worried about the tape damaging your nails, paint them with a coat of clear nail polish or base coat first!
-
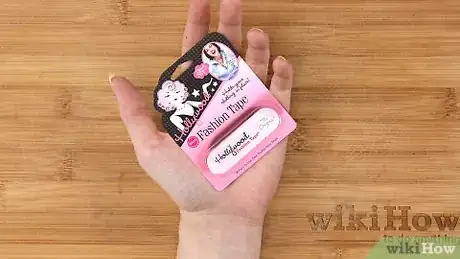
2Opt for double-sided fashion tape for a temporary look. Fashion tape is made to stay in place for a few hours, but it won’t hurt your skin—or your nail—when you pull it away. You can use it to adhere fake nails for up to a day.[4]
- This is great if you have a date or a wedding to attend on the weekend, but you need to be able to remove your nails in time for work on Monday!
- This tape is what people use to help hold up strapless dresses. It usually goes between fabric and your skin. You can find it at department stores, online, or at big box stores.
- You can also use double-sided wig tape.[5]
Advertisement -
3Trim the tape to fit your nails if you’re using fashion tape. Since fashion tape comes in a long roll, you’ll need to use scissors to cut the pieces to fit your nail. Your nails are all different sizes, to try to cut each piece to fit an individual nail, rather than cutting them all the same size.
- If it’s easier, you can stack 2 layers of tape together and cut 2 pieces at the same time. For instance, if you measure the piece for one of your thumbs, you could cut out 2 thumb pieces together, since they’ll probably need to be about the same size.
-
4Clean and prep your nails. Wash your hands and wipe each of your nails with a cotton ball dipped in non-acetone nail polish remover. This helps to remove dirt and oil and ensure the tape will stick.
-
5Peel the backing off one side of tape and press it to your nail. Match one of the pieces of tape to one of your nails, then peel away one side of the backing. Carefully lower the sticky side of the tape to your nail, then run one of your fingers over the top (non-sticky) side of the tape to ensure it’s smooth.[6]
- If the tape folds in on itself or bubbles up once you apply it to your nail, you may need to remove it and use another piece.
- It’s easiest to do one nail at a time.
-
6Remove the backing from the top side of the tape. Once the tape is adhered to your nail, carefully peel away the top side of the backing. You should now be left with nothing but adhesive on your nail.[7]
- Be careful not to touch the tape once you’ve peeled off the last piece of backing.
-
7Apply the fake nail, starting at your nail bed. Line the bottom of the fake nail up with your nail bed, or the very bottom of your natural nail. Then, carefully lay the nail down over the tape. Press lightly and smooth the tape over the nail to remove trapped air and ensure it sticks evenly.[8]
- The adhesive will be effective immediately, and there’s no need to let the nails dry.
-
8Put on the rest of your nails the same way. After you’ve applied the first nail, finish adhering the rest of your full set. It might take a little practice to peel the backing off once you’ve applied most of your nails, but you’ll get the hang of it if you use the pads of your fingers, rather than the tips.
- This is a quick application, especially since there’s no drying time!
-
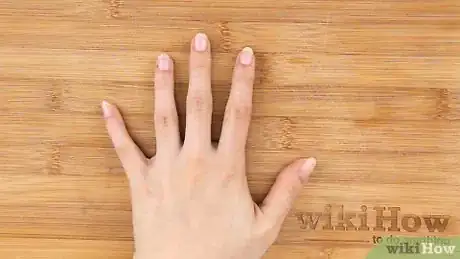
9Peel the tape off to remove the nails. You can easily take off nails you applied with tape. Carefully and gently peel the nails off of the tape, then remove the tape from your natural nails.
Adhering the Nail with Clear Polish
-
1Prepare your natural nails. Wash your hands and spray your nails with a dehydrator spray. If you don't have dehydrator spray, clean each nail with non-acetone nail polish remover. This is an important step to eliminate dirt and oil, which will help the nail polish adhere to your nails.
-
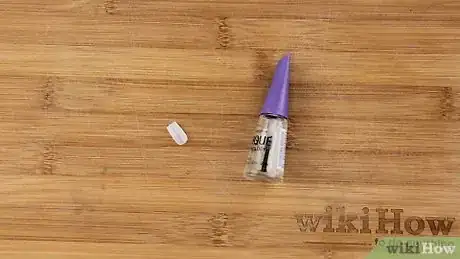
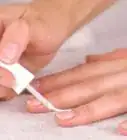
2Paint the back of the fake nail with clear polish. Use enough polish for a relatively thick coat, but not so much that it will squish out from under your nail when you apply it. The amount that you would normally apply on your natural nail should be plenty.[9]
- You can use any brand of clear polish, and you can even use polish that has glitter in it. However, avoid using colored polish, because it will be visible if some does come out from beneath the nail when you apply it.
- Alternately, you can apply the polish to your natural nail first.
-
3Allow the polish to dry for 15-30 seconds. Don’t let the polish dry all the way, but do give it a few seconds before you apply the fake nail. If the clear polish is tacky, rather than wet, it will adhere better.[10]
- If you’re using a quick-drying polish, you may not need to let it dry at all, while some polishes might take a little longer to become tacky. Experiment with one nail first and see what works best for you!
- If the clear polish dries out, just apply another coat. If it looks very thick, dip a cotton swab in nail polish remover and buff it away. Allow the nail to dry completely before applying another clear coat.
-
4Apply the fake nail and hold it in place for 30-60 seconds. Once the polish is tacky, but not completely dry, line up the bottom of the fake nail with your natural nail bed. Press the nail down onto your natural nail and hold it in place for 30 seconds to 1 minute to allow the clear polish to dry.[11]
- Don’t let the nail slide around as you’re holding it in place, or the clear polish won’t form as strong of a bond with the nail.
-
5Continue applying the nails one at a time until you’re finished. Since you have to hold each nail in place for up to a minute, this technique requires a little patience. However, when you’re finished, you’ll have a fresh set of nails that could last for several days!
- Although you only need to hold the nails in place for about a minute each, it can take 1-2 hours for the clear polish to fully cure, so avoid pressing or pulling too hard on the nails in the meantime.[12]
-
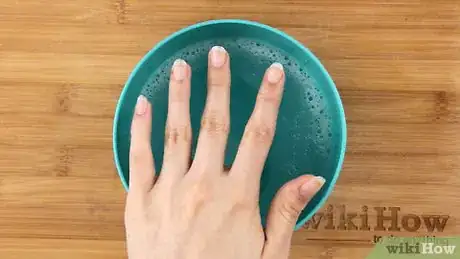
6Soak your nails in nail polish remover to take them off. In order to remove nails applied with polish, you have to remove the polish. Fill a shallow bowl with nail polish remover and soak your nails in it for 5-10 minutes. Then gently peel the nails off.
- Do not try to rip the nails off, as this could be painful and would damage your natural nails.
Using Base Coat and White Glue
-
1Wipe each nail with nail polish remover. First, wash your hands. Then, dip a cotton ball in non-acetone nail polish remover and use it to clean each nail. Alternatively, spray a dehydrator spray on your nails. If you skip this step, the dirt and oil on your nails may prevent the polish and glue from sticking.
-
2Paint one nail with a base coat made for nails. Base coat is a protective layer that’s often used beneath nail polish to extend the life of a manicure. It seals your nail, so the natural oils produced by your fingernails won’t interfere with the glue’s ability to hold your fake nail in place.[13]
- Base coat may be clear, or it may be a pale opaque color like white, cream, or blush.
- Since you don’t want the base coat to dry, it’s best to work on 1 nail at a time.
Tip: In a hurry? Mix the base coat and white glue together first and apply them in 1 coat!
-
3Apply a coat of white glue before the base coat dries. Use a clean nail polish brush or small craft paintbrush to coat your nail in a layer of white school glue. You should apply enough glue to cover your nail generously, but not so much that it starts to run off the sides of your nail.[14]
- It may be helpful to pour the glue into a small dish first, like a saucer or a small bowl. However, if you’d like, you can apply it straight from the bottle, then brush it out into an even coat.
-
4Press the fake nail onto the glue and hold it for 30-60 seconds. Line the fake nail up with your natural nail and press it into place. Then, apply gentle but steady pressure for 30 seconds to 1 minute so the glue starts to dry.[15]
- Don’t slide the fake nail around while the glue is drying. This could make it hard for the glue and the nail to form a strong bond.
-
5Allow your nails to dry for about 5 minutes. Once you’ve applied all of the nails, give the glue about 5 minutes to fully cure. Try to avoid hitting your nails against anything, don’t pull on them, and try not to get them wet while the glue is drying.
- Your nails should last for about a day.
-
6Remove your nails by soaking them in nail polish remover. Put some nail polish remover in a small dish. Dip your fingers in the remover for up to 10 minutes, then gently remove the nails. Avoid trying to peel or pop off the nails without soaking them first, as this could ruin your natural nails.
Expert Q&A
-
QuestionHow do you glue nails without damaging them?
 Marta NagorskaMarta Nagorska is a Nail Technician and Nail Art Blogger based in London, UK. She runs the blog, Furious Filer, where she gives tutorials on nail care and advanced nail art. She has been practicing nail art for over 5 years and graduated from Northampton College with distinction with a Nail Technician and Manicurist degree in 2017. She has been awarded the top spot in the OPI Nail Art Competition.
Nail Artist Purchase nail guards if you're worried about applying nail glue directly to your nails and possibly damaging them. These act like a barrier between your nails and the glue. They are clear, extremely thin, and come in different shapes to suit a variety of nail shapes and widths.
 -
QuestionHow do you use nail glue?
 Laura MartinLaura Martin is a Licensed Cosmetologist in Georgia. She has been a hair stylist since 2007 and a cosmetology teacher since 2013.
Licensed Cosmetologist Apply to glue to the surface of the natural nail and add the fake nail on top. Rock the nail gently to remove air bubbles and press firmly until the glue has dried.
 -
QuestionCan you use superglue to put on fake nails?
 Laura MartinLaura Martin is a Licensed Cosmetologist in Georgia. She has been a hair stylist since 2007 and a cosmetology teacher since 2013.
Licensed Cosmetologist No, do not use superglue. This could cause severe, permanent damage to your nail bed and will make the nails nearly impossible to remove.
Things You'll Need
Applying Fake Nails with Double-Sided Tape
- Nail polish remover or dehydrator spray
- Nail tabs or double-sided fashion tape
- Scissors (optional)
- Fake nails
Adhering the Nail with Clear Polish
- Nail polish remover or dehydrator spray
- Fake nails
- Clear polish
- Cotton swabs
Using Base Coat and White Glue
- Nail polish remover or dehydrator spray
- Nail polish base coat
- White school glue
- Small polish brush or craft paintbrush
- Saucer or small bowl (optional)
- Fake nails
References
- ↑ Marta Nagorska. Nail Artist. Expert Interview. 26 May 2021.
- ↑ https://www.self.com/story/fake-nails-manicure-tips
- ↑ Marta Nagorska. Nail Artist. Expert Interview. 26 May 2021.
- ↑ https://www.self.com/story/fake-nails-manicure-tips
- ↑ Marta Nagorska. Nail Artist. Expert Interview. 26 May 2021.
- ↑ https://youtu.be/fMVhOzPYsas?t=300
- ↑ https://youtu.be/fMVhOzPYsas?t=307
- ↑ https://www.self.com/story/fake-nails-manicure-tips
- ↑ https://youtu.be/sdsCy7S26DE?t=104
- ↑ https://www.elle.com/beauty/g16670682/how-to-fix-broken-nail/
- ↑ https://youtu.be/sdsCy7S26DE?t=121
- ↑ https://www.byrdie.com/how-long-does-it-take-nail-polish-to-dry
- ↑ https://www.allure.com/story/manicure-nail-polish-mistakes
- ↑ https://youtu.be/sdsCy7S26DE?t=146
- ↑ https://youtu.be/sdsCy7S26DE?t=124
- ↑ https://www.self.com/story/fake-nails-manicure-tips
About This Article
To apply fake nails without using glue, start by washing your hands, then wiping each of your nails with a cotton ball dipped in non-acetone nail polish remover. Next, paint the back of the fake nail with a clear polish, using enough for a relatively thick coat, but not so much that some will squish out when applied. After giving the polish about 15 to 30 seconds to dry, line up the bottom of your fake nail with your natural nail bed, then press it into place for 30 to 60 seconds. For the best results, apply the fake nails one at a time. When you want to remove them, soak your nails in nail polish remover for about 5 to 10 minutes, then gently peel the fake nails off. For more tips from our Beauty co-author, including how to apply fake nails with white glue, scroll down!


