This article was co-authored by wikiHow Staff. Our trained team of editors and researchers validate articles for accuracy and comprehensiveness. wikiHow's Content Management Team carefully monitors the work from our editorial staff to ensure that each article is backed by trusted research and meets our high quality standards.
There are 8 references cited in this article, which can be found at the bottom of the page.
The wikiHow Video Team also followed the article's instructions and verified that they work.
This article has been viewed 148,979 times.
Learn more...
Candy apples are a great fall treat that's easy to make and tastes great. There are two different types of candy coating: chocolate and candy. Chocolate apples can be made with white, milk, or dark chocolate. If you use colored bakers chocolate, you can make them in even more colors. Candy apples can be made in just about any color; if you add white gel food coloring, the candy coating will turn opaque. They are perfect not just for Halloween, but for other themed events as well, including birthdays and weddings.
Ingredients
- 8 small apples (or 4 large ones)
- 12 ounces (350grams) chocolate chips
- 2 tablespoons (30 grams) butter
- 12 small apples (or 6 large ones)
- 3 cups (675 grams) white sugar
- ½ cup (120 milliliters) light corn syrup
- 1 cup (240 milliliters) water
- ½ - 2 teaspoon (2.5 to 10 milliliters) gel food coloring
- 1 teaspoon (5 milliliters) vanilla extract (optional)
- 2 tablespoons (30 milliliters) white gel food coloring (for opaque)
Steps
Making Chocolate-Coated Apples
-
1Wash and dry the apples, then insert a wooden stick into the top of each one. If your apples came with a waxy coating, the chocolate may not stick. Boil 6 cups (1.4 liters) of water with 1 tablespoon (15 milliliters) of white vinegar. Dip each waxy apple into the mixture for 5 seconds, then pat dry.[3]
- If the sticks are hard to insert, make a shallow cut in the top of the apple first with a sharp knife. Make sure that the apples are secure on the sticks.
-
2Place the apples in the fridge. The apples will chill as you prepare the chocolate. This will help the melted chocolate harden faster once you dip the apples into it.Advertisement
-
3Cover a large baking sheet with wax paper. If you don't have wax paper, lightly coat the baking sheet with cooking spray instead. This way, the chocolate won't stick to the baking sheet.
-
4Assemble a double-boiler. Fill a saucepan with 1 to 2 inches (2.54 to 5.08 centimeters) of water. Place a heat-safe glass bowl on top of the saucepan. The bottom of the bowl should not be touching the surface of the water.
-
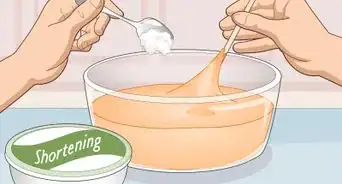
5Place the chocolate and the butter into the bowl. To help the butter melt faster, cut it into small cubes. You can use any type of chocolate you want: white, milk, or dark. If you bought colored bakers chocolate, it may have different melting instructions; follow the directions on the bag instead.
-
6Melt the chocolate and butter over medium heat, stirring occasionally with a rubber spatula. Don't let the chocolate get wet, or it will seize. Also, don't let the chocolate burn, or it will have a bad taste. This will only take a few minutes.
-
7Remove the bowl from the saucepan and set it down onto a stable work surface. Get your apples out, and be prepared to start dipping. The chocolate will start to harden quickly.
-
8Dip the first apple into the melted chocolate. Roll it around the chocolate to coat it evenly, then lift it out of the bowl. Give the stick a twirl to help the chocolate coat the apple more evenly. It will also help get rid of any excess chocolate.
-
9Consider dipping the apple in chopped nuts. You can also shake some sprinkles over the apples to make them more colorful. When shaking sprinkles onto apples, try to do it over a paper coffee filter. The filter will catch the sprinkles, and make it easier to funnel them back into the jar when you are done.[4]
-
10Set the apple down onto the baking sheet and move onto the next. Work quickly, as the chocolate will start to harden. If the chocolate begins to harden, simply place the bowl back onto the saucepan, and warm the chocolate up again.
- When placing the apples onto the baking sheet, remember to leave a little space between each apple so that they don't stick together.
-
11Place the baking sheet into the fridge for 5 to 10 minutes, or until the chocolate hardens.[5] Because you added some butter to the chocolate, it will never become rock-solid.
-
12Finished.


Making Candy-Coated Apples
-
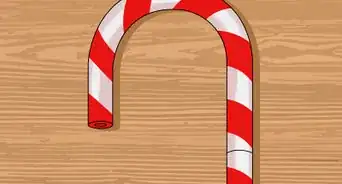
1Wash and dry the apples, then push a wooden stick through the top of each one. Some apples come with a waxy coating, which can keep the candy coating from sticking. You can get rid of this waxy coating by boiling 6 cups (1.4 liters) of water with 1 tablespoon (15 milliliters) of white vinegar. Dip each apple into the vinegar water for 5 seconds, then pat dry.[6]
- If you find the sticks difficult to insert, make a shallow slit in the top of the apple with a sharp knife first. Make sure that the apples are secure on the sticks, or they'll fall into the candy mixture.
-
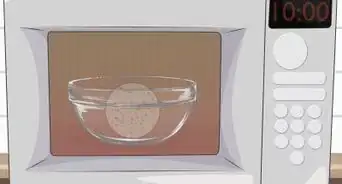
2Place the skewered apples in the fridge. The apples will chill as you prepare the candy mixture. Melted candy will harden a lot faster on cold apples than on room temperature ones.
-
3Cover a large baking sheet with wax paper. If you don't have any wax paper, lightly coat the baking sheet with cooking spray instead. This will keep the candy apples from sticking to the sheet while they harden.
- The baking sheet needs to be large enough to hold all of the apples without them touching. If you need to, use two baking sheets.
-
4Heat the sugar, corn syrup, and water in a saucepan over medium to high heat. During this time, you will want to clip a candy thermometer to the side of the saucepan. Don't let the bottom of the thermometer touch the bottom of the saucepan, however. If you don't have a candy thermometer, don't worry; there are other ways to test the temperature of the candy.
-
5Wait until the mixture reaches 300°F (148.9°C).[7] It will take about 20 minutes. Don't stir the candy during this time. If you don't have a candy thermometer, you can test whether or not the candy is ready by putting a drop into a cup of cold water. If the candy hardens and cracks easily, it's ready. If it sinks to the bottom and stays gooey, it is not ready.
-
6Remove the saucepan from heat, and stir in the gel food coloring and vanilla extract using a rubber spatula.[8] The candy coating will be translucent once it hardens on the apple. If you want it to be opaque, add 2 tablespoons (30 milliliters) of white gel food coloring. The more gel food coloring you use, the brighter the color will be.[9]
- Avoid over-stirring the mixture. You don't want any air bubbles. Stir just enough to mix in the flavoring, but not so much that you get air bubbles. You are mixing the extract in now, because otherwise the high heat will kill the flavor.
- If you aren't a fan of vanilla, you can omit it, or use another flavor, such as cinnamon.
-
7Wait for the candy mixture to cool and the bubbles, if any, to disappear before dipping the first apple into it.[10] Quickly dip the apple into the candy, then pull it out. Twirl the stick in your hand to help the candy coat the apple more evenly, and the excess to drip off.
- For a smoother finish, let the candy cool on the apple for 30 seconds, then dip again.[11]
-
8Turn the apple upside down for a few seconds before setting it down onto the baking sheet. This will allow any excess candy to drip towards the stick, and prevent any puddles from forming.[12]
-
9Continue dipping the apples and placing them on the sheet until you have none left. As you continue to work, tip the saucepan towards you, so that the candy mixture gathers in the corner. This will make the candy mixture "deeper" and make it easier to coat the apples.[13]
-
10Wait for the candy to harden. It will take about 1 hour for the candy to harden.[14] Don't get impatient and stick the candy apples into the fridge, or they may turn sticky.
-
11Serve the apples. Candy-coated apples are best eaten the same day.


Community Q&A
-
QuestionHow do I make candy apples if I do not have apples?
 Community AnswerYou can't make any kind of apples without apples, obviously. If you don't have them, you can buy them, or just buy ready-made candy apples, or use a different fruit and make a 'candy [name of fruit]' instead.
 -
QuestionHow can I make toffee apples?
 QamarTop AnswererWe have an article on that! Check out how to make toffee apples.
 -
QuestionIs adding the gel food coloring optional?Community AnswerThe food coloring is just for looks. Your apples should come out fine, they just won't be the bright red shown in the article.
Warnings
- Be careful when handling the melted candy. The mixture can get very hot. Handle pot using oven mitts.⧼thumbs_response⧽
- Be careful when eating candy apples with fillings, braces, and retainers. Ask your dentist or orthodontist if you are unsure if this will mess with your teeth.⧼thumbs_response⧽
Things You'll Need
Candy-Coated Apples
- 6 to 12 popsicle sticks
- Baking Sheet
- Wax paper or cooking spray
- Saucepan
- Candy thermometer
- Rubber spatula
Chocolate-Coated Apples
- 4 to 8 wooden sticks
- Baking sheet
- Wax paper or cooking spray
- Saucepan
- Heat-safe glass bowl
- Rubber spatula


References
- ↑ http://wonkywonderful.com/bloody-white-chocolate-apples/
- ↑ http://www.justataste.com/candy-apples/
- ↑ http://www.justataste.com/candy-apples/
- ↑ http://rosebakes.com/make-white-chocolate-dipped-easter-apples/
- ↑ http://wonkywonderful.com/bloody-white-chocolate-apples/
- ↑ http://www.justataste.com/candy-apples/
- ↑ http://www.justataste.com/candy-apples/
- ↑ http://www.justataste.com/candy-apples/
- ↑ http://rosebakes.com/how-to-make-hot-pink-candy-apples-or-any-other-color-orange-blue-purpl/
- ↑ http://sayitwithcake.org/halloween-party/
- ↑ http://thekitchenmccabe.com/2013/10/01/purple-candied-apples-with-tutorial/
- ↑ http://thekitchenmccabe.com/2013/10/01/purple-candied-apples-with-tutorial/
- ↑ http://sayitwithcake.org/halloween-party/
- ↑ http://simply-delicious-food.com/2013/10/29/poison-toffee-apples-halloween/
- ↑ http://thekitchenmccabe.com/2013/10/01/purple-candied-apples-with-tutorial/
- ↑ http://sugarandcharm.com/2015/09/how-to-marble-candy-apples.html
- ↑ http://sayitwithcake.org/halloween-party/
- ↑ http://www.justataste.com/candy-apples/
About This Article

To start your candy apples, skewer clean apples, place them in the refrigerator to chill, and cover a baking sheet with wax paper. Then, combine 3 cups of sugar, 0.5 cups of corn syrup, and 1 cup of water over medium-high heat. When the mixture reaches 330 °F, remove the saucepan from the heat and stir in 1 to 2 teaspoons of gel food coloring. Once the mixture cools, dip the first apple into the candy coating and set it on the baking sheet. Dip the rest of the apples and enjoy! For a chocolate-coated candy apple recipe, read on!