wikiHow is a “wiki,” similar to Wikipedia, which means that many of our articles are co-written by multiple authors. To create this article, 14 people, some anonymous, worked to edit and improve it over time.
This article has been viewed 506,944 times.
Learn more...
When you laminate paper, you protect the paper from dirt, creasing, aging and discoloration. You may choose to laminate a keepsake document, such as a wedding announcement, or a document that will be handled frequently, such as a menu. This article will teach you to laminate paper either with or without a machine.
Steps
Using a Laminating Machine
-
1Choose a laminating machine that suits your needs. Most home users buy machines that can accept documents as large as the standard 8-1/2" x 11" letter size (216 by 279 mm).
-
2Turn on the machine and allow it to warm up. Most laminating machines have an indicator light that will tell you when the machine is ready.Advertisement
-
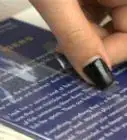
3Place your document inside the laminating pouch. These are 2 sheets of laminate plastic attached at one end.[1]
- If the pouch is only slightly larger than your document (for instance, if you are laminating a business card with business-card size pouch) you will need to carefully center the document so there will be an even border all around.
- If the document is significantly smaller than the pouch, it's not necessary to center the document because you can trim the edges.
-
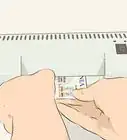
4Place the laminating pouch containing the document inside the carrier. The sealed end of the pouch should be snug against the sealed end of the carrier.[2] The carrier is 2 sheets of treated cardstock that protects the laminating machine from adhesive buildup.
-
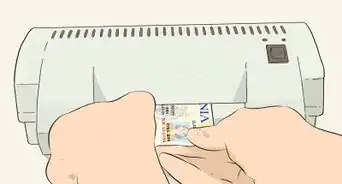
5Feed the carrier through the machine. Insert the sealed end first until the machine grabs it. Don't force the carrier through the machine; it must go slowly enough for the machine to fuse the sheets.[3]
-
6Allow the pouch to cool before removing it from the carrier.
-
7Trim the edges if needed using a paper cutter or scissors. Leave at least a 1/16" (2mm) border.[4]


Laminating with Self-Adhesive Sheets
-
1Buy self-adhesive laminating sheets. The best come with a grid on the backing and allow you to reposition the paper if you make an error placing it on the sheets.[5]
-
2Remove the backing to expose the adhesive. Handle it by the edges so you don't leave fingerprints in the adhesive. If the backing has a grid, then save it to use as a guide when placing your document.[6]
-
3Position the adhesive. Lay the sheet on your work surface adhesive side up with a grid under it. You can use the grid on the backing you just removed, a sheet of graph paper or a grid you drew on a plain sheet of paper.[7] Tape the grid down so it doesn't slide around.
-
4Line up your document so it's centered on the sheet. With small documents on large laminating sheets, alignment isn't important. You may need to adjust the laminating sheet on the grid.
-
5Press 1 corner onto the sheet. Press the corner down with your finger.
-
6Secure the rest of the paper onto the laminating sheet. Smooth the paper your hand so that it lies flat with no wrinkles or air bubbles.[8]
-
7Expose the adhesive on a second laminating sheet by removing the backing. Discard the backing.
-
8Add the second sheet on top of the first. Start at 1 corner and smooth the sheet down a bit at a time to remove wrinkles and air bubbles. You can also use a tool called a brayer to smooth the sheet, or you can burnish it with the edge of a credit card.
-
9Trim the edges with a paper cutter or scissors. Leave a 1/16" (2 mm) border so that the laminate doesn't loosen.


Community Q&A
-
QuestionCan I use tape to laminate paper?
 Community AnswerYes, to laminate paper with tape, use clear tape and cover all parts that you want laminated. Use packing tape to make the process faster, but small clear tape works as well.
 -
QuestionHow can I laminate my paper with everyday household objects? I can't use other stuff.
 Community AnswerYou could try using clear packing tape or plastic wrap, but it may not look as good as the methods in the article.
 -
QuestionWill my pictures be protected with laminate paper?Community AnswerA hot laminator is not appropriate for heat-sensitive documents, such as photos or artwork created with wax crayons. It could melt/ negatively impact these documents.
Warnings
- A hot laminator is not appropriate for heat-sensitive documents, such as photos or artwork created with wax crayons.⧼thumbs_response⧽
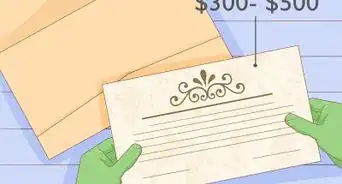
- Avoid laminating valuable historical documents.⧼thumbs_response⧽
Things You'll Need
- Laminating machine
- Laminating pouch
- Carrier
- Paper cutter
- Scissors
- Laminating sheets
- Brayer or credit card
- Grid

References
- ↑ https://www.youtube.com/watch?v=fws1hN782yw
- ↑ https://www.youtube.com/watch?v=fws1hN782yw
- ↑ https://www.youtube.com/watch?v=fws1hN782yw
- ↑ https://www.youtube.com/watch?v=fws1hN782yw
- ↑ https://www.wise-geek.com/what-are-self-laminating-sheets.htm
- ↑ https://www.hamblyscreenprints.com/how-to-laminate-paper/
- ↑ https://www.hamblyscreenprints.com/how-to-laminate-paper/
- ↑ https://www.hamblyscreenprints.com/how-to-laminate-paper/
About This Article
To laminate paper using a machine, turn the machine on and wait until it heats up. Next, put your document inside the laminating pouch, which is 2 sheets of laminate attached at one end. Place the pouch into the carrier, taking care that the sealed end is pushed up against one end, then feed the carrier through the machine sealed end first. When the laminating is finished, let the pouch cool before removing it from the carrier and trimming the edges if needed. For tips on how to laminate using self adhesive sheets, keep reading!