This article was co-authored by Jen Webber and by wikiHow staff writer, Jennifer Mueller, JD. Jen Webber is a Knitting Specialist and the Manager of The Quarter Stitch, a crafting store based in the French Quarter of New Orleans, Louisiana. With over 17 years of knitting and crafting experience, Jen helps educate customers and the public on best knitting practices for their DIY projects.
There are 9 references cited in this article, which can be found at the bottom of the page.
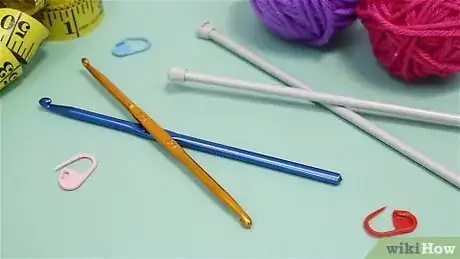
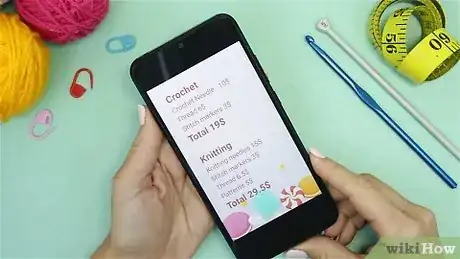
Knitting and crochet have more similarities than they do differences, and it can be hard to tell the finished products apart. The key difference is that crochet is made with a single hook while knitting is done with a pair of needles. Both knitting and crochet are relaxing, meditative hobbies that allow you to express your own style and creativity. But which one should you do? Read on to find out how to compare these two crafts. You'll also learn the first steps to take if you want to get started in either (or both).
Things You Should Know
- Knitting requires you to use both hands and two needles. With crochet, you hold a single hook in your dominant hand.
- Choose crochet if you're a creative person who likes to go with the flow, isn't afraid of making mistakes, and wants a craft you can do on the go.
- Choose knitting if you're a logical person who has patience, strong manual dexterity, and time to commit to a more extensive project at home.
Steps
Getting Started with Knitting
-
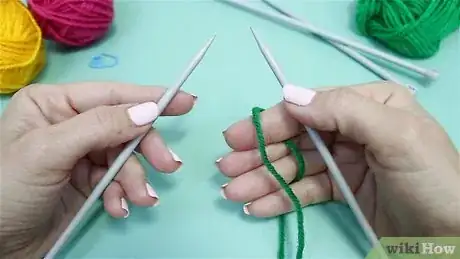
1Pick up a pair of knitting needles and a ball of yarn. Hold one knitting needle in each hand. Hold them between your thumb and first finger like pencils, so they're resting in the crook of your thumb. Some people also hold them with their first finger on top of the needle, so that their hands are on top of the needle itself, which rests between their thumb and middle finger. Play around with this until you find what's comfortable for you.[10]
- You'll need to hold the yarn in one of your hands—play around until you get a sense of which way you want to do this. You'll wrap it around the fingers of one of your hands—most people use their right hand for this.
- Wrap the yarn around your pinkie, under your fourth and middle fingers, then over your first finger. Some people wrap it under their fourth finger, over their middle finger, and under their first finger.
-
2Create a slip knot on one needle, then "cast on" a row of stitches. Start with the knit stitch, which is the most basic knitting stitch. About 22 stitches are good for practice and will get you started with a good-sized square sample of fabric.[11]
- Once you're comfortable with the knit stitch, try the purl stitch. Together, these 2 stitches are the foundation of any other knitting stitch, so you'll use them in everything you make.
-
3Choose a small, beginner's knit and purl pattern. When you first look at a pattern, it can be pretty intimidating—but the abbreviations are there to make it clearer. Look for a pattern with Ks (knits) and Ps (purls), since those are the stitches you know. The number after the letter tells you how many of that type of stitch to do. Now, all you have to do is follow the formula and knit![12]
- You can find plenty of free patterns online to get started. They're usually labeled with the level of difficulty so you won't get in over your head.
- Try Ravelry—it's an online community of yarn crafters with hundreds of thousands of knitting patterns to choose from.[13]
- Patterns are usually written with a specific type of yarn in mind. If you can't find that specific type, talk to someone at a yarn or crafting store—they might be able to suggest an alternative that would work for your project.
Getting Started with Crochet
-
1Hold your crochet hook in your dominant hand like a pencil. Most people hold the hook in their right hand and the yarn in their left. Hold the yarn tight enough to keep the tension on the yarn, but loose enough that it can still slide through your fingers while you crochet.
- It takes some practice to keep the tension right, but you'll get it! Run the yarn over your pinkie, under your third and middle fingers, then over your index finger.
- If you need more tension, loop the yarn once around your pinkie before you pass it under your third and middle fingers.
-
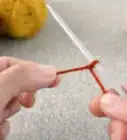
2Cast your yarn onto your hook with a slip knot. Pull about 6 inches (15 cm) of yarn loose from the yarn ball, then cross the ball over and on top of the tail-end of the yarn to make a loop. Insert your crochet hook into the loop, then use the hooked end to grab the ball end of the yarn and pull it through the loop. Now you have your slip knot. Just pull on both ends of the yarn to tighten the loop.[14]
-
3Create a row with the chain stitch. Hold the hook in one hand and both ends of the yarn in the other. Move the hook over and under the yarn so that it wraps around the back of the hook counterclockwise. Now, catch the yarn in the hook again and pull it through the slipknot loop to make your first chain stitch.[15]
- The chain stitch is the starting point for any crochet project, so if you can get this down, you're well on your way to making a scarf, hat, or amigurumi figure.
- When you've finished a sample, remember to bind off the stitches so it doesn't come unraveled.
-
4Choose a single crochet stitch pattern for your first project. You don't really need a specific pattern to start crocheting—you can jump right in with a chain stitch and figure out what you're making as it comes to you. But once you get comfortable and decide you want to do something specific, search online for your next free pattern. Many of these patterns also come with video tutorials that make it easy to follow along.[16]
- Ravelry has lots of free beginner crochet patterns you can try, so that could be a good place to start.
- There are a lot more crochet stitches to learn as you progress, but as long as you can make a chain stitch, you'll be able to complete the most basic beginner patterns.
- Patterns are always marked with a level of difficulty, so make sure you're choosing one that's not too hard for you to do. You don't want to get frustrated, especially when you're just learning!
References
- ↑ https://www.gathered.how/knitting-and-crochet/crochet/crochet-vs-knitting-difference/
- ↑ https://www.gathered.how/knitting-and-crochet/crochet/crochet-vs-knitting-difference/
- ↑ https://www.stitchclinic.com/difference-between-knit-and-crochet/
- ↑ https://www.stylishknitting.com/knitting-vs-crochet-ultimate-guide5/
- ↑ https://www.gathered.how/knitting-and-crochet/crochet/crochet-vs-knitting-difference/
- ↑ https://www.stylishknitting.com/knitting-vs-crochet-ultimate-guide5/
- ↑ https://www.gathered.how/knitting-and-crochet/crochet/crochet-vs-knitting-difference/
- ↑ https://www.stylishknitting.com/knitting-vs-crochet-ultimate-guide5/
- ↑ https://www.gathered.how/knitting-and-crochet/crochet/crochet-vs-knitting-difference/
- ↑ https://www.simple-knitting.com/hold-your-knitting-needles.html
- ↑ https://www.gathered.how/knitting-and-crochet/knitting/knit-stitch/
- ↑ https://www.gathered.how/knitting-and-crochet/knitting/knit-and-purl-patterns/
- ↑ https://www.stitchclinic.com/difference-between-knit-and-crochet/
- ↑ https://www.craftyarncouncil.com/knit_vs_crochet.php3
- ↑ https://www.gathered.how/knitting-and-crochet/crochet/how-to-chain-stitch-and-count-your-stitches/
- ↑ https://www.craftpassion.com/crochet-patterns/
