This article was co-authored by wikiHow Staff. Our trained team of editors and researchers validate articles for accuracy and comprehensiveness. wikiHow's Content Management Team carefully monitors the work from our editorial staff to ensure that each article is backed by trusted research and meets our high quality standards.
The wikiHow Video Team also followed the article's instructions and verified that they work.
This article has been viewed 32,409 times.
Learn more...
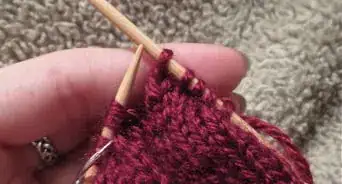
The brioche stitch is a knitting stitch that has a raised, textured appearance. This stitch creates rows of alternating knit and purled stitches similar to a rib stitch, but it is bit more advanced. If you already have some good basic knitting skills, then learning the brioche stitch should be easy for you.
Steps
Working the Purl Row
-
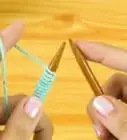
1Gather your materials. You can knit the brioche stitch in the round or using two straight needles. A bulky weight yarn is ideal for this stitch, but you can also use a thinner yarn if you prefer. If you are trying the brioche stitch for the first time, then you will need:[1]
- two balls of bulky weight yarn in two different colors or two balls of the same color
- a pair of US 13 straight needles or US 13 circular needles for knitting in the round
- a stitch marker (only if knitting in the round)
-
2Cast on your stitches. Choose one of your colors to begin with and cast on as many stitches as you like. If you just want to practice this stitch, then 20 stitches is good amount for straight needles, or 36 stitches for knitting on the round.[2]
- Make sure that you cast on an even number of stitches.[3]
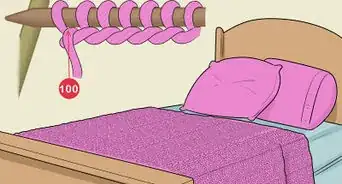
- You can turn your practice project on straight needles into a scarf or turn your practice project on the round into a hat.
Advertisement -
3Purl two together. To purl to stitches together, put your right needle through the next two stitches on the left needle. The right needle should cross in front of the left needle as you do this. Then, wrap the front piece of yarn around the right needle and pull it through the two stitches on the left needle.[4] As you do so, slip the stitches off of the left needle. The stitch on your right needle will replace them.[5]
- “P2 together” is the abbreviation for purling two stitches together.
-
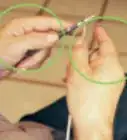
4Do a yarn over. Take the strand of yarn that is in front of the needles and pull it up so that it is in front of the most recent stitch on the right needle. Then, insert the right needle into the first stitch on the left needle as if you are going to purl this stitch. Instead, slip the stitch off of the left needle and onto the right needle.[6]
- The yarn over is often abbreviated as “YO” in knitting patterns.
-
5Repeat the process to the end of the row. After you have completed the sequence of P2 together and YO, then you will need to repeat it until you get to the end of the row or round.[7]
- If you are knitting on two straight needles, then you can just turn the stitches around when you get to the end of the row and then continue working the pattern the same fashion.
- If you are working the brioche stitch in the round, then you will need to change the pattern for the second row.

Working the Knit Row
-
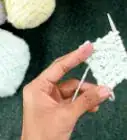
1Hold the other strand of yarn behind the stitches. If you are knitting in the round, then you will need to grasp the piece of yarn that is behind the stitches before you can begin the second row. You can just let the other piece of yarn hang down in front of your stitches. You will not need to use it until you get to the next round.[8]
-
2Do a yarn over on the first stitch. Just as you did a yarn over for the purl round, you will need to do yarn over for the knit round. However, this time you will need to keep the strand of yarn behind the left needle and insert your right needle behind it. Then, slip the stitch off of the left needle and onto the right needle.[9]
-
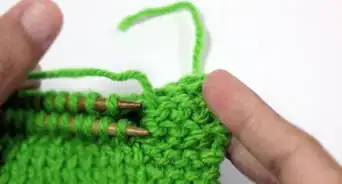
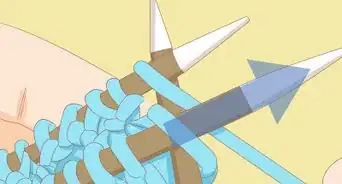
3Knit two together. Next, instead of purling two stitches together, you will be knitting two stitches together. Insert your right needle through the next two stitches on the left needle, and then wrap your yarn over the right needle. Holding the yarn taut, pull the yarn through the two stitches and allow them to slide off of the left needle as the new stitch replaces them on the right needle.[10]
- Knit two together is abbreviated as “K2 together” in knitting patterns.
-
4Continue to follow this pattern until the end of the round. You will need to continue to YO and K2 together until the end of this round. Then, you will switch back to the purl row pattern.
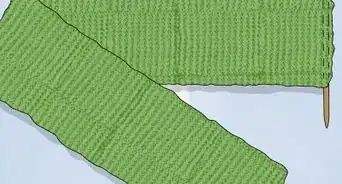
- After you have achieved the desired length for your project, then you can cast off your stitches and finish your knitting project.
Community Q&A
-
QuestionOn Step 3 you say to purl 2 together, but the video shows knitting 2 together. If it were purling, wouldn't the yarn be in front and the needle enter the stitch from right to left?
 T. ChinsenTop AnswererAt Step 3, the continuation of the pattern is to pull the yarn to the back for purl and to the front for knit to create a replacement stitch for the knitted 2 together decrease. Your summary of the technique is correct.
References
- ↑ http://www.craftsy.com/blog/2013/08/brioche-knitting-tutorial/
- ↑ http://www.craftsy.com/blog/2013/08/brioche-knitting-tutorial/
- ↑ http://www.purlsoho.com/create/2013/09/26/brioche-stitch/
- ↑ http://www.vogueknitting.com/pattern_help/how-to/beyond_the_basics/decreases/k2tog
- ↑ https://www.youtube.com/watch?v=8TjJelUaxog
- ↑ https://www.youtube.com/watch?v=8TjJelUaxog
- ↑ https://www.youtube.com/watch?v=8TjJelUaxog
- ↑ https://www.youtube.com/watch?v=8TjJelUaxog
- ↑ https://www.youtube.com/watch?v=8TjJelUaxog
- ↑ https://www.youtube.com/watch?v=8TjJelUaxog
- Videos provided by iknitwithcatfur
About This Article